Insulation of the inner wall of the balcony. Internal insulation of the walls of the loggia: which material is more reliable. Alternative option. We use expanded clay
The use of a balcony (loggia) as an additional room with unusual functions - as a greenhouse, kitchen, recreation area or study in recent years has become almost ubiquitous. With the advent of PVC structures that allow you to quickly and efficiently perform glazing with 2-3-layer double-glazed windows, which perfectly retains heat, insulation of the balcony from the outside or from the inside with your own hands, quite successfully solve these problems.

But the balcony (loggia) is a small room. Therefore, high-quality insulation, especially in the northern regions, leads to a critical reduction in its area due to the thickness of the insulation and finishing materials.

There is a need for external insulation, which allows not only to save space, but also to solve a number of technical problems associated with the removal of the "dew point" outside the perimeter of the balcony area.
In this article, we will tell you how to insulate a balcony from the outside.
External insulation: pros and cons
When we talk about do-it-yourself insulation of a balcony from the outside, with the exception of balconies located on the uppermost floors, it is impossible to insulate the entire balcony (loggia) from the outside. In the overwhelming majority of cases, we are talking about the external insulation of the balcony parapet and (in very rare cases), the external insulation of the balcony slab, which serves as a "roof" for the balconies of the upper floors.

Among the advantages of outdoor insulation, two main ones can be distinguished:
- Saving the area of the balcony.
- Carrying out the "dew point" on the outer surface of the parapet fence allows you to avoid condensation and mold on the balcony.
The disadvantages of outdoor insulation are:
- The need to coordinate work on external insulation and changes in the design and appearance of the facade of the building with the architectural and construction and housing and communal authorities.
- Obtaining a work permit.
- The need to attract specialists - industrial climbers or special equipment - aerial platforms.

- Restriction on the choice of materials for insulation.
- A significant rise in the cost of insulation work.
Preparatory stage of work
Before starting to carry out DIY work on the insulation of the balcony parapet (loggia) from the outside, it is necessary to assess the amount of work to be done, the condition of the material from which the parapet is made, and calculate the cost of the work, taking into account the involvement of industrial climbers or the rental of special equipment. If the received calculations do not scare you and we are not talking about the price and not about the time spent on obtaining permission from the regulatory authorities to make changes to the design and appearance of the facade of the building - then let's get started!

We have already written in an article dedicated to the difficulties associated with making changes to the external enclosing structure of a small balcony and the facade of a building. In addition to the absence of Russian legislation of regulatory documents that would provide for such a possibility, and would make such insulation legal, it will also be necessary to coordinate work with the owners of the apartment building, since the outer walls and structures are the joint property of all owners of the apartment building.

Unauthorized introduction of changes entails not only the dissatisfaction of neighbors, but the obligation to restore the facade structures in their original form at their own expense.
If it was possible to obtain the necessary permits, then you can start work.
Strengthening the parapet structure
The balcony parapet can be:
- Metal - from "corrugated board", rods, metal strip, pipes - in old houses.
- From reinforced concrete slabs of "light" concrete - in panel houses starting from series 121.
- Brick - in most modern brick or monolithic-frame residential buildings.
The material from which the parapet is made plays an essential role in the choice of not only the material of the insulation, but also its thickness and installation methods.

If the balcony parapet is made of corrugated board or metal welded structures, preliminary sheathing of this metal structure from the side of the balcony (loggia) will be required - otherwise the metal "ribs" of the corrugated board will spoil the whole look of the insulated balcony and will serve as "bridges" of cold, which will nullify all your efforts.

In addition to the device of an internal screen that will hide the metal structures (made of chipboard, drywall, PVC siding, plywood), it is imperative to create such a layer of insulation that would completely hide the elements of metal structures, otherwise in winter they will freeze and the costs of heating the balcony ( loggias) will be excessive.

If the parapet is made of reinforced concrete slabs or bricks - everything is much simpler - no additional work is required to change the design of the parapet.
Material selection
Considering that the construction of the balcony - in 90% of cases, is external - that is, it protrudes beyond the facade of the building (with the exception of recessed loggias), it experiences increased wind loads and the effect of atmospheric precipitation.

Therefore, as a heater, it is necessary to choose a material that is resistant to street moisture.
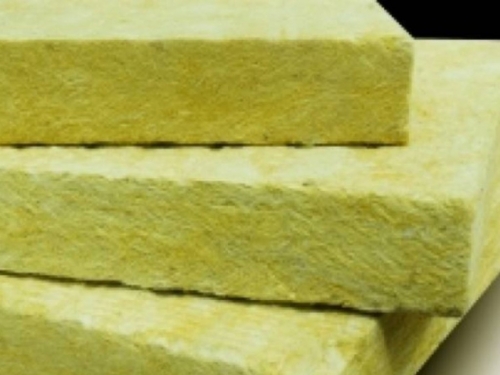
The best in this regard are penoplex, foam or sprayed polyurethane foam. It is undesirable to use mineral wool as a heater.
It is hygroscopic - it absorbs and retains moisture well, is heavy, inconvenient to work with and requires the obligatory arrangement of the lathing. Therefore, it is better to refuse the idea of insulating the balcony outside with mineral wool.

Quite rarely used in do-it-yourself insulation of balconies and loggias, the material - polyurethane foam - is an ideal insulation for parapets of balconies made of welded metal structures or corrugated board. Due to the "flow around" with foamed polyurethane, all metal structures (corrugated board ribs) are immersed in the insulation and do not form "cold bridges".

In addition, the application of such insulation to the corrugated board does not require the installation of any retaining structures. The only "drawback" is the high price. Both the insulation itself and the cost of work on its application. It is unlikely that it will be possible to perform such insulation with your own hands.

But, but if you decide to rent special vehicles or teams of industrial climbers in order to insulate your balcony from the outside, then the cost of applying PPU in comparison with the indicated work will be insignificant.
Insulation with polystyrene or penotex
Insulation of the outer wall of a balcony or loggia parapet does not require additional waterproofing, since moisture condensation does not occur on the outer wall, foam or foam boards can be glued to the outer surface of the parapet using any moisture-resistant adhesive construction mastic applied to the surface of the insulation plate with a comb spatula. The glued boards are additionally fixed with dowels-"mushrooms" with a wide head.

Considering that the thickness of a foam or foam board rarely exceeds 50 mm. it is possible not to arrange a crate for attaching the sheathing - an external decorative screen that will close the insulation from the outside (unless it is PVC siding, which needs guides into which individual siding elements are inserted).
Sheathing - (corrugated board, waterproof drywall, sheet metal siding, cellular polycarbonate or other waterproof sheet materials), which you decide to decorate the facade of your balcony from the outside, can be mounted on anchors 100-150 mm long., The holes for which are drilled through the insulation and the outer fence of the parapet ...

The length of the anchor should not exceed the total thickness of the parapet fence and insulation, so as not to protrude inside the balcony.
Let's summarize
Despite some savings in the area of \ u200b \ u200bthe balcony with external insulation of the balcony (loggia) with your own hands, it is quite problematic to carry out the entire amount of work. This is due to the need to use special equipment (aerial platform) or safety equipment (climbing equipment). All this leads to an unreasonable rise in the cost of insulation of the balcony (loggia). Before proceeding with such work - think more than once - whether the saved 0.5 sq. m of balcony area for investment of such significant funds and headaches with the collection of the necessary bureaucratic permits?
It may seem that joining a balcony to a room is not so difficult. However, people often face a situation where, after glazing the parapet and removing the old door block, the balcony becomes a source of colossal heat loss. Moreover, glaring mistakes are made not only by home craftsmen who decided to cope on their own, but also by hired professional builders. Let's figure out what misconceptions prevent everything from being done correctly, what pitfalls exist, and how to get around them.
Myth # 1: A balcony is practical and convenient
If we consider the finished projects of country cottages, then almost each of them has a balcony. As practice shows, in the private sector, this element of the building is extremely rarely used, especially when it is located on the front side of the facade. People make it, and then they safely abandon it. Until a certain moment ... until the first troubles begin. Near the slab, the wall freezes and gets wet, materials on the street gradually collapse (the surface of the site crumbles, the fences rust), the wooden door crumbles and begins to see through through it.
Important! The stationary balcony slab is tied to the outer wall of the building, it goes directly into the room at floor level and is a huge bridge of cold. In a private house, it makes sense to build a balcony made of wood, it is advisable to use hinged and attached structures with supporting columns.
Roughly the same horrors are observed in the apartment of a high-rise building. But if in the private sector the owner can, by a willful decision, completely abandon the construction of a balcony, then in a high-rise building people have nowhere to go, they have to do something. It turns out that the balcony is one of the most problematic places in the apartment. It turns out that the homeowner has additional structures “on the balance sheet”, moreover external ones, which should be protected from wind, snow, rain, and the scorching rays of the sun. Every season something needs to be tinted, greased, adjusted, etc.
So, the structures of an open balcony need regular careful maintenance, but some of the problems can be eliminated by glazing and insulation. The implementation of an insulated balcony is akin to a miniature construction site, since it will be necessary to erect / assemble walls, create a roof (on the uppermost floor), take care of heating and electricity.
Myth # 2: Any translucent structure can be used for glazing
In fact, there are two types of glazing: warm and cold. Frameless and most sliding structures are cold glazing elements - if the balcony remains a space isolated from the rooms. The warm option is used when the area will be attached to the room. For such purposes, only the most technologically advanced products are suitable, which are distinguished by the greatest resistance to heat transfer, because the windows will be the main enclosing structures, and their area is quite large.
Most aluminum systems here cannot provide normal thermal insulation; it is better to give preference, for example, to wooden structures (naturally, modern ones). However, PVC windows show the best energy saving characteristics on the balcony. But these should be models with a multi-chamber (5-6 chambers, total frame width from 80 mm) profile, which allows filling with two-chamber bags and corresponding sandwiches (from 32 mm). Obviously, double-glazed windows must be used with maximum thermal insulation capacity - that is, with three glasses, in which argon and special spraying are used.
Important! Swing systems with several sealing circuits have proven themselves best for insulation. Sliding models (as well as frameless solutions) usually do not provide sufficient thermal insulation and tightness, although there are so-called tilt-and-slide and tilt-slide systems, which have quite a decent level of energy efficiency.

As for the configuration and equipment of the glazing, it is worth mentioning the mandatory use of some standard components, which in all characteristics correspond to the tasks set for the insulation. These include:
- corner connecting profiles (has chambers and allows you not to build a supporting frame);
- straight H-shaped connecting profiles (allows filling a long opening with several frames, has chambers and elastic seals);
- support elements (makes it possible to insulate the floor);
- expanders (allows you to insulate the ceiling and blank walls).
To hang the resistance to heat transfer, the cavities of these components can be filled with mineral wool or polyurethane foam.
It should be understood that even the highest quality glazing has relatively low thermal insulation properties. Therefore, it is better to assemble a massive or frame parapet around the perimeter of the slab and insulate it, and put the windows from a solid fence to the ceiling. If the PVC balcony structure is still chosen "from floor to ceiling", then it is not necessary to fill all the frames with double-glazed windows, it will be more efficient to install a warmer sandwich (PVC + EPS + PVC) in some openings - for example, on the end walls of the balcony, the lower part frames.
Myth number 3: Any modern insulation with a layer of 3-5 centimeters is enough
Insufficient thickness of the thermal insulation layer is the most common mistake. It may seem that, since the area of the balcony is relatively small, it would not be logical to "eat" it with thick enclosing elements. But, if you make simple calculations (see the article on calculating the thickness of thermal insulation), it becomes clear that the minimum layer of additional insulation will be 100-120 mm, and sometimes all 150-180. It is clear that foamed polyethylene canvases so much loved by domestic craftsmen will not cope with the tasks. Here, definitely, you need to apply:
- basalt wool;
- Styrofoam;
- or extruded polystyrene foam.
Moreover, of all the options for density / thermal conductivity, it is worth giving preference to the most effective (thermal conductivity coefficient from 0.040 W / (m * K) and below), which will allow you to perform high-quality insulation and still help save usable space.

Myth 4: The ceiling and floor need not be insulated
Sometimes we hear that the owner of the real estate does not want to spend money on thermal insulation of some elements of the balcony / loggia, since "the neighbors' balconies above and below are also glazed." But after all, we cannot know what level of thermal insulation is implemented there, maybe there is no insulation at all in the structures, and cold glazing was used. Even if it turns out that the neighbors have warmed themselves normally, there is no guarantee that over time these or other residents will not change their minds and will not alter something.
Also, do not forget that, as we have already noted, this is the most powerful bridge of cold: a concrete balcony slab with three ends faces the street. Therefore, in winter it freezes easily, and the more intensively it happens if from the side of neighbors it is reliably fenced off from the heating system by a layer of heat insulator. That is, it does not warm up and cools down even faster, this cold from the balcony will definitely go to your apartment.
Important! Due to the freezing of a massive element from the end, the blank walls of the loggias are also subject to full insulation, even isolated from the side of the adjacent apartment.

Myth number 5: First of all, the frames are assembled, and then the heaters are laid
Frame cladding is indeed the best option for finishing a balcony, which undergoes additional insulation, because the wet method of bonded thermal insulation, as on the facade, seems to many to be too impractical indoors - for example, overly prone to pushing. However, when assembling the frames, the craftsmen make the same mistake - first they install the subsystem right next to the supporting base, and then they attach expanded polystyrene or stone wool between the racks. As a result, the insulating layer breaks, and cold stripes are obtained, which are clearly visible when examining the frame with a thermal imager. It turns out especially badly if metal profiles are used for the construction of the frame instead of wooden bars. Wood is preferable here, such insulation, of course, is better than nothing, but freezing is possible.
Important! Insulation, whether it be expanded polystyrene or cotton wool, must be wound behind the frame elements and the sheets must be joined tightly with each other and with the supporting elements. If polystyrene and EPS, such as penoplex, are used as an insulator, it is recommended to foam the joints and gaps. When using direct suspensions, they must be drilled in advance and fixed on the base through thermal insulating gaskets, and only then the heaters can be pierced on them (most likely, elongated U-shaped brackets will be needed).
Myth 6: Moisture on the balcony is not particularly scary
Quite the opposite is true. There can be a lot of unpleasant options, when water, during the operation of the insulated balcony / loggia, can get where it is not needed. The most dangerous is slanting rain. The glazed balcony is a prefabricated structure with a large number of elements and interfaces of various materials. Water through poor-quality junctions can get into the insulating layer, which then ceases to perform an insulating function. Most often, leaks are observed in the area of the junction of the frames with the upper and lower slabs, if the ebb / sills are not installed correctly.
Important! It is imperative and special to use metal or plastic canopies. The upper one should be fixed to the plate, and the lower one - to the frame. Mounting gaps must be filled with high quality foam. By the way, we must not forget about the area of joining the frames and the outer wall of the house, very often here they "forget" to use strips that protect the foam from both water and ultraviolet radiation.
If you need to make a roof, then you cannot do without a corner that will cover the joint between the roofing material and the wall. It is best to use a Z-shaped galvanized profile with a polymer coating, which cuts into the wall with one shelf. Also, if the humidity in the rooms sometimes rises too much, then it is recommended to cover the insulation from the inside with vapor barrier films with gluing the cloths with adhesive tape.

Myth number 7: The radiator from under the window can be easily transferred to the balcony parapet
For a number of reasons, this is not the smartest decision. If, after removing the balcony door block, the part of the wall on which the battery was hanging is also dismantled, then it is better to install the heater on the side wall of the balcony. Even if you are engaged in transferring to the front wall, then the supply and return lines will have to be mounted in an open way. Laying the pipeline on the floor is dangerous, because almost any winter day, the pipes located in the thickness of the insulation can be thawed and damaged by destruction, if the heating is stopped for at least a day.
Perhaps the most practical and safe way to heat a glazed balcony would be electric underfloor heating. For example, realized with self-regulating cables, rods or infrared foil, which can be laid directly under the floor finish.
Until recently, the balconies of city apartments served as a kind of storage room - where people kept preservation and various things. What is really there, on the balconies they carried out any unnecessary rubbish that it was a pity to throw away. However, today these premises are increasingly used as additional living space. And in order to realize such an idea, you need to take care of the insulation of the balcony.
If you insulate the balcony, then you will be able not only to expand the living area of the apartment relatively cheaply, but also significantly reduce the heat loss of housing. The fact is that it is through the balconies that most of the heat leaves. But in order for everything to be done efficiently, you need to know where to start. With a well-designed scheme, it will be much easier to turn a cold balcony into a small, but almost full-fledged room.

So, first, sketch out a rough work plan - it will include:

Important information! The balcony can be insulated both inside and outside. But in view of the fact that you will be doing the work on your own, that is, without the help of specialists, it is better to resort to internal insulation.
Stage 1. Choosing a heater
There are many thermal insulation materials on the modern construction market, but for a balcony it is more suitable:

As for the foam and EPS, the laying of these materials is carried out practically according to the same technology (the only exception is the form of adhesion - in EPS it is better due to the use of grooves).
It is better not to use mineral wool for the balcony - the installation procedure will be more laborious, and the condensate that inevitably forms on the balcony is undesirable for this material. Expanded clay, for obvious reasons, can only be used for floor insulation (insulation technology will be described in detail below).
And if to all of the above we add the fact that the balcony should in no case be overloaded, then it becomes obvious: the most suitable option is foam plastic 4-5 cm thick, which is cheaper than expanded polystyrene or mineral wool.


Stage 2. We carry out glazing
If your balcony is already glazed, you can skip this step. The glazing procedure itself largely depends on the parapet installed on the balcony. If we are talking about an iron crate, then you must build it up using foam blocks or ceramic bricks. It is important that the thickness of the walls as a result exceeds the mark of 10 cm. And if you have a reinforced concrete parapet, you can immediately start installing windows.

Today, many (especially fans of environmentally friendly building materials) prefer double-glazed windows with wooden frames. It is worth remembering that such structures must be treated with an antiseptic and painted regularly. You can learn about the installation of insulating glass with wooden frames from the video below.
Video - How to install a wooden window with double-glazed windows
However, most of the consumers still buy PVC windows. When buying, choose a special plastic profile with increased rigidity and strength characteristics. In addition, the profile must have good thermal insulation performance.

Also, plastic windows should have:
- 5-chamber profile;
- 2-chamber (if you live in the middle lane) or 3-chamber (if in a more severe climate) double-glazed window;
- reinforced reinforcement.
After the installation of the PVC structure ordered according to the size of the balcony (the work must be done by specialists), you can proceed directly to the insulation.
Stage 3. We insulate the floor
Consider how to insulate a balcony from the inside with your own hands using polystyrene foam (although the technology described below is also suitable for expanded polystyrene).
Table. Floor insulation on the balcony
| Steps, no. | Short description | Illustration |
|---|---|---|
| Step # 1 | First, prepare the work surfaces - seal all the cracks found in the concrete, as well as at the joints between the slabs and the wall, with polyurethane foam. |
|
| Step # 2 | Mark the floor for the subsequent construction of the lathing. In this case, it is important that the pitch of the lathing exceeds the width of the insulation sheets by about 10 mm. |
|
| Step # 3 | According to the previously made markings, lay the slats (the approximate size of the bars is 4x4 cm, however, it is necessary that their width corresponds to the thickness of the insulation material). The first and last slats should retreat from the walls by 50-100 mm. Connect the rails with self-tapping screws. |
|
| Step # 4 | Place foam sheets between the battens of the battens, gluing them to the floor with liquid nails or special glue. Blow out all the resulting voids with polyurethane foam. |
|
| Step # 5 | Lay on top of the insulation On top of the insulation, lay a vapor barrier layer (necessary to increase thermal insulation and prevent condensation). If you are using regular PET film, never place it on the “cold” side of the insulator. If you are installing foil insulation, use foil to the foam. |
|
| Step 6 | Fasten plywood or chipboard on top, with the floor covering at least 20 mm thick. Attach the sheets to the slats with self-tapping screws. |
|
| Step 7 | All that remains is to lay the topcoat, which you can use as carpet or linoleum. |
|


Important information! There is another way to insulate the floor on the balcony with foam: sheets of foam are attached to the leveled and cleaned surface, and a thin screed is poured from a previously prepared solution of a dry mixture on top. Ceramic tiles can be used here as a topcoat.
Alternative option. We use expanded clay
As noted earlier, the floor on the balcony can also be insulated with expanded clay. This material is also inexpensive, and its installation is not difficult. Let's get acquainted with the algorithm of actions.
Step # 1. First, lay a waterproofing film on the floor with an exit to the walls of 10 cm.

Step # 2. Place the beacons around the perimeter in increments of about 25 cm, while being careful not to lean them too much against the walls.
Step # 3. Fill the floor with a layer of expanded clay 15 cm thick, distribute the material evenly over the surface.


Step # 4. Moisten expanded clay with cement "milk" (this is a water solution of cement).


Step # 5. Pour the expanded clay with a layer of concrete or self-leveling mixture. This must be done carefully so as not to damage the structure of the insulator.

Step 6. Wait until the screed is completely dry. After that, you can start laying the topcoat.

Stage 4. We insulate the walls
The technology here is practically the same as for floor insulation. Follow the steps below.
Step # 1. Mark the future location of the slats on the walls (as for the floor).
Step # 2. Attach the strips according to the given markings.

Step # 3. Apply polyurethane foam to the surface in a wave-like motion. At the same stage, holes for the dowels should be drilled.
Step # 4... Attach the Styrofoam sheets using plastic mushroom plugs.

Step # 5... Blow out all the cracks formed with polyurethane foam, and then glue it with polyurethane tape.
Step 6... Lay a waterproofing layer on top - for example, penofol, which will also serve as thermal insulation at the same time.


Step 7... Cover the seams at the joints with foil tape.
Step number 8. Mount the counter grill over the foam foam and install the finishing material.

Stage 5. We insulate the ceiling
This procedure is also performed using a similar technology, however, some differences still occur.
- First, make the markings along which the hangers will be installed for attaching the guides.
- Install the hangers themselves, necessary to fix the guides (in the role of the latter, use a galvanized profile or timber).


- In the appropriate places, cut out small holes in the insulator (foam or EPS) for the hangers.


- Next, fix the insulation plates using the same polyurethane foam.

If the insulation weighs too much, then you can use dowels for fastening. Blow out the cracks with foam. Otherwise, there are no significant differences.

Finishing features
In most cases, balconies are lined with clapboard or profile from the inside, but drywall is also used, followed by wallpapering. PVC panels are also used for cladding. As for the exterior decoration, it is better to entrust it to professionals, especially if your apartment is located higher than on the ground floor.


Important information! It is forbidden to carry out central heating there, so if additional heating is required, you can lay a film "warm floor" under the linoleum.
You can also install an outlet on the balcony to which an electric heater will be connected. The described room is small, so heating will take a minimum of time. Note also that a glass unit weighs a lot, so the rest of the materials (including the insulator itself) should be with a minimum weight. By the way, this is another reason why it is better to give preference to EPS or foam plates.

Video - Balcony Insulation Instructions
Now you know about the strengths and weaknesses of materials suitable for insulating a balcony, as well as the technologies for laying foam and expanded clay. Therefore, it's time to start working directly! Moreover, there is nothing complicated here if you are armed with step-by-step instructions and all the necessary materials. If you do everything right, then turn the balcony into a full-fledged living room with all the benefits that follow from this.
Many tenants of apartment buildings are faced with the problem of a shortage of square meters. An excellent solution to this issue can be an independent insulation of the loggia. This is a painstaking business, requiring certain construction skills and time from the contractor. However, the finished result is worth it. A warm balcony expands the possibilities of using space, "ennobles" the living space and can become the pride of a home craftsman.
The need to insulate the loggia
Each apartment owner decides for himself how to use the additional square meters of the loggia. Some equip a pantry or a workshop on the balcony, others operate the premises more rationally - they create a "winter garden" or a separate room. The insulated loggia can be converted into a cozy place for rest, work, a compact gym or an area for children's creativity.

In addition, an insulated balcony solves a number of problems:
- the heat loss of the premises and the cost of heating the apartment are reduced;
- reduces the risk of mold on the walls of the balcony.
External or internal insulation can be done. The obvious advantages of the outdoor method:
- useful area is not "eaten up";
- simplification of interior wall decoration.
A significant advantage of internal insulation is the ability to perform work on your own without hiring workers.
The choice of thermal insulation material
Various heat-insulating materials are used as insulation, ranging from traditional, inexpensive, and ending with modern high-tech ones. To insulate the loggia from the inside, it is better to use thin, lightweight materials. Thanks to their small width, it will be possible to save useful space.
Consider the characteristics of the main thermal insulation materials for warming a loggia / balcony.
Foil-clad polyethylene foam - a layer of foil is applied to one side of the polyethylene, which reflects the IF radiation and "throws" heat fluxes back. Insulation characteristics:
- roll width - 1 m, thickness - 2-5 cm;
- ease of installation - the polyethylene foam sheet is easily cut with a knife;
- laying method - end-to-end or overlapping;
- the effectiveness of thermal insulation is almost doubled;
- the material is used to insulate the ceiling and walls.
Warming the loggia: step by step instructions. Penofol use
Mineral wool has good thermal insulation qualities and an affordable cost. However, experts do not recommend using this material for insulating a loggia for a number of reasons:
- poor moisture resistance - mineral wool absorbs liquid, so you will have to additionally strengthen the waterproofing;
- when using mineral wool, natural ventilation is required - a gap must be left above the insulation, which slightly "hides" the area of the balcony;
- for facing the loggia, you will need wall reinforcement and additional measures.
Polyfoam - foamed plastic of various densities. The bulk of the material is gas. Polyfoam has the following characteristics:
- slab size - 1 * 1 m;
- insulation thickness 2-10 cm;
- foam density - 15 or 25 kg / cm2;
- durability.
Extruded polystyrene foam (penoplex) is a modern heat insulator, reminiscent of polystyrene, but characterized by a more durable structure and functionality. Properties of expanded polystyrene:
- rectangular plates 1200 * 600 mm;
- thickness - 2-10 cm;
- foam density - 35-45 kg / sq. cm;
- vapor permeability;
- frost resistance;
- slabs are chamfered for tighter laying;
- light weight and ease of installation;
- flammability class - G-1;
- the material is not used in open places where UV rays penetrate.
Do-it-yourself loggia insulation: step-by-step instructions. Penoplex installation photo

Insulation fastening methods
The choice of the method of insulation, first of all, depends on the used heat-insulating material and the further decoration of the walls.
Insulation for putty and plaster is suitable when using foam or polystyrene foam. Thermal insulation panels are glued to the base with tile adhesive. Plates are additionally fixed with dowel mushrooms. You can start plastering / filling walls or ceilings one day after installing the insulation.
Foil-clad polyethylene foam is laid under the base of the frame. In this case, it does not matter how the profiles are fastened - to the wall or by means of U-shaped fasteners. Penofol sheets are applied to the ceiling / wall of the loggia and are fixed with slats. In this case, an overlap joint is permissible, and the connecting strip can be glued with tape.

Insulation under the base of the frame is possible only when using a thin insulation with a thickness of up to 20 mm. Pressing a thicker heat insulator will affect the stiffness of the battens and fixings.
If you plan to clad the balcony with plasterboard or PVC, MDF panels, then it is advisable to lay the heat-insulating material in the cells of the frame. As a heater, 15 density foam or mineral wool is used. The disadvantage of this technology is an increase in the thickness of the heat-insulating "pie".
Options for arranging a "warm" floor
The technology of floor insulation on the loggia is somewhat different from the insulation of the hay and the ceiling. Excessive requirements are imposed on this element of the balcony.
There are several basic options for arranging a "warm floor":

Do-it-yourself loggia insulation: step-by-step instructions
Below is a step-by-step instruction for insulating a loggia with penoplex.
Tools and materials
For work you will need:
- foam plates;
- building level, stationery knife, marker;
- PVC pipes for cable laying;
- container for kneading glue;
- construction mixer;
- trowel;
- polyurethane foam;
- assembly gun;
- a grater for grinding heat-insulating sheets;
- plastic smooth trowel for grouting the floor;
- metal grid;
- sand concrete M300 coarse fraction;
- polyurethane glue.
Warming the loggia: step by step instructions. Photo - a diagram of a heat-insulating "pie".

Preparatory work
First of all, it is necessary to install energy-saving plastic windows on the loggia. It is not worth saving on glazing - it is better to choose double-glazed windows and fittings from firms that have proven themselves in the "window" market.
If high-quality windows have already been installed on the balcony, then you can proceed to the insulation of the balcony.
Preparatory activities:

Ceiling insulation

Installation of heat insulator on walls and parapet

Warming the floor of the loggia with penoplex: step by step instructions
Consider the stages of creating a "warm floor" using foam and cement-sand screed:

- If it is necessary to install the supporting frame, it is better to use a galvanized metal profile. Unlike wood, it does not rot and is not heavy.
- Thermal insulation work should be carried out in dry weather. Many adhesives and primers have features of application in high humidity conditions.
- The slots on the loggia are treated with foam that is resistant to low temperatures.
- The wood used must be dried, and then treated with anti-fire and decay agents.
Warming the loggia with your own hands: step by step instructions. Video.
The value of additional square meters in a city apartment can hardly be overestimated. A loggia can be a cold storage island or a warm room to live in. But, in order for it to be fully used, you need to take care of ensuring an acceptable temperature in this room.
It has become a major challenge for those who want to expand the usable area of the apartment.
The degree of insulation depends on the purpose of the room, as a living room or storage space.
And if the question of whether it is necessary to insulate the loggia has long been resolved, then there is still no consensus about the place of insulation.
Three directions for warming the loggia
- insulation of the loggia outside Is the preferred option. In this case, the freezing point is shifted to the outside, i.e. towards the insulation, mounted outside the loggia. This will allow not only to insulate the surface of the wall, but also to preserve the bearing properties of the material from which it is built. In addition, the internal space of the loggia is saved.
The only drawback of outdoor insulation is the cost of high-rise work (industrial mountaineering). For insulation outside, a rigid heat-insulating material (expanded polystyrene, polystyrene) is used, which is covered with a polymer mesh and protected with a strong cement mortar and / or decorative plaster;
Note. In some cases, the decision on whether it is possible to insulate the loggia from the outside is determined by the City Council. For example, if the house is of architectural value, it is prohibited to carry out external work that changes the appearance of the building.
- double-sided insulation and finishing of the loggia... It involves the installation of heat-insulating material outside and inside the loggia. Such a solution is not advisable in principle, since from the point of view of thermal efficiency, it does not matter from which side the work is carried out.
- insulation of the loggia from the inside... Internal insulation is the most popular option, because there is an opportunity to do the work yourself. However, in this case, the useful space of the loggia decreases. Nevertheless, we will dwell on this option in more detail.
Do-it-yourself loggia insulation - step-by-step instructions with a photo
Simple technology for beginners with no construction experience.
Step 1 - Determining the need for insulation
Depending on the future purpose of the room, a decision is made on whether it is necessary to insulate the loggia from the inside or outside, what kind of insulation and what thickness will be used.
By definition, a loggia is a room in a building with one open side. This specificity makes it possible for owners to carry out insulation with lower financial costs compared to balcony insulation.
The fact is that only one side will need to be insulated - the parapet of the loggia. As for the rest of the parties, if they border on the heated rooms of the apartment, there is no need to carry out insulation.
Step 2 - The degree of insulation of the loggia
It is a mistake to think that glazing a loggia with double-glazed windows is a fairly reliable way to save heat in a room. In order to ensure the desired temperature in the room with minimal costs, you need to take care of the thermal insulation of all surfaces: walls, floor, ceiling. It is better to do the work at the same time, but you can also do it in parts, the main thing is to follow the sequence.
Step 3 - Choosing insulation for the loggia
At first glance, the selection is not difficult. However, the variety of thermal insulation materials makes you wonder what is the best way to insulate the loggia from the inside.
- penofol(40-50 rubles / sq. M.). Refers to a group of semi-rigid heaters. It is distinguished by the presence of two layers: foamed polyethylene and foil, which will perform the function of a reflector (reflecting up to 97% of thermal energy). Warming a loggia with penofol is more justified than insulating a balcony with it, but, despite this, the use of only penofol is quite a rare phenomenon;
- Styrofoam(2560-3200 rubles / cubic meter). Optimal price / quality ratio. It has excellent thermal insulation properties, is non-hygroscopic, does not require the use of films, and is easy to install. There is foam on the market with different densities (15, 25, 35 kg / m3) and different sheet thickness - 20-100 mm, which makes it possible to vary the thickness;
- expanded polystyrene(extruded foam or penoplex) (3500-5000 rubles / cubic meter). A newer generation of foams. While saving the advantages of foam, it is distinguished by a high density (40, 100, 150 kg / m3) and a groove-comb fastening system, which makes it possible to avoid cold bridges. Warming a loggia with penoplex is one of the most effective methods of thermal insulation, but its widespread use restrains its cost;
Note. Warming the loggia with expanded polystyrene is advisable if you need to minimize the loss of space during the thermal insulation process.
- cotton wool... The representative of soft insulation. Mineral (400-500 rubles / pack = 5.76 square meters) or basalt wool (650-720 rubles / pack = 5.76 square meters) are good because they make it possible to insulate a surface with irregularities or slots. In the line of heaters of this type, there are materials with different densities and prices. However, the general disadvantage of mineral wool is its susceptibility to moisture. This requires the use of waterproofing films;
- polyurethane foam... Heat-insulating material, which is sprayed onto the surface under pressure, allowing to fill the smallest gaps. Insulation of the loggia is carried out quickly, but expensive;
- expanded clay... Loose insulation. It has a significant weight and can only be used for floor insulation;
- aerated concrete... Allows you to level the walls and insulate them, but the usable area decreases.
With the exception of expanded clay and aerated concrete, each of the heaters can be used to insulate the loggia.
Factors affecting the choice of insulation:
- the technical condition of the surfaces to be insulated: their configuration, the height of the floor raising / lowering of the ceiling, the condition of the ceiling;
- the number of surfaces to be insulated. Often, the wall adjacent to the room is not insulated;
- climate. In regions with high humidity, it is undesirable to use soft insulation;
- environmental friendliness. Polyfoam is considered the least environmentally friendly material, basalt wool is the most;
- ease of installation. Rigid insulation is easier to install. When using them, you can do without the formation of a crate for laying soft cotton wool. Also, there is no need to use films. The best qualities in terms of installation are polystyrene foam, thanks to the groove-comb system;
- type of finishing coating;
- project cost: loggia insulation on a turnkey basis or with your own hands.
Step 4 - Preparing Materials and Tools
For work, you need to prepare: heat-insulating material, mounting foam, a primer, a wooden bar (50x50, for the floor) and slats (50x30, for installing a batten under a soft insulation), a film of steam and waterproofing (for soft insulation), hardware, metallized tape, Decoration Materials.
From the tool: puncher, drill, level, hammer, tape measure, foam gun, vacuum cleaner, stapler, pliers, pencil.
Note. Wooden beams can be replaced with plasterboard profiles. The dimensions of the timber are determined by the thickness of the insulation.
Step 5 - glazing the loggia
Glazing and insulation of loggias are two interdependent actions. When installing plastic windows, you need to give preference to a 4-chamber profile and a 2-chamber double-glazed window. During installation, you need to monitor the tightness of all structures. Outside, the installation of an ebb is mandatory, which avoids water infiltration. A window sill is installed inside, taking into account the thickness of the insulation.
Installation of PVC windows makes it possible to increase the temperature on the loggia by 2-3 degrees compared to the temperature outside the window.
If it is not possible to replace old windows, they can be sealed. It is better to insulate the windows of the loggia using Swedish technology. It makes it possible to increase the thermal insulation properties of the window without changing their functional characteristics.
Step 6 - surface preparation
Whatever type of insulation is carried out on the loggia, due to its small area, it must be freed from all strangers. It is for this reason that it is advisable to insulate the entire loggia at the same time.
Then the actions necessary for further work are performed:
- removal of protruding parts that can be dismantled;
- chipping and drilling of walls. If necessary, electrification of the loggia;
- handling of items that cannot be dismantled. The metal is cleaned and primed;
- primer treatment of all surfaces of the loggia. This will prevent the development of the fungus;
- cleaning.
Step 7 - Insulation of the floor on the loggia
It is advisable to start insulation work from the floor.
Regardless of the material, it is performed on lags. An exception is the laying of insulation with subsequent screed under the tiles or when installing a warm floor system. The work is carried out in several stages:
- penofol installation... This is not necessary, but the masters advise to lay penofol with the reflective side up. Due to the reflectivity of penofol, almost all the heat that comes from the wall adjacent to the room or from a heating source remains in the room;
- installation lag... Before starting the installation, the timber must be cut to size and treated with a primer. The longitudinal beam is laid at a distance of 50-70 mm from the walls, and the transverse one with a step that is equal to the width of the insulation (for foam plastic 500 mm, for cotton wool and expanded clay - 600 mm.). The bars are attached to the floor with dowels. When installing the lags, they monitor the correctness of their fastening, in the future they will serve as a guide for arranging the floor and installing a clean floor covering.
Note. Mounting the logs close to the wall increases the risk of deformation of the wood if it gets wet.
- installation of insulation... Rigid insulation is placed between the logs. When insulating the loggia with foam or polystyrene, it is not recommended to use thick material. Craftsmen advise purchasing thinner sheets and stacking them with an offset. This minimizes the surface of the cold bridges. Cotton wool is also placed between the joists so that the material can be laid loosely, without knocking down. A vapor barrier film is laid on top of the cotton wool to prevent it from getting wet.
- joint sealing... If a rigid insulation is laid with gaps, they must be blown out with polyurethane foam, which is a good insulator.
- arrangement of the subfloor... It is not recommended to lay laminate or linoleum before the end of the work. If the floor is tiled, it is mounted immediately and protected (covered) with cardboard.
Note. The use of the underfloor heating system will provide heating of the loggia, because it is forbidden to take out central heating radiators, and the use of a heater does not give a long-term effect.


Step 8 - Insulating the ceiling on the loggia
This stage can be excluded if the floor of the neighbors from above is insulated. If not, then the simplest solution would be to insulate the loggia with polyurethane foam. It adheres well to any surface, and the work can be done in a day.
Often, the insulation of the ceiling on the loggia is carried out with rigid insulation, less often with cotton. The order of work may vary.
Option 1 - frame method of thermal insulation of the ceiling on the loggia
- installation of penofol. It is known from the physics course that warm air rises upward. And in order not to warm the floor to neighbors from above, it is advisable to install penofol on the ceiling;
- arrangement of the frame. For work, wooden slats are used, with a thickness equal to the thickness of the insulation;
- the insulation is placed in the cells of the frame. If cotton wool is used, a vapor barrier film is additionally mounted;
- finishing of the ceiling is in progress.
Option 2 - "wet" way to insulate the ceiling on the loggia
If the base of the ceiling is flat, you can glue hard insulation to it. Additional fixation will be provided by the use of dowels with a large head. Places of abutment of sheets of insulation are foamed with foam. For an additional effect, penofol is installed.
Option 3 - insulation of the suspended ceiling on the loggia
Lay insulation (usually cotton wool) on the ceiling finishing material. Suitable for suspended ceilings or ceiling finishes with laminate or plastic panels.


Step 9 - Insulating the wall on the loggia
Warming the walls of the loggia is the simplest stage. However, it has an important feature, namely: the walls of the loggia are insulated in different ways.
- the wall adjacent to the room is insulated in one layer;
- the outer wall is insulated in two layers or a thicker heat-insulating material is used. Moreover, it fits in pieces, and always with an offset.
Similar to work on the ceiling, there are two ways of insulation: "wet" and frame:
- "wet"- suitable for rigid insulation and the only possible for aerated concrete. Often this method is used to insulate the loggia with penoplex.
- wireframe- compulsory for soft materials. Without a frame, it is impossible to insulate the loggia with cotton wool. The frame can be made of wood or metal profiles. The technology of laying cotton wool on the wall does not differ from its installation on the ceiling or floor. The protection of the cotton wool is provided by the installation of the film.