Wood aging. Brushing wood with your own hands: how to artificially age a tree. Prices for various types of stains
Many design styles (French, Tuscan, vintage, shabby chic and others) are characterized by the presence of antique woodwork among their elements. Paint wear, the texture of old wood give a special charm to the interiors. In their work, designers actively use antique furniture, wall panels, floors, stairs, beams, columns and other small decor. However, antiques are not cheap, which greatly inflates the cost of projects, and wooden elements from the past are not strong and durable. To solve these problems, artificial aging of the tree has appeared, and you can even do it yourself.
Aging methods
There are several ways to age a wooden surface. The choice of the desired aging method is influenced by the type of wood, the design style, the availability of the necessary tools and materials, professional skills and experience. The following types of artificial aging of natural wood are most common:
- chemical way;
- heat treatment;
- wood aging by dry brushing.
chemical method

In order to process wooden products by this method, it is necessary to have special chemical reagents, professional tools, certain qualifications and knowledge. Caustic substances (acids, alkalis or copper sulphate) are applied to the surface of the parts, after which the wood changes color, and the soft fibers are destroyed. The process itself is hazardous to health and requires increased security measures. It is almost impossible to implement such artificial aging with your own hands and at home.
Heat treatment method
The essence of this technological process is to burn less dense layers of wood by means of an open fire. It consists of several stages:

- annealing soft fibers to obtain the desired wood texture;
- surface cleaning with abrasive materials;
- applying varnish.
To implement this method with your own hands, you can use a very affordable tool - an ordinary blowtorch.
brushing
The name of this technique comes from the English word "brush", which means a brush. Brushing is based on the structural features of wood, consisting of hard and soft fibers, and the process itself consists in combing soft fibers out of wood with a metal brush and giving the surface the texture of old wood. Do-it-yourself brushing can be divided into a number of successive stages:
- mechanical processing of wood along the fibers;
- cleaning from chips and pile;
- glossing;
- staining or patination;
- varnish coating.

Despite the fact that the tool for brushing seems extremely simple, the process itself is quite laborious. When using this method of applying a touch of antiquity to wooden products, it should be remembered that hardwoods, as well as pine, yew and larch, cannot be brushed.
Artificial aging of wood by dry brushing
This process is also easy to do with your own hands, it is applicable to cabinets, tables, shelves, armchairs and other types of home furniture. It consists of several stages, and not all of them are required.
- Creating the effect of many years of operation.
At this stage, scratches, potholes, chips and dents are applied to the surface of the furniture. To do this, you need a carpentry tool and a little imagination. Since the damage caused is irreversible, this stage of tree aging can be skipped.
- Coloring.
For this, two variants of paint of similar shades are used. First, one is applied, and after drying - the second.

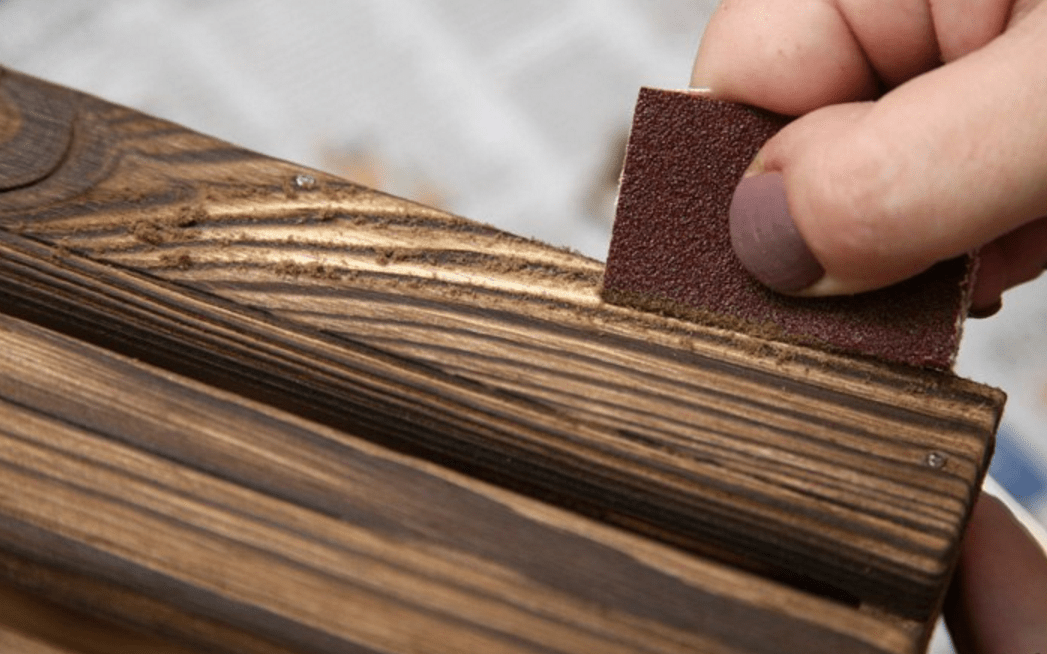
- Surface treatment with abrasive materials or sanding.
Using fine sandpaper or sand, the top layer of paint is erased. This is done unevenly, in some places only up to the first layer, and in some places up to wood. It is important to achieve the effect of natural wear, so special attention should be paid to the edges and protruding parts. After sanding with a vacuum cleaner, chips and wood dust are removed.

- Applying paint with a dry brush.
At this stage, it is important to choose the right tool for applying paint. A stiff, flat brush works best. The choice of paint should also be approached responsibly. It should be contrasting with previously used shades. For a light base, the best option would be dark shades of brown or burgundy paint. The technology of applying paint to the surface in this method of wood aging is the most complex. The paint is applied with your own hands with an almost dry brush, the strokes should look like a trace of numerous bristles. Crossing strokes is not allowed.
- Rubbing the top layer.
For this, a cloth napkin is used, which smears the newly applied strokes.

- Coating the surface with varnish.
It is best to use a clear varnish, which should be applied in one or two coats.

There are several other ways to force the aging of wood with your own hands, but they are not so effective and do not always achieve the desired goal.
Despite the variety of glossy facades, antique wood interior elements remain in demand. The purchase of such furniture will cost a pretty penny. In the case when you don’t really want to spend money, you should not refuse the idea of \u200b\u200bhaving an aged chest of drawers or a table. You can try to age the furniture yourself. Let's try to figure out what technology is used to process semi-antique wood with our own hands. After all, natural conditions age a tree for many years. And to get the result quickly, you have to age the tree artificially.
You will not find semi-antique furniture in every home. It should be used where appropriate. The design of the room should be thought out in the appropriate style so that antique products look decent.
Usually, the tree aging procedure is performed for a specific purpose, namely:
- Satisfy the taste of the dwellers.
- Save money on antiques. It is much cheaper to buy inexpensive furniture and age artificially.
Using certain methods of aging wood, you can get exclusive things. Both the entire product and its individual parts are processed. Particular attention should be paid to items such as chests of drawers, sideboards, book shelves, mirror frames. They are most often aged, since it is difficult to imagine a vintage-style interior without these items.
Aging methods
The process of processing semi-antique wood with your own hands is carried out in several ways. The main ones are:
- Chemical processing- used for hardwoods.
- Roasting or heat treatment- universal option.
- Machining or brushing- this way you can process products made of oak or needles.
Furniture for aging is selected massive, with a rough texture, so that outwardly it resembles hand-made objects of past centuries. Before processing, it is better to disassemble the furniture into individual parts. This will make it possible to process even hard-to-reach places.
To facilitate the achievement of the effect of aging wood, it is better to purchase material that is already damaged by a bug, with minor chips, cracks and knots.

If the process of aging a tree with your own hands is performed for the first time, then it is better to practice a little on separate unnecessary bars. The quality of the result depends on how well the solution, stain or varnish is applied. It is recommended to perform work outdoors so as not to harm your own health.
How to make new boards or furniture look like old products? Now you know that several techniques are used for these purposes. Let's consider each of them in more detail.
Mechanical restoration
It is possible to age a tree mechanically in products from such species as pine, spruce, larch. It is these types of wood that have a pronounced texture, the presence of layers of fibers with varying degrees of hardness.
The main task during machining is the formation of various kinds of chips, potholes, cracks in an artificial way. You can achieve this by doing the following:
1. Wooden surfaces are processed with an ax or a special grinder. Potholes of various depths and widths are randomly applied to them. The bar is hewn, while you should not achieve special accuracy and symmetry.

2. After that, we proceed to grinding the surface with a brush with metal bristles. It will be easier to do this with a grinder and an appropriate nozzle. When processing, grinding is carried out along the fibers until the applied potholes and chips take the form of naturally formed defects on the wood.

3. Then we move on to the second degree of grinding. At this stage, we work with a brush with soft bristles and sandpaper. During this treatment, soft fibers are removed, and coarser ones remain. Thus, we get an uneven tree structure. In the same way, you can additionally highlight knots and cracks.

4. At the next stage, we work on the color of the wood. It is necessary to bring the light new wood as close as possible to the shade of the board darkened from old age. Here you can apply a stain or a dark shade of acrylic-based paint.

5. When the applied product is completely dry, we process the surface with fine-grained sandpaper. At the same time, we try to perform all actions carefully. The paint must be removed from the hills and ridges, and it remains in the potholes.
6. At the final stage, we open the treated surface with a colorless or light yellow varnish and dry it completely.
On the video: a method of mechanical aging of a wooden board.
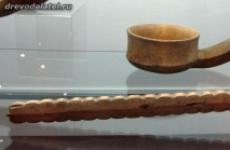
As for the question of how to age wood on small items, such as small pieces of furniture or wooden utensils, here the process is a little simplified. The surface to be treated is thoroughly cleaned with a brush from wood dust until the desired effect is achieved. The subsequent staining and opening with varnish is identical to the process described earlier.
Brushing should only be done by hand using a metal bristle brush until small dents and ridges are achieved.

Heat treatment
Wood can be aged by heat treatment. A feature of this method of aging is the complete absence of mechanical processes. The disadvantage is a certain danger to human health during the work. Therefore, they should be performed outdoors, while protecting the skin, eyes and respiratory organs.
Heat treatment or firing is done by exposing the wood to direct fire. Either a torch or a blowtorch should be used. It is necessary to burn to a depth of about 3 mm.
If heat treatment is carried out superficially, then the effect of aging will not be as pronounced as with stronger firing.

After finishing the heat treatment, perform the following steps:
- With the help of a metal brush or a grinder with a bristle nozzle, they begin to scrape off the carbon layer to the desired degree of antiquity. It is not necessary to paint the surface. Soot will highlight the entire structure.
- Sanding is done with sandpaper.
- A top coat of clear lacquer is applied to the aged wood.

chemical method
A tree can be aged during chemical treatment by means such as alkaline compounds or ammonia. You can use household chemicals that contain alkaline components.
The essence of the process lies in the fact that when the product gets on the wood, it burns out its soft tissues. The structure of a tree is distinguished by the presence of hard and soft tissues. When processing antique wood, soft tissues are removed in various ways.

In this case, the surface layer of wood is burned out with alkali, which in parallel paints it gray.

The next step is the process of washing off alkaline residues. To do this, you can use vinegar or citric acid. A solution of citric acid is prepared in the proportion: 1 teaspoon of acid per glass of water. If vinegar is used, then it should be a 9% solution. Acetic acid must not be used. Further, the treated surfaces are well dried, polished and varnished.
Aging a tree in all the ways listed above is quite simple if you make efforts and efforts. You can give the desired effect to any surface. Can be aged as small household items, furniture or even a wooden floor.
Classic interiors, Provence and vintage are unthinkable without or decor. We invite you to experiment and make a thing "with history" with your own hands. We will tell you how to age a tree at home in different ways, and you will choose the right one from them.
Tree aging methods:
Aging a tree with your own hands by brushing
The method is simple, but not every breed is suitable for it. Spruce, larch, oak, wenge have large fibers and the result will be impressive. Alder, cherry, birch, teak, on the contrary, are unsuitable for brushing due to their fine-grained texture. When you decide on the material, you need to prepare the tools.
You will need
- Hard metal brush.
- Abrasive brush or sandpaper.
- One of three coatings: varnish, wax, oil.
Sequencing
- Wet the object with water so that there is no wood dust during processing.
- Walk on it with a metal brush, moving along the fibers. A stiff brush will select soft fibers without damaging hard ones. The wood will become more embossed. The deeper the relief, the more aged the tree seems.
- Use an abrasive brush or sandpaper to clean the surface of burrs and roughness.
It remains to apply the coating and wait until it dries. To enhance the decorative effect, you can paint the product in two colors. Grooves - in a light shade, convex relief - in a dark one.
Use patination
Now we will tell you how to properly age a tree with staining.
You will need
- Two tone paint.
- Hard sponge or fine sandpaper.
Instructions for patination
- Lightly sand the wood before processing for better adhesion to the coating.
- Apply paint that matches the color of the furniture and let it dry.
- Repeat the procedure, but with a lighter tone.
- After drying, wipe the top layer with a hard sponge or fine sandpaper so that the bottom one shows through.
At the end, apply varnish, let it dry. It should give the impression that the furniture was painted many times.
use wax
Wax helps to get the effect of the destroyed top layer of paint.
You will need
- Paint two or three colors (depending on what result you want).
- Wax (you can use a regular candle).
- Rag.
- Small sandpaper.
Sequencing
- To get the job done right, sand the wood.
- Choose a color to be the main one. For example, the darkest of the three. Paint the product in it, making wide, uneven strokes, let dry.
- Take a candle and, pressing hard, rub the places where, in your opinion, there should be holes in the color.
- Then apply a light shade, wait until it dries.
- Wipe the areas where the wax has been applied well with a rag. The paint there will lag behind, giving the product an old and shabby look.
If you are satisfied with the result, then the third layer can be omitted. If you want to change the color, then repeat the whole procedure. At the very end, cover the product with a fixing varnish.
Cover with stain
Protective and coloring impregnation ages wood for decades. Stain tinting looks beautiful both on its own and with other techniques. For example, with brushing.
You will need
- Water-based stain.
- Mordant on white spirit.
- Soft sponge.
- Primer.
- Antique wax.
Antique wax is a completely natural product. It contains three types of wax: mineral (mountain), animal (bee), vegetable (carnauba). Suitable for processing any wood. Waxing impregnates wood well, has restorative and protective properties.Sequencing
- Treat the item with a water-based stain.
- Take a soft sponge and wash off the impregnation without touching the edges and corners. So it will look more embossed.
- After drying, apply a layer of stain based on white spirit. Leave overnight until completely dry.
- Use a soft sponge or brush to prime the surface, filling in all cracks.
- Wait for it to dry and use the brush to rub in the antique wax.
Use the dry brush method
The method is simple and economical. It is suitable for furniture that does not differ in relief.
You will need
- Dry, very hard brush.
- Water based paint.
You can use an old dry brush.
Sequencing
- Dip the brush into a small amount of coating and or decor in different directions so that there are unpainted areas.
- Let dry.
The product after such processing looks scratched. There is a second version of this method. It needs two shades: the base one and the one with which you will imitate scuffs. In this case, you need to act a little differently.
Instruction
- Paint over the entire surface with the base color.
- Dip the brush in the second tone and dry it well with a cloth or paper. So that it becomes almost dry.
- Apply careless strokes in the direction of the fibers where dirt usually accumulates in natural conditions, shabby appears.
Make aging using the Provence method
We will tell you how to artificially age a tree for a romantic, bright and not only.
Required Tools
- Dye
- Brush
- Scraper or spatula
Sequencing
- Color the item.
- Until it dries and remains tacky, use a scraper or spatula to scrape off the layer of color in the desired areas.
- After drying, wipe with a soft cloth.
- Sand the roughness.
It is best to scrape off the sticky layer in the corners of the furniture - this way the effect of aging will be more natural.
Use a rinse
Rinsing is one of the easiest ways to age wood with your own hands.
You will need
- Brush
- Dye
- Rag
Sequencing
- Paint the product in the color of your choice. As with the previous method, don't wait until it dries completely.
- Take a rag and gently wash off some of the shade, creating the desired worn effect.
Make a vinegar solution
A solution of vinegar and metal wool can quickly give an item a noble, aged look.
You will need
- Vinegar
- Steel wool (crushed metal sponge will do)
- Container for mixing them
- Gloves
- Brush
Sequencing
- Put on gloves and crumble steel wool into a container (you can use a regular glass jar).
- Fill everything with vinegar. After a few minutes, a chemical reaction will begin, the solution will begin to darken. The longer the solution is infused, the darker the color will be. After a few hours, it will be ready to use.
- Moisten the wood liberally with black tea, leave to dry.
- Then spread the vinegar and steel wool solution. It will immediately begin to absorb and give a dark shade.
When the surface dries, you can make another one or two layers with the solution. Wait for the product to dry completely and varnish it to give the product a finished look. Waxing can be used instead of varnishing.
Use soda
For this method, hardwoods containing a large amount of tannins and having a dark color are suitable. draws tannins from the paint and brightens the product, artificially ages. The item you want to age must be unfinished. If the item was previously painted or varnished, sand it first. The treatment solution is very easy to prepare at home.
You will need
- Baking soda
- Brush
- Metal brush
- Rag
Sequencing
- Pour one part baking soda into a bucket or bowl and fill with one part water. The solution should be thick.
- On a horizontal surface with a brush, apply a thick layer of the solution, leave to dry, preferably in the sun. Before complete drying should take at least six hours.
- Remove the dried solution with a metal brush. Press hard on the brush to remove all the soda from the pores and further age the surface externally.
- Take a clean, damp cloth and wipe the item well.
- Wait for it to dry to evaluate the result.
The procedure can be repeated several times.
burn the tree
Firing is in demand when you want to quickly age the material and have tools for work at hand.
You will need
- Gas burner or blowtorch
- Metal brush
- Protective glasses
Instructions for firing without pretreatment
Use a blowtorch or gas burner to quickly burn the product. Do not keep the tool in one place for a long time to prevent fire.
brushed
- Pre-treat the surface with a wire brush, choosing soft fibers. This will give the wood the necessary bulge.
- Then fire at an accelerated pace, also avoiding ignition.
Do not forget about safety glasses, they must be worn at the very beginning of work. When performing both methods, the final step will be the application of varnish.
Using wood in interior design is always a win-win option. This is the most beautiful natural, aesthetically perfect, breathable material. In addition, it has a beneficial effect on human energy, has bactericidal properties. Furniture items, floors, doors, ceiling beams, various decorative elements made of natural wood, which can be processed better than other materials, look great in any room.
Why artificially age a tree
It is difficult to get a definite answer to this question, but there are three main answers:
- Personal preferences.
- The processed material allows you to create one of the fashionable styles: vintage, shabby chic, retro, provence, country style.
- If there is not enough money for antique furniture, then you can age the tree yourself. Subsequently, nothing will prevent you from passing off a table or chair made of such material as a product with a history.
How to age a tree. Master Class. brushing

There are several ways to achieve the desired result. The most interesting and most used of these is the method of texturing, or brushing. Its name comes from the English word brush, which means "brush" in translation. The essence of this method is that soft fibers are removed from the top layer of solid wood. As a result of processing, the surface becomes embossed. In the process of natural aging of a tree, the same changes occur with it, but this takes a very long time. Brushing is considered the closest to reality method of imitation of antiquity. It is used to give the wood a pronounced textured texture.
What types of wood are suitable for brushing
Converting an antique wooden surface using the brushing method is not difficult at all at home. But not all wood lends itself to such processing. In order to age a tree, you need to use rocks with a distinct texture: pine, oak, larch, ash, walnut. And maple, beech, cherry, pear, teak and some exotic trees are categorically not amenable to mechanical aging. It is useless to use such a mechanical method for MDF products. But how to make an aged tree from these materials if others are not available? For this case, there is a chemical method. If it is necessary to age coniferous wood, then it would be more rational to use a mechanical method.
Mechanical restoration

Brushing is a rather laborious process. The main tool in this case is a hard metal brush. Since it will not work quickly to age a tree in this way, the process can be accelerated. To do this, you need a drill or a grinder equipped with a special wire brush.
Processing wood with power tools is a rather unsafe process, associated with characteristic vibration and the risk of breaking off wood chips and metal rods. Therefore, it is necessary to know how to artificially age a tree and not suffer. Work is recommended to be carried out in a protective suit. To prevent small debris and dust from entering the eyes, it is necessary to wear special camouflage goggles or cover the face with a shield, and use a respirator to protect the respiratory tract.
Chemical processing
How to age wood with your own hands without using special tools? To do this, you need hard sandpaper. She needs to clean the surface, and then apply a solution of ammonia (ammonia), which causes a noticeable darkening of the wood. As a result, the structure of the tree will be able to appear especially brightly, and the noble darkening will give the finished product an antique look.
Depending on the degree of aging desired, this treatment can be light, superficial, using a non-rough polymer brush, or deep, when growth rings become visible. In this case, it is very important not to overdo it, since you can get not the desired textured noble product, but spoiled loose wood.
After the initial rough cleaning, regardless of the processing method, the workpiece must be brought to the desired aesthetic appearance. To do this, burrs are removed from the surface, then the product is polished with a polymer abrasive brush. After that, the wood must be additionally carefully lightened with sandpaper and give it a final gloss.
Patination

To obtain the desired effect of antiquity, mechanical processing alone is not enough. Then you can simply varnish the product. But it is recommended to perform the so-called patination. This will further emphasize the relief surface of the product. Patina is a characteristic luxurious gloss that a tree acquires over the years. Its reconstruction at home is carried out in several stages and requires a lot of effort.
Patination is the process of applying special compounds and stains to the treated surface. They are chosen depending on the desired color and shade of the finished product. The compositions are applied in such a way that they get into the pores of the tree, which open during mechanical processing. It is important to achieve a patina effect, in which woody deep pores look a little darker and more contrast than lighter surfaces. When performing such processing on your own, it is recommended to use the paint of the desired color. To do this, the surface is first completely painted over, and then the top layer is removed with a sponge or cloth, without waiting for drying. As a result, the tree looks more ancient and noble.

But patination is not necessary at all. Antique enameled items also look great. With the help of such materials, you can create a real masterpiece, which will be distinguished from real antiques only by a true connoisseur of antiquities. One layer of enamel should be applied to the surface. Then the tree needs to be dried and another layer applied. When re-painting the enamel, it is necessary to choose a more liquid one and a different color. When the wood is completely dry, it is necessary to wipe the surface with sandpaper so that the bottom layer shows through and scuffs are obtained.
Toning. Varnishing
After patination, further toning should be performed. For this process, compositions based on natural oils and resins are used. At the last stage of processing, the tree is covered with 2-3 layers of varnish. Then it should be rubbed with a soft cloth to give extra shine. Varnishing fixes all previous stages and gives the product a finished look. Despite the fact that the process is laborious, anyone can master it. The main thing is to follow the technology. Then it will be clear how to age a tree with your own hands.
Brushing Secrets
How to age a tree to get the best effect? To do this, you need to know some subtleties.

- The main surface is painted over with the following colors: white, red, black, blue, yellow, purple, brown, orange. For pores take blue, red, yellow and white colors.
- If you look at a board tinted with paint at an angle, you can notice the heterogeneity of the application.
- Manual brushing allows you to do the work more artistically, although the process will be very long, unlike the automatic method.
- The more defects (knots, curls, eyes) wood has, the better the product made from it will look.
Where can treated wood be used?

Far from every dwelling you can find processed material, since it is not enough just to age a tree. It is very important to use it correctly in the interior. Thanks to the use of the brushing method, you can create exclusive, almost antique products. For example, pieces of furniture: exquisite book shelves, chests of drawers, wardrobes, kitchen sets, country furniture, picture or mirror frames, candlesticks and other decor.
This method is perfect for processing parquet and floorboards, as well as for the manufacture of doors, partitions, and various wooden elements. Often, antique-processed wood is used in the decoration of the walls of a home bath or sauna, non-standard rooms or the whole house, retro cafes, bars, billiard rooms.
Today, it is no secret to anyone how to age a tree. In addition to brushing, there are many more ways. They differ in the complexity of the technology and the amount of time spent. But regardless of the choice, aged wood helps to create a unique spiritual atmosphere in any room, to connect eternal values and the spirit of modern times, to fill the house with an atmosphere of noble antiquity.
- This is a long and painstaking process, consisting of mechanical processing of wood and work with paints and varnishes. This finishing method is associated with Leon42, a participant in the forum "House and Dacha", with naturalness, antiquity, folk culture.
According to Leon42, buy furniture and brush it with a metal brush - this is not yet aging it, but simply scratching or, at best, making a textured surface. Furniture bought in a store - made of lamellas and "skinny" - is not suitable for texturing, it looks rather sad and flawed.
leon42 believes brushed furniture should be rough and solid, able to capture the natural beauty of wood.
It is the superficial approach to the aging of wood, according to the forum member, that forms the opinion of many people about products processed using this technology as “furniture of fire victims”. Meanwhile, the combination of aged wood with metal, stone or ceramics in the interior is always a fashionable and stylish technique that allows all the inhabitants of the house to touch eternity and feel like in the Middle Ages.
Under natural conditions, wind and moisture, sun and temperature changes "work" on the aging of a tree. How to do what has been happening for many decades, in a few days?
Material preparation
For brushing, it is better to use soft and medium hard wood with a pronounced texture, such as spruce, pine or larch. In these wood species, soft fibers are formed, as a rule, in the spring-summer period, when there is an intensive growth of annual rings, and they are more “loose”.
Wood with a uniform and unexpressed texture like beech and maple is not suitable for aging.
Before working with wood, prepare its surface. Eliminate all defects and dirt, whether traces of sweat, grease or other stains that may appear during the application of the tinting composition. Process any products (small architectural forms, furniture, etc.) after disassembling: you will spend less time and can get it everywhere with a brush.
brushing
Brushing (English brush - “brush”), or texturing a tree is giving it a relief characteristic of old wood. At the initial stage, soft fibers are removed from solid wood. There are several processing options: light aging - a barely noticeable roughness is created on the surface, or deep and rough, when the depth of the roughness reaches 2-3 mm (for decorative elements, sometimes for rough furniture).
You can pre-treat any part, say, a ceiling beam, with an ax: make notches, trim the edges without fear of spoiling - no one but you knows what the result should be. In this case, you will receive a product with a deep microrelief of the surface and irregularities on it up to 20 mm deep.
Do not forget about the "traces" of the vital activity of bugs and worms. Simulate them before finishing with a drill or drill. You can also apply simple carving elements: pigtails, dragons, etc. - you will get "Scandinavian style".
Sanding: tools and brushes
At large enterprises, machines and automatic lines are used, where everything is provided - from the feed rate of the workpiece to a powerful dust removal system. For an ordinary summer resident, such equipment is expensive and, in general, an unnecessary pleasure. If you will do this type of work often, it is better to purchase a brushing machine. The most common and publicly available is Makita. The most economical and simple option is a “grinder” or a drill, preferably with the ability to adjust the speed.
The whole brushing process can be divided into three stages:
- Rough selection of soft fibers
- Grinding
- Polishing
Accordingly, each of them needs its own brush. At the first stage ( brushing) use metal (brushing). If you are making structures for the outdoors - a gazebo, a canopy, a fence, etc., then most likely this will be your only brush.

When processing with a metal brush, scratches can remain on the annual rings themselves, which are difficult to get rid of during further processing.
When working with kratsovka, you must adhere to the following rules:
- brush along the fibers, otherwise damage the annual rings and ruin the woody pattern;
- the speed of movement of the brush and the pressure should be approximately the same, otherwise pits will result;
- the light source should be placed on the side at an acute angle, directing the beam of light across the fibers - this way you can better see the surface to be treated;
- do not press hard on the surface, do not overload the engine, otherwise it may cause premature equipment failure;
- the speed of revolutions should not be higher than 3000, better - 2000-2500: the brush can quickly scatter;
- be sure to work with glasses, do not neglect protective gloves: pieces of wire from the brush can fly off several meters, injuring others;
- take care of respiratory protection and dust removal: during this work, even eyelashes are covered with “powdery mascara”, let alone the lungs;
- a new brush needs to be “run in”, otherwise it will strongly “wave” the workpiece, after a while it will begin to process the surface cleaner;
- work only in one direction (rotation), the reverse should not be turned on - this will “kill” the metal brush;
- the humidity of the processed wood should not exceed 15%, otherwise, instead of a textured surface, you will get a shaggy-hairy one.
When processing sustainable and hard wood (larch, oak), be sure to use dust extraction systems: the dust of these wood species is considered carcinogenic and can cause lung cancer.
If you want to get rid of lint and get a better finish, you will need another brush - plastic (nylon), or rather, a grinding disc made of polymer-abrasive material. The most common grain size is 120.

Abrasive brush - universal, characterized by a more delicate surface treatment. If you use this brush, you can do without a metal brush, especially if the item needs to be treated delicately or if you want to avoid the specific scratches left by brushes.
The principle of working with an abrasive brush is the same as with a metal one. It is better to reduce the speed to 1500 in order to extend the life of the brush. Dust when working with a plastic brush is finer and stickier, so do not forget about a respirator.
Surface treatment specifics:
- do not grind the edges-edges and corners of the workpieces, especially if you do not plan to varnish them later: they will cling and chip off;
- do not make a deep relief on the seats, table tops and other horizontal surfaces - they will make it difficult to clean the surface: spilled drinks, crumbs, etc. will clog between the fibers;
- in order to prevent clogging of dust and snags of a rag during cleaning, such surfaces must be sanded with an abrasive brush and fine-grained sandpaper.
The final stage of brushing - polishing or fine grinding: performed with sesal or other synthetic brushes. You can use fine-grained sandpaper, abrasive sponges, metal wool, removing dust from the finished surface with a wide brush and vacuum cleaner.
Finishing operations
At the final stage, tinting is done (changing the color of wood by several tones), patination (underlining the texture of wood with special compounds that penetrate into the pores opened during brushing), craquelure (the effect of cracking and drying out), and varnishing.
After brushing, the board will look like new, but with a textured surface. To give it an old look, it is covered with various compositions, dark colors look more natural.
It is the right play with the color of brushed wood that gives it an aged look. Areas with soft wood (pores or depressions) are unevenly painted in a darker color, with hard wood (ridges) - in a lighter color. Recently, options with light troughs and darker ridges have been popular.

The easiest way is to apply a generous amount of dark stain and immediately wipe the area with a rag or a wide rubber spatula. In theory, stain should soak quickly into soft surfaces, but slower on ridges. However, this is often not the case in practice, so Leon42 I settled on a more complex method: after complete drying, the ridges are polished with fine-grained sandpaper. This method requires further processing with varnish or colorless impregnations, so the top layer that is opened remains without a protective coating.
Another option is to use paint in two contrasting colors: the surface is completely painted over with the first color, then the second is applied. While the last coat dries, run with a wide rubber trowel, removing excess paint and exposing the ridges of the first coat.
Proper texturing is a simple but messy, time consuming and unhealthy process.
As a result of difficult and hard work, you will get decorative elements that carry the beauty of antiquity and at the same time have high strength. Every detail, lovingly made with your own hands, will be unique.
According to the materials of the participant of the forum "House and Dacha"
Editor: Olga Travina