What ceiling is better to make in the kitchen? Wallpaper on the ceiling: how to choose the perfect finishing material (23 photos) Kitchen wallpaper for painting on the ceiling
How much time a day do we spend in the kitchen: we cook, have breakfast, have dinner, drink tea with friends... Of course, it should be cozy here, and comfort is created by such things as furniture, interior items and, of course, well-chosen finishes, including and the correct design of the ceiling in the kitchen.
In this article we will tell you how to choose ceiling wallpaper for the kitchen.
The ceiling, pasted over with properly selected wallpaper, will add coziness, a feeling of home.
However, this type of finish can be short-lived. Under the influence of moisture and temperature changes, the wallpaper will sooner or later begin to move away. In order for this moment to come as late as possible, it is worthwhile to carefully approach the choice of materials.
Wallpaper worth choosing
- lightweight so that they do not stick out longer,
- with a high degree of permeability so that condensate does not accumulate,
- moisture resistant, because the ceiling will have to be wiped and even washed.
Wide wallpapers look better, there are fewer joints on the surface, however, they are also heavier, that is, they can peel off faster.
Wallpaper for painting is good for dry rooms. They are less suitable for the kitchen: moisture and paint weight are added to the severity of the wallpaper itself, which is why such a coating will last less.
The color of the ceiling sets the mood!
How do you want to feel in the kitchen? Relaxed and calm? Or maybe you need extra energy?
Depending on what tasks you set for the kitchen as a whole and the ceiling in particular, the choice of wallpaper colors depends.
If the room is small, then light colors will add space and lightness.
- No wonder the white ceiling is a classic.
- All sorts of shades of orange will awaken your appetite and cheer you up.
- Red color in addition to appetite can awaken aggression, will put pressure on you.
- Shades of blue, turquoise and purple are soothing and reduce appetite, however, dark purple will create an oppressive feeling and a feeling of tiredness.
- Yellow color helps to concentrate, does not let you relax.
If you choose wallpaper with a pattern, remember that the distance to the ceiling is greater than to the walls. Too small and frequent pattern will be hard to see, especially in homes with high ceilings. That is, the drawing should be chosen medium or large.
Unlike the walls, most of which are covered with furniture, the ceiling is constantly in sight, so too bright, saturated and complex patterns can quickly get bored.
As an example, we give several options for finishing the ceilings in the kitchen (photo):
What to do to make the ceiling wallpaper in the kitchen last a long time?
- To begin with, the ceiling must be treated with an antifungal primer to avoid mold. Impregnations are inexpensive - from 50 rubles per liter. Consumption - about 0.2 - 0.3 l per m². The most famous brands are: PP-1 primer, SENEG Ecobio antiseptic, Zodiak primer, Galamix and others. Dry from 2 to 4 hours.
- It is better to choose wallpapers that are light, and they need to be glued end-to-end, and not overlapped. There are special wallpapers for ceilings from manufacturers such as York, Marbug and others. Wallpaper for painting is not the best solution for the kitchen. In addition to the fact that the sheets become heavier from moisture, the weight of the coating will also be added. Therefore, we leave them for drier rooms.
- You should not save on glue, because it largely depends on how long the wallpaper on the ceiling will last. It is better to give preference to slightly more expensive, but high-quality ones (for example, "Moment"). Glue is applied both to the sheets themselves and to the ceiling.
- After gluing, gently smooth the surface and release trapped air. If this is not done, then in place of the bubbles, the wallpaper will quickly begin to peel off.
- You can also attach borders that will not only decorate your ceiling, but also "seal" the edges of the wallpaper.
- Do not open windows immediately after wallpapering: temperature changes and changes in humidity will also cause the wallpaper to begin to peel off.
We note again that the wallpaper will give your kitchen a special charm, and can last from 5 to 10 years.
The advantages of such a finish include low cost and ease of execution.
On the other hand, the wallpaper will not have time to bother you, more often there will be a reason to “refresh” the room, to show imagination.
It is up to you to decide what is more important: frequent, simple repairs and a constant feeling of something new and cozy, or practicality.
Another option for finishing ceilings, more suitable for the kitchen, is plasterboard finishing. Read more here: (http://potolkyy.ru/category/potolok-iz-gipsokartona-gkl/dizajn-potolka-iz-gipsokartona/)
Comparison table on the website will help you to compare different ceiling materials and choose the most suitable one for you.
To make the ceiling in the kitchen (photos open the doors to the world of numerous finishing materials) not only beautiful, but also practical, you need to consider that it is he who will take the blows of moisture, soot and soot. Which finishing materials are better than others to cope with the tests and retain a presentable appearance against the background of operational characteristics? More on that below.
Finishing requirements for the kitchen ceiling
You need to understand that the kitchen is a special room. It is often humid here, it is hot, there is a lot of smoke, even despite modern hood options.
The finishing materials chosen for the ceiling in the kitchen must cope with all of the above problems. This is the first. In addition, it is important that the ceiling canvas is simple and easy to use - this is the second.
Not the last requirement is environmental friendliness, after all, we are talking about a room where food is prepared and eaten, a stylish appearance and, of course, an acceptable cost, although this factor does not play a decisive role for everyone when choosing a quality finish. Consider the most popular options for finishing the ceiling in the kitchen.
Painting and whitewashing - simple and affordable
One of the oldest low-cost finishing methods is whitewashing, and as a more practical alternative to painting. In the first case, lime with bactericidal properties is used, which makes it possible to obtain a neat snow-white canvas at low cost.
It does not make sense to say that whitewashing will help create a unique ceiling design in the kitchen, since this material is for simple decoration without claiming originality.
At the same time, it also has advantages. Whitewash can be updated every few months on its own and again, without feeling financial discomfort. And only after a few years, in order to maximize the renewal of the ceiling, it will be necessary to remove the old layers of whitewash along with the base layer of plaster for subsequent finishing, for example, with paint.
Painting the kitchen ceiling opens up more opportunities for the implementation of interesting ideas. With, again, relatively low costs for consumables, you can arrange a beautiful ceiling in a single color or with a combination of several shades in the style of a kitchen interior. It is easy to take care of the painted ceiling - it can be washed from time to time and, like whitewash, for the time being updated with new layers of paint.
Wallpaper in the kitchen on the ceiling - is the choice justified?
If we compare the finishing of the canvas with wallpaper with staining or whitewashing, then the process will be more troublesome, protracted and costly. It is difficult to glue wallpaper on the ceiling, so you need to do the work with an assistant or entrust it to professionals. In order for the design of the ceiling in the kitchen with wallpaper to turn out beautiful and neat, be sure to take the time to prepare the surface:
align;
close up joints;
putty, etc.
In terms of costs, kitchen ceiling wallpaper is not the most expensive way to decorate. The costs will depend on the type of wallpaper and the choice of adhesive for finishing.
In general, this option can hardly be called practical. If these are not washable wallpapers, then it will be possible to remove dirt and fumes from them in one way - by replacing them with new canvases. At the same time, if you choose colorful or contrasting wallpapers, you can make the traces of active use of the kitchen less noticeable.
What wallpaper is chosen for the kitchen?
There are several options for wallpaper for the ceiling canvas in the kitchen. It:
paper;
non-woven;
vinyl;
liquid.
Making a choice in favor of a particular material, you need to take into account the features of the room. The paper version is almost immediately excluded. You can use this kind of wallpaper only in the kitchen, where the cooking processes are so rare that the ceiling is practically not tested by steam, fumes and fat.
In a fully-operated kitchen, it is better to glue more practical wallpapers that can be washed. The best option is vinyl based on several layers of interlining and paper and polyvinyl chloride as a finishing surface.
If you need a durable and stylish ceiling finish in the kitchen, such wallpapers will fully meet your expectations. They are easy to use (can be washed with a damp cloth), resistant to detergents, moisture, moreover, can be used as a base for painting in five layers!
No less justified solution can be non-woven wallpaper. The advantage of the material is a dense base, due to which it is possible to mask some surface defects of the rough canvas, using the outer part as a base coat for painting. Just like vinyl, non-woven wallpaper can be washed without loss of quality, removed and re-pasted again, for example, after a flood.
It is worth paying attention to the fact that non-woven wallpaper comes in two versions: as a base for painting and in the form of construction.
In the kitchen in Khrushchev with a limited area and low ceilings, liquid wallpaper will fully justify itself. The material is characterized by high elasticity and adhesion.
Suitable for finishing even not the most ideal ceilings with irregularities. It is easy to care for the coating, for this use a washing vacuum cleaner. A prerequisite is a sufficient level of ventilation that prevents the development of unwanted bacteria and fungi in the room.
The composition of the wallpaper includes cellulose (recycled wood and artificial silk fibers). This is what makes the material environmentally friendly. Of the minuses, it is worth highlighting the high cost, especially in comparison with the prices of the finishing materials listed above.
Plastic panels in the kitchen - what you need to know
Analyzing the types of ceilings in the kitchen, you should pay attention to the budget and at the same time practical option - based on the use of plastic panels. The dies are suitable for a stylish canvas decor in the kitchen, but most importantly, they cope with tests during operation. Plastic ceilings can be mounted in a room of any size with any height - the result will meet expectations.
The advantages of PVC panels for the kitchen include easy maintenance with the possibility of wet cleaning, affordable cost, resistance to temperature extremes and changes in humidity.
It is quite easy to build plastic ceilings with the help of do-it-yourself fasteners, experimenting with design options, colors, panel textures, including those imitating natural types of materials.
Foam tiles on the ceiling - available finishes
Considering ready-made ceiling projects, you can pay attention to an interesting option for finishing material - foam tiles. Designed specifically for ceiling decoration, it will delight you with its low cost against the background of excellent performance.
With all the availability, such a ceiling will look aesthetically pleasing and modern even after several years of active use, it will not lose its appearance due to soot, steam, and fluctuations in the humidity regime. If necessary, it is easy to replace individual sections of the ceiling; to update the entire canvas, it will be enough to paint it in any of the trendy colors in a few hours with your own hands.
If desired, for decoration, you can choose both classic options for foam tiles, as well as new items with ornaments, imitations of wood, natural stone and even metal.
Standard plates cannot be washed due to the components included in the composition. A washable ceiling in the kitchen based on foam boards can only be obtained if you choose special injection panels or extruded foam material.
Suspended structures - difficult, but effective
Those who are not looking for easy ways and set a firm goal - to bring to life the most creative and modern ideas, should study in more detail the designs of plasterboard suspended ceilings. The designs are mounted on a special frame in one, two or even three levels, supplemented with interesting lighting options, experimenting with colors without limiting the imagination.

Of the advantages of suspended ceilings, one can single out the possibility of implementing author's ideas, as well as masking communications.
The disadvantages include limited application. For full-fledged multi-level products, only a kitchen with high ceilings is suitable, since the design “eats” centimeters, visually reducing the area.
Stretch fabrics - a modern solution for finishing the kitchen ceiling
It is unlikely to surprise anyone with stretch ceilings in the kitchen. Unless, if you come up with an unusual combination of paintings in combination with ceiling moldings. Despite the variety of materials that are more affordable and open the same scope for the implementation of bold ideas, many are sure that it is better to make the ceiling from PVC stretch film in order to insure the room from possible flooding from above.

The fact is that ceilings of this kind are able to withstand several hundred liters of water in the event of flooding, preventing damage to property and, importantly, simply return to their previous form after simple manipulations with drying with a heat gun.
Stretch canvases in the kitchen are a very practical option. In addition to insurance against leaks, the ceiling will be able to emphasize the features of the interior design, cope with the temperatures in the room, and will not limit the possibilities during cleaning (including wet cleaning). Of the minuses, it is necessary to highlight the laborious installation with the installation of the frame, high cost and susceptibility to mechanical damage.
So what material for finishing the canvas in the kitchen to choose? It all depends on how often the ceiling is planned to be repaired, what budget you need to meet and what creative ideas to implement. The main thing is to try to move away from stereotypes and come up with something special.
We offer viewing photos of the ceiling in the kitchen, as well as interesting ways to design it. Among them are: whitewashing, painting, wallpaper, drywall, plastic, rack material, stretch ceiling in the kitchen.
The kitchen is a special space. And the design here must be practical and functional.
Also, do not lose sight of aesthetics, since it is in this room that we are used to sitting in the evenings, having gatherings with friends, and also creating, creating new culinary masterpieces.
The microclimate that is maintained in this room should also be taken into account. After all, here, as a rule, steam evaporates, a lot of pollution, a constantly elevated level of humidity, and temperature changes are constant ...
Therefore, in each individual case, it is worth thinking about what kind of ceiling to make in the kitchen?
Whiten?!
This version of the ceiling in the kitchen is not very relevant these days.
Indeed, as an alternative to it, there are many different options. Although this one is still used by some.
Among its advantages, familiarity and cheapness can be distinguished, since it is made from chalk with lime. Due to the porosity, the ceiling in whitewash better passes more air.
Yes, and the process of whitewashing is done by hand, which is not at all difficult. But, this method also has disadvantages.
Since whitewash does not tolerate high levels of humidity, as well as temperature changes, it is less suitable for decorating the design of the ceiling in the kitchen.
You will also have to frequently update the whitewash, since such a surface cannot really be washed, and if this is done, then the coating simply will not. And yet, when lime is applied in several layers, it becomes completely unattractive.
The ceiling in whitewash crumbles and cracks very quickly, in comparison with other types of its design.
We paint
It is also a traditional option, several times better than the previous one. In addition, it can even be washed if necessary, and you can paint it yourself.
Ceilings in the kitchen require special attention, since high humidity, grease and soot create extreme operating conditions that not every finishing material can withstand. In order for the ceiling not to lose its original appeal and the kitchen to remain cozy and beautiful for as long as possible, you need to choose the right type of finish. An overview of popular materials and ceiling design options will help you decide which ceiling is best for your kitchen.
plastered ceiling
The classic option for decorating ceilings in the kitchen is their plastering, followed by puttying and whitewashing or painting. If, after careful leveling with plaster and putty mixtures, the ceiling in the kitchen is whitewashed, it will not be possible to clean it of grease and soot. Regular whitewashing over time will lead to the formation of ugly sagging, to eliminate which you will have to remove the coating along with the plaster.
Tip: if yellow spots appear, the coating can be refreshed with the previously used water-based composition, without forgetting to pre-prime the yellowed areas with alkyd matte paint. The primer will prevent stains from showing through the finish coat.
Pros:
- low cost of materials;
- environmental friendliness;
- incombustibility;
- resistance to changes in humidity and temperature;
- ceiling height is not reduced.
Minuses:
- large time costs;
- high complexity of finishing works;
- lack of protection against flooding.
Tip: if you are going to plaster the ceiling in the kitchen in a new building, use sickle and fiberglass. This will help prevent cracks in the ceilings in the kitchen as the building shrinks.
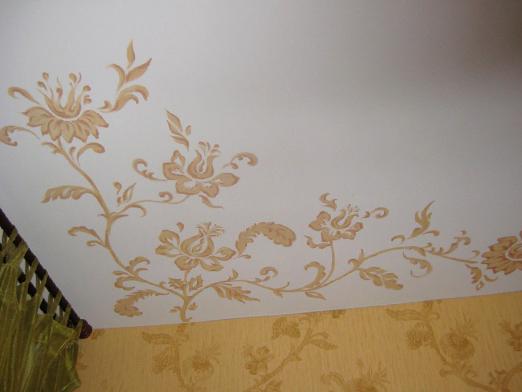
Wallpapering the ceiling
If you wallpaper a plastered ceiling in the kitchen, you will get a completely different result. For the kitchen, it is best to choose washable vinyl wallpaper or paintable wallpaper. They have sufficient resistance to moisture and dirt, in addition, they can be repainted several times.
Pros of vinyl wallpaper:
- a wide selection of colors and design options;
- lower surface requirements compared to paint;
- the possibility of hiding microcracks on the plaster resulting from shrinkage;
- admissibility of humidity cleaning.
Minuses:
- under the influence of steam and hot air, heavy wallpaper begins to peel off from the surface after a while;
- even the most moisture-resistant wallpaper will not withstand leakage from neighbors from above.
PVC panel ceilings
The second budget option for kitchen ceilings is plastic paneling. Unlike plaster, this design method is simpler when performed independently. Plastic panels have all the characteristics necessary to withstand difficult operating conditions.
Advantages of a plastic kitchen ceiling:
- low cost;
- ease of installation;
- ease of washing and cleaning;
- neat appearance;
- a wide selection of textures and colors;
- moisture resistance;
- soundproofing properties;
- good protection against leaks;
- undemanding to the surface of the base ceiling;
- the possibility of hiding communications and mounting recessed fixtures.
Minuses:
- lowering the ceiling height by 5–15 cm;
- plastic is not suitable for creating an elite kitchen design.
Tip: soot and dust accumulate in the seams between the panels, so when decorating the ceiling for the kitchen, it is better to prefer seamless patterns. Glossy panels are better than matte ones as they tend to get less dirty.
Styrofoam Ceiling Tiles
Foam tiles allow you to update the ceiling in the kitchen with minimal cash costs and as soon as possible.
Advantages of adhesive ceiling for the kitchen:
- budget finishing;
- low requirements for the quality of leveling the ceiling surface;
- exceptional ease of installation;
- preparation and gluing take little time;
- moisture resistance;
- washable.
Minuses:
- the white color of the tile can quickly turn yellow;
- decorative tiles with a relief pattern will collect soot and grease in the recesses of the relief, which will be very difficult to clean
- limited design options.
What can be used to make a false ceiling for the kitchen, masking all communications - from wires to the ventilation pipe? Of course, from drywall. In terms of design, drywall is a material of a higher level, since it allows you to realize any ideas. Spectacular multi-level structures can transform a standard room, give it a touch of individuality.
Pros:
- an easy way to level the ceiling surface;
- no need to remove the old finish;
- the ability to use lamps of any type;
- availability of do-it-yourself installation;
- the plasticity of the material allows you to create structures of any shape, multi-level ceilings for a modern kitchen;
- Variety of finishing and decoration options.
Minuses:
- a significant reduction in the height of the walls;
- inability to retain water, in case of leakage, a complete replacement of the material will be required;
- susceptibility to deformation and cracking.
Tip: for painting the ceiling for a plasterboard kitchen, it is advisable to use not the usual water-based, but acrylic paint. The surface painted with such a composition can be washed with detergents.
Stretch ceiling
For the installation of stretch ceilings for the kitchen, a special PVC film is used. A variety of textures allows you to choose the right material for any style of interior design.
Pros:
- installation speed;
- the base ceiling surface does not need to be processed;
- moisture resistance;
- masking wiring, ventilation;
- the possibility of using spotlights;
- practicality - can be washed with soapy water;
- effective protection against leaks - the ability to hold large volumes of water;
- large selection of textures and colors.
Minuses:
- self-assembly is not possible;
- instability to mechanical damage;
- reducing the height of the walls.
Each of the listed materials for the ceiling in the kitchen has its own advantages and disadvantages. The choice of finish will depend on the design of your kitchen, as well as your financial capabilities and experience in the renovation industry.
The ceiling, decorated with beautiful materials, is an integral element of the interior of a city apartment. Currently, in the construction market, you can pick up a variety of materials for ceiling coverings (in the photo - a modern version of the design of the ceiling).
Attention! The choice of finishing for the ceiling is influenced by the material possibilities of the owner of the dwelling, his taste preferences, as well as the chosen design.
To date, wallpaper remains the most affordable way to finish the surface of the ceiling. Thanks to modern technologies used in the manufacture of various types of wallpaper, the glued ceiling fits perfectly into any design (in the photo-example of the ceiling on which the wallpaper is glued).

Material options
Pasting the ceiling in the living room or children's room is a good solution for apartments with high ceilings, and for houses with low ceilings.
Advice! Using a combination of various finishing materials, it is possible to distinguish several separate zones in the interior of the room.
Manufacturers offer four types of materials that are suitable for decorating residential premises (samples in the photo):

- vinyl;
- non-woven;
- liquid;
- glass wall papers.
Pasting features
Non-woven wallpaper has a dense base, so they are easy to use. Such materials "breathe", that is, they perfectly pass air. Due to the high density, these wallpapers (pictured are samples of design solutions) fit into any design.

They hide minor cracks, wall imperfections, are highly resistant to water, and are suitable for use in rooms with high humidity. Professionals often design with the help of glass wallpapers, which include natural components: clay, quartz sand, limestone (in the photo, the design of the ceiling surface using glass wallpapers).

They consist of glass fibers of different thickness, intertwined with each other. That is why such materials have high strength, do not deform, and no visible defects form on their surface. These wallpapers are quite profitable to use, from an economic point of view. The average service life of such materials is 25-30 years. In addition, you can repaint if the design of the room changes (in the photo - wallpaper with fiberglass).

Liquid wallpaper fits perfectly into the design of studio apartments. They have an external resemblance to decorative plaster. Such materials are ideal for decorating those surfaces that have a sufficient number of protrusions, corners, as well as for decorating rooms with low ceilings. Among the advantages of these finishing materials, we highlight the natural composition, excellent adhesion to the surface being decorated, the ability to accumulate heat, and repel dust from the surface. Ceiling design using such materials (example in the photo) is possible even for beginners.

Advice! In case of damage to the coating, in order to return the ceiling to its original aesthetic appearance, it is enough to replace the damaged area.
The main disadvantages of liquid wallpaper is instability to high humidity. Ceilings in bathrooms and toilets cannot be decorated with such materials; liquid wallpaper is not suitable for kitchens either. The video clip shows all the nuances of using wallpaper to decorate the ceiling in a living room.
Features of vinyl materials
Design using vinyl wallpaper is an expensive pleasure (option in the photo).

The structure of such materials includes two layers: the top is made of polyvinyl chloride, the bottom is made of interlining or paper. Manufacturers offer four types of these finishing materials:

Advice! When choosing the type of wallpaper for the ceiling, be guided by your taste preferences, as well as the style decision for your apartment (the photo shows an example of a ceiling design).
Wallpaper for painting
Decided to paint the ceiling a certain shade? In this case, choose wallpaper for painting. Manufacturers offer them in white, so that if desired, the owner of the finished ceiling can choose the color that will harmoniously fit into the interior of the room. Such materials have a relief structure, so you can add additional sophistication and originality to the room.

Currently, the construction market is in demand finishing materials for decorating the ceiling, which have a matte pattern. It is offered in various colors, when painted, you can get a plain ceiling with a protruding pattern.
The specifics of ceiling wallpaper
For painting, you can use vinyl, non-woven, as well as glass, as they are highly resistant to high humidity. Vinyl is better to choose those based on interlining. Finishing materials made on the basis of foamed interlining are distinguished by a relief structure. They are suitable for decorating the ceiling, with their help the room will acquire the desired design.

The use of photo wallpapers in design
Among the popular wallpaper options that are used to decorate the ceiling, photo wallpapers are of interest. Due to the realism of the image printed on the canvas, the room acquires any design style. Currently, the following types of photo wallpapers are offered to customers:
- velor;
- textile;
- 3d models;
- PVC materials.
Textile photo wallpapers are supposed to have a paper or fabric base. The top layer is decorated with silk or linen polypropylene threads. This material is used to make a variety of patterns and textures. Such wallpapers are resistant to high humidity in the room, they will be an excellent solution for decorating the surface of the ceiling in the kitchen. Textile photo wallpapers are obtained by pasting the pattern applied to the base with velor villi. These canvases are pleasant and soft to the touch, with their help you can create the most realistic effect.

Advice! Materials of this type are unstable to high humidity, so it is advisable to use them for pasting ceilings in children's rooms, bedrooms, living rooms.
PVC materials are highly resistant to moisture, so they are ideal for bathrooms, kitchens.
3d materials have a 3D look and are considered an innovation in the production of photographic materials for the construction industry. Due to the realism of the images obtained on the ceiling, you can find yourself in the atmosphere of amazing wildlife, enjoy its splendor to the fullest. Looking at the ceiling of your bedroom in the morning, decorated with voluminous 3d photographic materials, you can get a charge of vivacity and optimism for a new working day. Designers recommend choosing 3d pictures for low ceilings.
Preparatory work
Before proceeding with pasting the ceiling, clean and dry its surface. Check visually for major defects on the ceiling. If you find serious problems on the surface, putty, prime all problem areas. Cut the canvases of the desired length, first measure the ceiling. For shrinkage, add 2-3 cm to the obtained parameters. To glue the canvases evenly, it is necessary to mark the surface. To do this, threads intersecting in the center are pulled in different directions in the center. The gluing process must be started from the window so that the joints between the individual canvases are not visible. As a final element, use a decorative plinth or border around the entire perimeter of the ceiling.

Conclusion
The ceiling is an important element of any city apartment and country house, so you need to pay close attention to decorating it. Despite the variety of finishing materials that exist on the modern construction market, professionals do not advise disregarding traditional wallpapers of different types. The choice of finishing materials for the ceiling depends only on personal wishes, the material capabilities of the homeowner. Based on the ratio between the reasonable cost of finishing materials and a long service life, vinyl wallpapers are in the lead. In addition, they have excellent aesthetic characteristics that even the most fastidious owner will like.
When repairing a kitchen, installing a beautiful and high-quality ceiling plays an important role. In order for this part of the interior to please the eye of the family for a long time and not be subject to wear, there are the following requirements for the future kitchen ceiling:
- high wear resistance in kitchen conditions - high temperature and humidity, possible contamination and coating with plaque;
- environmental friendliness and safety;
- the ability to hide all possible defects in building floors and laid details of communications;
- attractive appearance, combination with other interior details;
- reasonable price and affordable installation method.

Much in choosing a ceiling covering for the kitchen depends on the preferences of the owner, everyone wants to make a beautiful and fashionable design. But it is not always possible to implement the desired project, for example, very stylish and popular suspended and multi-level ceilings can take a lot of space from low rooms, and simple painting or sticking with polystyrene foam is impossible on the surface even with minor irregularities.


The main determining factors in choosing a ceiling are materials and installation costs. It is with these two criteria in mind that it is necessary to determine in advance the total cost of future repairs and the features of the kitchen flooring.

Finish options
Modern renovation in the kitchen includes the following options for finishing the ceiling:
- painting;
- whitewash;
- wallpapering;
- rack ceilings;
- plastic coating;
- tile;
- drywall installation;
- stretch ceiling.

You can paint the kitchen ceiling with various materials, which paint is better, you can decide by examining the properties of its possible varieties:
- Acrylic paints are waterproof and durable. When finishing, they dry quickly and do not emit a smell, so that the room can be used almost immediately after the work has been completed. On sale there is a huge number of glossy and matte acrylic paints of different colors.

- Water-based varieties can independently change the shade by adding the appropriate pigments. They are hygroscopic, breathable and harmless to health.

- Water-based paints have the same advantages as water-based paints, but they can be washed with a damp cloth when dry. Therefore, for kitchen conditions, they are most preferred.

- Silicone varieties have a high cost, but are very resistant to moisture.. They can be washed regularly without fear of breaking the coating. If the kitchen does not have a hood, then this is the best option.

Painting the ceiling can be done independently and manually, it does not require much experience and expensive tools. The items you will need are: a roller with a long handle, a paint bath and a stepladder. Before coating, it is necessary to clean, level and prime the ceiling. The quality of putty for painting the surface should be higher than for paper wallpaper. It is optimal to carry it out in 2 layers: the first rough, the second - finishing, there is even a special grade of dry mix for it. Before painting, it is necessary to securely cover the entire space of the kitchen with plastic wrap.

Painting the ceiling with an electric compressor and sprayer is good because the paint is evenly distributed over the surface, and the material itself is saved as much as possible. The disadvantage is expensive equipment (it can be rented), the complexity of maintaining the unit, high energy costs and noise during work.

Whitewashing - a method of external decoration of the ceiling, which has been used for a long time, has recently been used less and less. It has lost its popularity due to low resistance to humidity and temperature changes, the inability to hide bumps, the need for frequent updates, the appearance of cracks and soot stains. Instead of whitewashing, more practical materials have come that are devoid of these shortcomings. Nevertheless, this is a cheap way to update the ceiling in the kitchen, which even an amateur in matters of repair can easily cope with. The main advantage of whitewashing over other technologies is its high porosity, which ensures air exchange.


Whitewashing is possible with two materials: lime and chalk. Lime is remarkable in that it is able to tighten small cracks and kill bacteria, but chalk, when dried, has ideal whiteness and freshness.

Renewal of old whitewashing occurs only with chalk on chalk or lime on lime, it is not worth interfering with two types of material. To clean the ceiling from the old finish layer, it is necessary, first of all, to cover all the furniture and coatings in the kitchen with a waterproof material (plastic film) and prepare a soapy solution with a cleaning cloth. Then, with a damp roller or sponge, the old surface is wetted and scraped off with a spatula as much as possible. If large irregularities are noticed, then it is worth leveling them with putty, and after it dries, go through the treated areas with sandpaper. Then the entire surface is smeared with a primer, and after it dries, it is bleached.

For chalk whitewashing 10 sq. m. ceiling should be thoroughly mixed in a bucket of warm water 3 kg of sifted chalk, 30 g of PVA glue or primer and 20 g of blue. Another option for the same area: 1.7 kg of lime, 40 g of blue.
To finish the ceiling in the kitchen, you must definitely choose a moisture-resistant washable wallpaper. For kitchen walls, this type of coating is often used, but the ceiling coating has its own characteristics: it is at the top that warm air accumulates, and all the soot goes there. Therefore, over time, the wallpaper may become dirty or begin to lag behind the surface. It is optimal to use the vinyl look, even if stains appear, they can be painted over, cleaned with a damp cloth from dirt.


The surface for ceiling wallpaper is cleaned in the same way as for whitewashing, you can use a thin layer of liquid rough putty. As a primer, many recommend using the same wallpaper paste. Before gluing, it is necessary to prepare a free area of the floor for spreading with glue, to protect the furniture from stains. In the process, the marked and cut rolls are applied to the ceiling and smoothed out. During work and after it for 6-8 hours, it is undesirable to cook something in the kitchen or ventilate it.

Liquid wallpaper is the most successful option for paper covering the kitchen ceiling. They are protected from moisture and high temperatures, do not lag behind the surface, do not form spots. Even with a defect formed, it is easy to cover it with a new layer in a small area. On sale there are various types of colors and textures in the form of a dry mixture, which is diluted with water on the spot, stirred until a homogeneous mass and after keeping for several hours (the period for a particular variety is indicated on the package) are applied to a leveled and primed surface with a spatula. Of the disadvantages of this method of finishing, only the high cost of raw materials can be noted.

Slatted ceilings for the kitchen are mounted on a rectangular frame at a horizontal level using aluminum rails covered with protective colored layers. Their length is 3 and 4 m, which allows them to fit entirely into the width of a standard room. Colors depending on the surface can be shiny, matte, monotonous or with different textures. It is possible to choose any color for the existing interior. Advantages of river ceilings in the kitchen:
- they are durable, moisture resistant, protected from temperature extremes;
- easy to care for, easy to clean with a damp cloth;
- a niche between the rails and the ceiling can be used for laying communications;
- built-in lamps can be mounted inside;
- no need to level the base of the ceiling;
- dust does not stick to the surface of the rails;
- installation and material for this type of ceiling is cheaper than for stretch ceilings.


Reiki can have a curved shape, which allows you to make a fancy wavy relief of the ceiling in the kitchen.

Plastic ceilings are practical and reliable, and the prices of polymer parts are relatively low. This material is light and will not cause difficulties during installation, and thanks to the carving with an ordinary knife, you can make the required shapes and holes for built-in lights. Plastic panels have a standard length of 3 or 4 m, width from 100 to 500 mm. There are seam and seamless options, the latter are more expensive, but they create a flat surface without visible joints.

For the installation of plastic panels, a horizontal frame is created from a metal profile. Aluminum frames are attached to the wall with dowels-screws using a perforator. When the frame is ready, it will not be difficult to fix plastic on it. The advantages are that a damaged sheet can be easily replaced with a new one, the material does not bloom, does not rot, and is not subject to moisture.


Instead of plastic for interior decoration, some use siding for exterior work in the kitchen. This may be due to its rigidity and strength, resistance to moisture and high temperatures, and a variety of colors. But siding ceilings will have their drawbacks: large visible seams at the joints, it is possible to be harmful to health when using outdoor material inside the apartment.
Instead of plastic, you can use lightweight boards made of polyurethane, foam or other polymers. They do not require the installation of a frame, they are fixed on a special glue, but the surface must be leveled. Tile ceilings can be easily installed in the kitchen in 1 day, and they will last a long time.


Drywall is widely used in the installation of multi-level ceilings. For the kitchen, you should choose only a moisture-resistant variety - it has a green leaf color. After mounting the frame, the material can be decoratively processed in many ways: painting, wallpapering, tiling or mirrors, installing built-in lamps. Sheets of gypsum are easily cut with a clerical knife to give any curved shape, they can be fastened to a metal frame with self-tapping screws with a screwdriver, and if it is missing, then with an ordinary Phillips screwdriver. Despite the relative lightness of drywall sheets, they are able to hold a lot of weight.

The stretch ceiling is perfectly even, without the smallest defects, easy to maintain and looks very expressive. But its installation is not easy, it requires stretching a synthetic fabric with special equipment and at high temperatures. Only experienced specialists can carry out such work. During installation, you must immediately take care of the location of the built-in lamps; it will not be possible to replace the places for them in the future. But when flooded from above, all the water will be retained by the canvas and will not spill onto kitchen furniture, floors and walls. It is possible to create multi-level ceilings in the kitchen, the top layer of which will be stretched, and the lower level of plasterboard with finishing.

Types of kitchen lighting
Ceiling lamps for the kitchen can be chosen traditional - incandescent, energy-saving fashionable with daylight and built-in: LED, fluorescent and halogen. If the ceiling is painted, covered with wallpaper or tiles, whitewashed, then due to the lack of a niche, it is not possible to build lamps into it. In this case, an ordinary suspended ceiling is selected with the chandelier you like and bulbs from the 220 V network. The advantages of this method are obvious: the cheapness of the lamps, ease of replacement, no need for complex installation.

In the case of suspended and suspended ceilings, recessed spotlights are often used. They have the following benefits:
- high level of illumination at low operating power;
- the ability to install any number of lighting points anywhere;
- ease of replacement of fixtures in the installed socket;
- due to their low power, they emit little heat, so the surface around them does not deteriorate due to high temperatures;
- if 12 V lamps are used, this will significantly save electricity.
The best years of a woman are spent in the kitchen. A joke, of course, but there is a certain amount of truth in it. Here are the serious requirements that the kitchen makes to the choice of material for the ceiling are not surprising: even the highest quality hood will not save you from high humidity, temperature changes and rising fumes. Started a renovation, but do not know which ceiling is better to do in the kitchen? Then we come to you - and offer a detailed story about popular materials for decorating a vitally important room for everyone with specific photos in the interior.
About 10-15 years ago, the problem of choosing ceilings for the kitchen did not arise at all: in most cases, the fantasy of property owners came down to traditional whitewashing or painting and proceeded primarily from the meager supply on the market.
 Now the situation has changed dramatically, and a rich selection of finishing materials is already taken for granted. Well, the turn of the owners has come to take for granted the problem of choice!


 Above, we have already found out that the ceiling in the kitchen is permanently exposed to high humidity, hot fumes and soot, which is inevitable with regular cooking. From this follows the obvious conclusion: when deciding which ceiling is better to make in the kitchen, it is necessary to start first of all from the practicality of one or another option. Of course, no one canceled the aesthetic and decorative qualities - we have not been living in the Soviet Union for a long time, which means that the ideal option would be a logical compromise between the categories we mentioned above.

 Consider options that are more or less suitable for the ceiling in the kitchen.
Whitewash
A decision that in the memorable Soviet years was considered practically uncontested. There were catastrophically few attractive features and personality in him, but tell me, who thought about such trifles in those years?
 Among the advantages of whitewashing:
 - cheapness
- excellent air exchange
- ease of execution
- whitewash hides little or does not hide irregularities on the ceiling at all
- requires regular updates
- under the influence of high humidity quickly cracks and crumbles
We do not recommend!

Painting
Outwardly, this version of the ceiling in the kitchen is very similar to the previous one. Still the same classic white color. True, the paint is more tolerant to high humidity in the room, and this is the rare plus that distinguishes it from lime or chalk. Otherwise, the balance of pros and cons is strikingly similar. Pros:
Pros:
- does not require special skills and tools
- easy to clean
- loses color very quickly
- terrible fragility
- flaking off the ceiling
- shows low loyalty to local restoration (if a separate area has exfoliated, it will not work to paint over it without irregularities)


Wallpaper
To glue wallpaper on the walls is our everything. We are ready to spend as much time as we want on the selection of that very unique drawing, which, after gluing, for sure, will thoroughly get bored after a few months of active contemplation. With ceilings - the same story. If you are thinking about which ceiling is better to make in the kitchen and are leaning towards wallpaper, then you are making a relatively good choice. Regarding whitewashing and painting, of course.  Pros of wallpaper for the ceiling in the kitchen:
- hide imperfections well
- cheap
- do not require expensive tools for gluing
- easily repairable in some areas
- impressive decorative potential
- inconvenience of gluing - it is difficult to fix pieces abundantly lubricated with glue without the appearance of bubbles and various shortcomings
- under the influence of moisture quickly peel off in different places and deform


Suspended plasterboard ceiling
From a design point of view, such ceilings are perhaps the most profitable solution. They allow you to bring to life the most complex and non-trivial designs, thereby bringing your kitchen closer to the high standards of design art.

 We note other advantages of using drywall on the ceiling:
- durability
- practicality
- high strength
- impressive decorative qualities
- wide range of coloring options
- resistance to mechanical stress
- susceptibility to temperature changes
- require frequent renewal of the painted layer
- deteriorate quickly in case of flooding
- require professional installation
 It should be noted that it is best to make the ceiling in the kitchen from moisture-resistant drywall and be sure to trust this business to professionals. In this case, the long service life declared by us above takes place in practice. In all other cases, you can quite expectedly experience problems with the suspended structure.
 Recommended with reservations!


Plastic panels on the ceiling in the kitchen
A popular material that is completely found in modern apartments and private houses. When solving the difficult question of what is the best way to make a ceiling in the kitchen, the first thing the owners pay attention to is the relative cost-effectiveness of this option.

 Let's mention the other advantages of using plastic for finishing the ceiling in the kitchen:
- elementary and quick installation
- usability
- structural durability
- environmental Safety
- a large number of variations in length and width
- immunity to high humidity
- easy care with non-abrasive products
 A common version of plastic panels is rack type. These are narrow and long panels that create a pleasant atmosphere in your room and easily fit into even the most complex interior.

 Also, white plastic has one significant drawback - this is a fairly quick appearance of yellowness as a result of prolonged and regular exposure to ultraviolet rays. Correct such a color deformation, alas, will not work.

 Otherwise, it is an up-to-date, inexpensive and very reliable option for the kitchen.
 Note to housewives: a plastic panel with a glossy surface requires more intensive care than a matte one.
Stretch ceiling in the kitchen
Perhaps the most demanded solution today, which we could only dream of before. It will be long and boring to describe all the advantages of using stretch ceilings in the kitchen, but we will try to be concise:
- moisture resistance
- perfectly smooth seamless surface
- endless decorative combinations
- flood safety
- impressive service life
- a wide choice for mounting fixtures
- easy care
- fit perfectly into any interior

 Manufacturers today offer such a wide range of textures that it is time to get confused even by a seasoned designer, not to mention more mundane people, for whom performance comes first. Therefore, if you are faced with a choice of which stretch ceiling is better to do in the kitchen, you need to familiarize yourself with all the options in advance in the brochures of the relevant service provider in your city.


 Most often, the dispute is around glossy and matte stretch ceilings.
The former actively dominate the market, offering a beautiful mirror effect that can visually enlarge even the most modest-sized kitchen.

 The latter are very similar to ordinary whitewashed ceilings and draw less attention, suggesting that you and your kitchen guests focus solely on the interior.


 What will you choose? This is a separate issue, which you should definitely think carefully about!


Summarizing
In order to decide which ceiling is better to make in the kitchen, you must first of all correlate the existing aesthetic requirements with your financial capabilities and extrapolate the resulting compromise to materials with better performance characteristics. The ubiquitous availability of various options makes any renovation today an amazing journey, the final point of which is the identity of your kitchen and the undisguised comfort of the room. Look for your own option, and we are always ready to offer you an ocean of incredible ideas, each of which can potentially lead you to a successful solution! Photo: vk.com