How to open vcd? VCD file extension Combining vcd files into one
Creating a video disc at home is not difficult at all, all you need is the original video material, free time and, of course, Nero.
This section will tell you how to create a Video CD (VCD) and Super Video CD (SVCD), although the formats of these discs are different, recording for them is completely the same and it would be unreasonable to create two identical partitions. If necessary, short explanations will be added along the text.
Briefly about the formats:
video CD is the first format for burning video to CD. Video on it is written in MPEG-1 format with a resolution of 352x288 in the PAL system at a frequency of 25 frames per second. Or in an NTSC system with a resolution of 352x240 at 29.97 frames per second.
Super Video CD- by the name it is clear that this is a later format and, accordingly, of better quality. For video, the MPEG-2 format is used with a resolution of 480x576 in the PAL system at a frequency of 25 frames per second. Or in an NTSC system with a resolution of 480x480 at 29.97 frames per second.
And now let's proceed directly to the recording, run Nero Express:
When asked which recorder to use, choose from the CD-R/RW drop-down menu. If your computer is only equipped with a CD-RW drive, this menu will not appear.
Let's start creating a disk by choosing its type. On the right side of the window, a menu is shown offering to create a disc - select Video CD (Super Video CD). To do this, simply move the mouse pointer to the desired item and see a new menu like this:

Select Video CD (Super Video CD) by simply clicking on it with the mouse button. That's it, the disk type is defined, now we go directly to the recording itself.
The project window appears, in which we will create a new disk.

Those who have already worked with Nero Express will immediately notice that creating a VSD (Super Video CD) is like burning an ordinary CD, and the initial settings are almost exactly the same. But let's continue...
There are two ways to place files in a project: the first one is to use the "add" button.

In the window that appears, select the desired file and click the "add" button, the selected file automatically appears in the project window. Nero will estimate the size of the future file and display it on the disk size bar.
By the way, when creating a project, you can track the degree of disk filling with an accuracy of one megabyte, in the lower left corner of the project window there is a corresponding entry - used and shows the total amount of occupied space. When the project is completed, click the “Finish” button.
At the bottom of the window there is a drop-down menu "File types", if you select video files in it, then only video will be displayed in the "Select files and folders" window, other files will not be shown.
The file display and window view can be changed using the button.
The second method is even simpler, just select the file we need in any Windows window and drag it with the mouse into the project window. And thus complete the entire project.
After the files for recording are prepared, we evaluate the future disc again, if an "extra" file has got into the project, then it can be deleted using the "delete" button, the video can be evaluated with the "play" button.
It should be said about the new setting in the project window - enable the VSD menu. By enabling it, we can create a nice menu, for this we select a video clip and click the "Properties" button
Next →The main disadvantage of the VCD format is that a full-length film can only fit on 2 CDs. This greatly affects the cost, so 1 film costs 165-185 rubles, even a pirated copy costs more than a hundred, which is much more expensive than a video cassette, with almost the same quality. Therefore, VCD, in our country, are not very common. VCD is perceived rather as exotic.
Until recently, it was believed that it was impossible to record a film in acceptable quality on 1 CD. But since the development of the VCD format (1993), 2 or 3 generations of computers have changed. It became possible to apply more advanced compression methods and take into account the peculiarities of human perception more strongly, because the main requirement for video compression formats is the possibility of real-time decompression. So in November 1998, a new development by the Moving Picture Expert Group was announced - the MPEG4 standard, of which video compression is a part. The hardware requirements for MPEG4 video playback are high - Pentium II300 is needed (Compare with P133 for VCD). But due to better compression, it became possible to compress video much more than when using MPEG1 (VCD). Now you can easily put a movie on 1 CD with even better quality than VCD! On the other hand, such hardware requirements are no longer serious - any computer from those that are now produced and sold will do. The situation is reminiscent of the one that was about 5 years ago, when the MPEG1 Layer3 format appeared. Remember multimedia disks "All albums of the group" in ADPCM 22050 Hz 4bit format - terrible quality, but they worked on fours. After that, mp3 appeared - the file size is the same, but the quality is an order of magnitude higher, but Pentium was already needed. And all due to the complexity of the algorithm. Some even call MPEG4 "the mp3 of the video world". This format has every chance to replace MPEG1 and MPEG2: first of all, it provides better quality for the same file size or smaller size for the same quality, more flexibility in choosing resolution, frame rate and bit rate, better transmission of fast motion, less compression time, easily compatible with different audio codecs, less sensitive to data loss, well suited for real-time video viewing over the network.
So, back to the topic of our article. It is clear that the maximum that we can achieve is to make the resulting film differ from the original as little as possible. In fact, even some subjective improvement in quality is possible due to the smoother transition of frames during movement. First of all, we need an MPEG4 codec. There are currently 2 such codecs - "Microsoft MPEG-4 Video Codek" (V1, V2, V3) and DivX ;-) MPEG-4 (Fast-Motion and Low-Motion). DivX is actually just a hacked version of the same Ms MPEG4 Codeka, as the authors claim, they removed glitches and slightly improved it. Ms MPEG4 is installed, for example, with Windows Media Tools (http://www.microsoft.com/windows/mediaplayer/). To install the DivX codec, you need to download and install "divx_311alpha.exe" (). You may also need to install Direct X Media. Both of these codecs allow you to set the following compression parameters: Data Rate (value of the data stream), Key frame interval (interval between key frames) and Compression Control (smoothness/crispness, smoothness/clearness ratio). Let's consider these parameters in more detail.
Data Rate - the most important value, it depends on it and the quality of the video and file size. The larger it is, the higher the quality, but the file size is also larger. Measured in bits per second. In MPEG4, with this parameter we set the maximum value of the data stream, the real value depends on the content of the movie at the moment and can constantly change. So, for example, when compressing the titles of a movie, the DataRate is more than halved.
Key frame interval - MPEG4, according to Microsoft terminology, refers to interframe (inter-frame) compression methods, i.e. e. one where a small number of key frames (Key frame or I-Frame) are completely preserved, the remaining frames (Delta frames) contain only the difference between previous and subsequent frames. Key frame interval sets the interval between key frames. This is what explains the delay when trying to start the movie from any place - in order to show an arbitrary frame, the player must return to the key frame and build all the frames up to the desired one. It would seem that the more keyframes, the better. However, it is not. The fact is that a key frame requires more data than an intermediate one, and when a key frame is inserted, less information remains for subsequent frames (because the stream is limited). In general, modern codecs can get by with a very small number of keyframes. So, for example, the VDO codec puts 1 cl. frame per 9999 frames, and for the MPEG4 codec in the NetShow program, the default value is 1 cl. frame at 3600 sec. Actually value of Key frame interval for MPEG4 codec means only the maximum distance between cl. frames, the MPEG4 encoder itself inserts cl. shots in difficult moments. When changing scenes quickly, it can even insert a few cl. frames in a row. In addition to rewinding cl. Frames are also needed for editing the film without recompression; you can easily cut the film into pieces using them and then glue them together. The best thing to do with this setting is to leave it at the default.
Compression Control (Smoothness/crispness) - Smoothness determines the smoothness of movement, crispness determines the sharpness or detail of the image. Unfortunately, these quantities are mutually exclusive, i.e. if you increase one, the other decreases. Generally this setting is only important for low datarate or frame rates less than 20 Hz. At high DataRate, when this parameter is changed, the films turn out to be exactly the same. For our task, it is more correct to set the clarity to the maximum or leave the default value.
Let's compare these codecs using my program (630 Kb). This program compares 2 video clips and expresses the difference as a number, taking into account the peculiarities of perception. The smaller the difference, the more the clips are similar to each other. More detailed information about the principles of the program can be found in her instructions. Unfortunately, it was not possible to use version 3 Ms of the codec for comparison. The fact is that Microsoft, starting with version 3845 of its codecs, closed V3 for use in programs other than ASF encoding tools. So, let's make 15 other clips for each codec from one source clip in MPEG1 format, with Data Rate changing from 100 to 1500 in increments of 100, while keeping the rest of the parameters constant (Key frame=10, Compression Control=100). Let's measure the file sizes and differences of each resulting clip from the original one. Let's build on the basis of the obtained data the graphs of the Differences / DataRate and Size / DataRate dependencies. The commercial for the film "The 6th Sense" (file "add01.mpg") with the sound removed, size 7 Mb, was taken as the source clip. This file is taken from the licensed disc with the movie "6th Sense". I cut a three minute fragment and removed the sound from this file. The original file was about 30 MB in size. I chose this movie as a reference because it contains a variety of scenes. In general, this choice was to some extent random.


Based on these graphs, the following conclusions can be drawn (remember that the lower the difference graph, the better):
- All codecs behave approximately the same, you can see a common origin. The only exception is DivX Fast-Motion. It is not clear what was done with it, although it is possible that at very low DataRate (less than 300) it will give some advantage, although this is not a fact. In any case, for our task we need a DataRate of at least 600, and here DivX Fast-Motion has a clear deterioration. In the future, we will not remember him.
- When DataRate is less than 700, the file size increases linearly, at large values, the size starts asymptotically approaching a certain value - here you can clearly see the asynchrony of the format (i.e., the dependence of the current DataRate value on the contents of the frame). Most likely, the division into linear and non-linear parts by 700 happened only for my video fragment - it is very dynamic. For other films, this division will occur at a lower DataRate. From this we can conclude that it is impossible to predict the file size in advance, you can only estimate it from above.
- The graph of differences is practically the correct hyperbole. But the differences tend not to 0, but to 5.5 - this value is the result of smoothing during compression and it cannot be called deterioration, subjectively this smoothing even improves the image. For clarity, I conducted our experiment for DataRate equal to 5000. The differences remained at the level of 5.5, and the file size at the level of 7 MB. It turns out that, starting from a certain point, increasing the DataRate does not give a particular improvement in quality, and the file size increases.
- It makes no sense to make the DataRate greater than 1200, the size of the MPEG4 file is almost the same as the original MPEG1 file. Although this is not surprising - the VCD format implies a bitrate of 1150kbps for video and 224kbps for audio.
- At high DataRates, DivX Low motion has a slightly smaller size, but a slightly worse quality, incomprehensible jumps are observed on the graph.
In order to somehow characterize the “Difference” value on the graph, I will say that if the difference is less than 8, I can no longer distinguish the resulting film from the original, with the exception of some frames. At a value greater than 12, the quality is simply terrible. But, of course, this is all very subjective.
(I remind you that the specific figures on the graph are only correct for my test film, but the general patterns will be preserved for any)
Based on the foregoing, I can advise you to use MS MPEG4 Codek V2. Firstly, neither you nor your friends will have problems with the codec, you won’t have to download and install anything. Even if you have a very old version of Ms Media Player, it will connect to the Internet itself and install everything you need, completely without your participation. Secondly, using hacked software is somehow not good, especially if the original one is completely free. Thirdly, it is not known what hackers could have messed up there.
Now let's move on to the practical part of the article. I must warn you that the received movies in MPEG4 format will not be able to watch, neither on DVD / VCD players, nor on game consoles. All software mentioned in the article is free and available for free download.
On VCDs, video files have the *.dat extension. It's not quite MPEG1, more precisely it's MPEG1 which adds some information necessary for VCD players. In any case, this information must be deleted. There is a special utility VCDGEAR2.0 () for this. We start, select the type of conversion dat-> mpeg. With the “Load” button, select the dat file on the VCD and where we want to save it. Start button. The speed of this conversion depends on the speed of your CD-ROM and will take no more than 10 minutes. As a result, you will get an MPEG file that will be 7-8 megabytes smaller than the original DAT file. At this stage, we can expect a serious problem. The fact is that the loss of 1 byte on a regular CD-ROM with programs can be fatal. Therefore, about 1/8 of the entire disk is occupied by various codes for error detection and correction. When an error is detected while reading a data disk, this fragment tries to be read several more times at a reduced speed. With VCD the situation is different. Continuity of flow is much more important, and reading errors can be ignored. It's better to let a couple of green squares flash in the corner than to have to watch one frame for 20 seconds. Therefore, for VCDs, the White Book format is used, in which most of the control codes are simply removed.
As a result, copying a movie from a VCD to a hard drive without errors is difficult. Of course, the VCDGEAR program fixes errors in the MPEG format if they occur during reading, but only minor ones. Therefore, before reading, it is recommended to carefully wipe the disc from specks and warm it up in CD-ROM-e for several minutes. If the error nevertheless appeared during reading (and how to check this I will write below, the operating system, of course, does not produce errors, because there are simply no necessary control codes), then you can try to perform this operation a few more times, you can first copy the dat file to HDD and after converting to mpeg, you can even try to exit to DOS and copy the file there. Although if you have a modern CD-ROM, then there should not be any special problems.
MPEG4 allows you to use any available audio codec for audio encoding. A good choice is MPEG1 Layer3. Install, for example, Fhg Radium MP3 codec ( ftp://ftp.ssga.ru/pub/DISTR/mp3soft/Encoders/ra-codec12.zip). In the future, we will use the excellent program VirtualDub1.3d () as the main tool.
Now let's proceed to the actual compression. We will work on both parts of the film separately and glue them together at the very end.
1. Run VirtualDub. Open MPEG1 file (File/Open Video File). The mpg file opens for a long time, as the integrity of the format is being checked. If the file does not open, then it contains an error, it is better to try reading the file again. If this does not help, try in the file selection window to enable the "Popup extended open options" option and then select "Accept partial MPEG streams". If this does not help, then you will have to cut out the damaged places in some powerful video editor, but such situations are rare, for example, I have never had it.
2. Select full audio compression (Audio/Full processing mode). Select the audio codec (Audio/Compression/MPEG Layer3) and select the audio compression options. I don't think it's worth saving on sound. You won't save much anyway, but you'll lose a lot. They say that the sound gives half the impressions, but it takes much less. But on the other hand, we cannot get better quality than at the source. Therefore, it is optimal to choose 128kBit / s, 44100, Stereo, although this depends on the specific situation.
3. Next, set the full video compression (Video / Full processing mode). Select the video codec (Video/Compression). Set the compression options (Configure). As we have already agreed, we leave the Keyframe and Compression Control parameters unchanged. It remains to select the Data Rate. We will proceed from the fact that you need to get a movie that will fit on 1 CD-R, i.e. it should be no more than 650 MB. But, as I said, it will not be possible to calculate the size of a compressed movie in advance, it can only be estimated from above using the formula:
M=(T*60*(BV+BS)/8)/1024
where M - file size in megabytes, T - movie duration in minutes, BV - DataRate, BS - sound stream value in bits per second.
Or BV=(M*8*1024)/(T*60)-BS
The accuracy of the estimate depends on the dynamics of the film. But on the other hand, it is not at all necessary to fill in the entire disc; in the remaining space, for example, you can put a Sound Track for a movie in mp3 format or photos of artists. In principle, Data Rate equal to 600 Kbps already gives quite decent quality.
4. Sometimes phrases like “insert disc 2” are placed at the beginning and end of each disc, they must be removed. Using the movie navigation buttons, we determine the frame numbers from which the movie itself begins and ends. Set the range we want to compress (Video/Select Range).
5. The compression itself. Select File/SaveAvi specify the path and type the file name. Everything. Now we have to wait. The compression process in MPEG4 is an order of magnitude faster than, say, in MPEG2. On my Celeron 75x5.5, the floor of a movie is compressed in just 3 hours. Ms MPEG4 codec supports dual processor configuration. Microsoft claims that a dual 400MHz PentiumII can do this real-time compression.
6. After both parts of the film are ready, it remains only to glue them together. Usually, the creators of the disc choose a quite suitable place for dividing the film into two parts, i.e. at the change of plans, so after gluing the joint is usually imperceptible. Open the first compressed part in VirtualDub, select File/Append Video Segment and add the second part. Disable compression (Video/Direct Stream Copy, Audio/Direct Stream Copy). We already save the whole movie in 1 file - Save Avi. In the same way, you can cut off unnecessary parts of an already converted movie (if you specify the appropriate Range), but only up to a key frame.
If you do everything as indicated above, then there will be no problems with sound synchronization, it has been checked many times. Synchronization can be broken if extra frames appear during compression, but this can be easily checked - we remember the number of frames in the original mpeg1 movie and compare it with the number of frames in the converted one (unless, of course, you crop anything). The FlasK MPEG program, which many people recommend for this purpose, suffers from this problem. VirtualDub keeps the number of frames 1 to 1.
This article is advisory in nature, I can be wrong about something, so experiment more. In any case, you can now convert a VCD movie to MPEG4 and burn it on 1 CD-R without losing quality.
In general, the possibilities of MPEG4 are much greater, in this case, the original quality of VCD, we were severely limited. Almost perfect MPEG4 video quality can only be achieved by compressing DVD discs. But translating DVD to MPEG4 is very different from translating VCD to MPEG4. The following problems occur:
- First of all, the DVD format, unlike the VCD, was designed with fairly strong copyright protection. Files from a DVD disc cannot be copied as easily as from a VCD. It is more like a regular audio CD, that is, you can browse the directory, but you can’t copy the file. It is necessary to use special programs-grabbers.
- DVD discs are available in both NTSC and PAL.
- A DVD is designed to be viewed on a television, so often the information is recorded in margins - ie 50 or 60 fields of even and odd lines in turn per second. When compiling a full frame, “teeth” are formed along the edges of moving objects, because even and odd lines of one frame are recorded with a time difference.
- When converting DVD to MPEG4, you need to reduce the frame size (for example, to 352×288) - there are also many algorithms for such reduction - bilinear, bicubic, HQ bicubic ... - they differ greatly in quality and speed.
I want to write my next article about solving these issues.
When copying an article
reference to the source is required.
I was inspired to write an article on this topic by purchasing a music center that could also play Video CDs and output video to a TV. Before that, I only viewed Video CDs on a computer, but now I have the opportunity to work with them, so to speak, in my "native environment". The ability to use the music center as a video player interested me, in particular because I had quite a few DivX movies, and viewing them on a computer monitor, especially not alone, is somewhat uncomfortable. The idea, therefore, was as follows - to convert movies from DivX to Video CD, burn them to CD-RW discs, and then view them using the music center on the TV. At first glance, everything was simple, but in practice there were some difficulties that were associated both with the variety of codecs that were used to create movies in the DivX format, and with the differences in the methods for converting from DivX to Video CD by different programs. All this required both studying the nuances of various implementations of the DivX and Video CD formats, as well as practical experiments on converting, which resulted in this article.
First of all, a little theory. Video CD is a standard for recording MPEG-1 video on a regular CD. One disc usually allows you to store up to 74 minutes of video, the quality is commensurate with the VHS standard. A single-speed CD-ROM is sufficient for playback. There are the following versions of the format:
VCD 1.0
Was developed in 1992. Supports only NTSC standard. Video output format - 352x240, 29.7 fps, bit rate - 1150 Kb/s, audio output format: MPEG-1 Layer II Stereo, one audio track, Bit rate - 224 Kb/s.
VCD 1.1
Was developed in 1993. The same as VCD 1.0, only playback control (PBC - PlayBack Control) has been added, which is carried out by turning the tracks, as in AudioCD.
VCD 2.0
Was developed in 1994. The most common VideoCD format at present. Video output format - PAL - 352x288, 25 fps, NTSC - 352x240, 29.7 fps, Bit rate - 1150 Kb/s, Still images: PAL - 352x288 NTSC - 352x240. Audio output format: MPEG-1 Layer II Stereo, one audio track, Bitrate - 224 Kb/sec. As background music for still images, you can use audio formats - stereo, join stereo with bitrates of 128, 192, 224 or 384 Kb/sec, mono - 64, 96 or 192 Kb/sec. Expanded playback control, support up to 1980 still images/audio files. It is possible to use only video files (without sound).
Super Video CD format
A standard for recording video in MPEG-2 format on a regular Compact Disk, the quality is commensurate with the SVHS standard. Video output format - PAL - 480x576 , 25 fps, NTSC - 480x480 , 29.7 fps, Variable bit rate up to 2600 Kb/s, Still images: PAL - 480x576 , NTSC - 480x480. Audio output format: two stereo tracks in MPEG-1 Layer II format with bit rates from 32 to 384 Kb/sec, or four mono tracks, or one MPEG Multichannel. The playback control capabilities are identical to VCD 2.0.
As you can see, the highest quality is provided by the standard Super VideoCD, but only DVD players, Sony PS-2s and computers can play it, forcing us to opt for VCD 2.0.
DivX movies can be recorded in different resolutions, bit rates, and audio formats. To parse DivX files, I recommend gspot (full name Gspot Codec Information) from the K-lite codec pack (http://home.hccnet.nl/h.edskes/finalbuilds. htm), by the way, I recommend using it as a DivX driver on your computer, as it supports almost all available codecs of this format.
Let's run gspot(Programs/K-lite Codec Pack/Tools/Gspot Codec Information). Let's select a DivX video file for analysis (File/Open). Gspot will display the analysis results as shown in Figure 1.
Rice. 1. Results of DivX file analysis by Gspot.
We are interested in the data displayed in the right part of the window - these are groups of fields video and A audio. In the field group video shows the codec with which the file is compressed (in this case DivX 3), playback time (in this case 1 hour, 37 min. 34 sec.), video format (512 * 288 in this case), frames per second (25 in our case). From this information, it can be seen that the source film was in PAL format, that is, there will be no special distortions when transcoding to VCD, we only need to take into account height scaling. In the field group Audio we can see the audio track compression method (in our case, MPEG-1 Layer 3), and its format (single channel, stereo, 44.1 kHZ, bitrate 96 k/b per second), this information will also be useful to us when transcoding.
All the software that I have tested by burning VideoCD discs can be conditionally divided into the following groups:
- All-in-one programs that both convert from other video formats to MPEG-1 format and burn VideoCD discs, as well as the ability to create discs with a custom design (this is called disk authoring).
- Programs that only record and disk authoring in VideoCD format.
- Programs that only convert to MPEG-1 files in other video formats.
Converting DivX Movies to Video CD
The most convenient and simple program of the first group is Roxio WinOnCD(http://www.roxio.de/). This program can burn both data discs and audio and video discs. Load WinOnCD and select Open Video Project(open a video project), a list of options for creating video discs will be displayed, as shown in fig. 2. A very convenient of the available options is to create Overspan Video CD(that is, automatically placing a video file on two discs if it does not fit on one). This option is one of the strengths of this program, most other "all in one" programs do not know how to do this. This option is very handy, because, as experience has shown, a 700 Mb compressed DivX movie, when converted to MPEG-1 with maximum quality, will take about 1 GB, which will definitely not fit on one disc. So choose Overspan Video CD, we will see the project window (Fig. 3).

Rice. 2. List of options for creating video discs in WinOnCD 
Rice. 3. Overspan Video CD project window
In the upper left part of the window there is a tree of directories on the current disk, in the upper right part there is a list of files in the current directory. At the bottom of the window is the settings window. Creating a Video CD can be started by simply dragging the desired video file with the mouse into the options window, tab Editor. First, the format compatibility window will be displayed (Fig. 4). Characteristics that do not comply with the MPEG-1 specification will be highlighted in red, and a message about a possible incorrect encoding will be highlighted. We take note of this and click on Ok. On the left, we will see the structure of our project (if we are going to record several video fragments in one project, we can set the order of switching between them here), and on the right - the icons of the placed video fragments (Fig. 5). Here we can correct the video fragment if we need it (expand it, insert background or text, etc.). All of these options are for creating VideoCD authoring discs, so we won't touch on them for now. It is important to check the conversion options (button Settings). The disc must be in the PAL format, standard for our region, and have a bitrate of 1151600 bps, since only devices that support the Super Video CD format can normally reproduce a higher bitrate. Bookmarked tracks we can see the structure of the created discs, as well as the playback time (Fig. 6). After that, go to the bookmark record, and set the recording parameters (Fig. 7). Here we can set the write speed, as well as whether we write directly to the CD, or create an image on the hard drive. When all parameters are set, click on the button record at the bottom right of the window.

Rice. 4. Compatibility test. 
Rice. 5. Editor tab. 
Rice. 6. Tracks tab. 
Rice. 7. Record tab.
Now we have to be patient, because in addition to physical burning to a CD, the video transcoding process must be performed (more than an hour on a computer with a Pentium 4 2.53 MHz processor for a 700 MB file). All this time, WinOnCD invites us to admire the progress of the process (Fig. 8).

Rice. 8. The process of burning a VideoCD disc in WinOnCD
Now about general impressions about working with WinOnCD. The indisputable advantages of this program are a very user-friendly interface and the ability to automatically split a video file into several discs. However, WinOnCD also has serious disadvantages. First of all, these are problems with sound after conversion. This is especially true for those films where the audio track is in MPEG Layer 3 format. The sound may disappear in places, "croak" or be completely absent. Another serious disadvantage is the lack of the possibility of batch processing of files, because it is much more convenient to leave the conversion of several files, for example, overnight, than to wait several hours for this process to end.
These problems forced me to look for a more professional program that would have more options for customizing the conversion process. I found two such programs. This TMPGEnc Studio(http://www.pegasys-inc.com/) and Canopus Pro Coder(http://www.canopus.com/). According to their functionality, I would classify them in the third group.
TMPGEnc Studio rearranges a set of independent utilities consisting of the following programs:
- TMPGEnc Plus is a utility for converting various video data to MPEG-1 and MPEG-2, has a basic set of editing tools (allows you to cut an MPEG file into parts, merge several files into one, perform multiplexing and de-multiplexing).
- TMPGEnc MPEG Editor is an editor that has more powerful MPEG file editing tools than TMPGEnc Plus
- TMPGEnc DVD Author - Quite a powerful DVD authoring program
- TMPGEnc DVD Source Creator is an MPEG-2 file creation program for TMPGEnc DVD Author.
- TMPGEnc Sound Player is an AC-3 audio data creator for TMPGEnc DVD Author.
- TMPGEnc Xpress is a video data conversion utility based on TMPGEnc Plus but with a more user-friendly interface.
TMPGEnc Plus is available for download on the net as a standalone utility, and I first tried using it to encode to MPEG-1. The program pleased with the presence of a larger set of settings, the possibility of batch conversion and high encoding speed. But again there was a problem with audio conversion if the source was in MPEG-3 format - TMPGEnc Plus simply did not perceive the audio track in the DivX file. The documentation indicated that to support MPEG-3 encoding, you need to install an external encoder - MAENC, tooLAME or SCMPX, but this also did not help. Then I tried using , and to my great joy everything worked! Let's take a closer look at this program. The interface of TMPGEnc Xpress is made according to the principle of a wizard - you are prompted in turn to set the parameters for each stage of the encoding process, which will be convenient even for a beginner (Fig. 9). The encoding stages are visually displayed in the upper part of the program window in the form of buttons.
Clicking on a button Start New Project entails displaying the window for setting source parameters. Let's press the button Addfile... to select the source file. A window will be displayed Add clip(Fig. 10), bookmark clip info.

Rice. 9.TMPGEncXpress 
Rice. 10. Add clip window, Clip Info tab.
Bookmarked clip info general settings for the current video file are displayed: its duration, frames per second, resolution, audio track parameters. Parameters in the field Advanced Clip Setting we leave them unchanged, it is recommended to change them only if TMPGEnc Xpress cannot set them on its own. Using a bookmark cut-edit the original video file can be cut into parts. Bookmarked filter contain filters that can be applied during encoding (Fig. 11). Here you can remove interlacing (filter Deinterlace, by default, correction occurs only when necessary), scale the image (filter resize, in our case it is recommended to use it with the following parameters: image location - full screen while maintaining the scale factor, scaling method - adaptive), select the image area (filter group), remove ghost image (filter ghost reduction), remove noise (Noice reduction filter), enhance clarity (filter sharpness), correct color (Color Correction filter) and sound (filter Audio Correction, which allows you to reduce noise, increase the overall volume, select the required language track if there are several of them in the original, for example, in different languages). Very handy bookmark feature filter is the presence of a preview window, which allows you to immediately evaluate the effect of applying filters.

Rice. 11. Add clip window, Filter tab.
After confirming the choice of settings, exit the bookmark filter. The main program window will be displayed with a list of video files selected for conversion. Here we can add several other files using the button Addfile..., each with its own filter settings, or go to the stage of setting the parameters of the output file by clicking on the button set output at the top of the window.
After pressing the Set Output button, a window with a list of available output formats will be displayed (Fig. 12). Select Video CD in PAL standard and by pressing the Select button we will go to the window set output(Fig. 13). Here you can set some encoding options. The Video tab sets the characteristics of the output video stream. motion search precision sets the accuracy of detecting dynamic scenes when encoding. The higher the accuracy, the fewer errors when encoding dynamic scenes, but the more time is spent on encoding. option Detect Scene Change it is also desirable to turn it on to improve image quality, it detects dramatic changes in the scene and sets it as an image, it also helps to reduce the level of noise that is usually present in compressed DivX movies (for example, squares in the background). The option serves the same purpose. Soft Block Noise, when using which, however, be aware that this may affect the clarity of the image. In the lower right part of the window, you can specify the approximate size of the output file.

Rice. 12. List of preset formats. 
Rice. 13. Set Output window.
After setting the parameters, click on the Encode button to display the corresponding window, which sets how the encoding process will proceed. Here you can specify an action after encoding is completed (for example, turn off the computer), register the current task for batch encoding using TMPGEnc Xpress Batch Ebcoder or set preview options when encoding.
Unlike WinOnCD, encoded with TMPGEnc Xpress MPEG-1 the files were played on the music center with sound without distortion and with acceptable graphics quality, but there was a problem associated with periodic image damage. When you press pause and resume playback, this problem disappeared. Since this file was reproduced on a computer without problems, the reason lies in the peculiarities of encoding by the program itself - obviously, some part of the control frames is missing in the resulting file, which, when processed on this device, leads to an accumulation of errors.
This problem forced me to try using for encoding Canopus Pro Coder.
Canopus Pro Coder in terms of its functionality, it is very similar to, but its interface is organized according to a different principle. The encoding process is divided into three stages: Source, Target and Convert, which are implemented as buttons on the left side of the program window. Selecting a file for encoding is done by pressing the button Source(Fig. 14). Clicking on a button Advanced displays a window where you can apply audio and video filters, and, if necessary, cut off part of the file. The set of filters is slightly larger than in - you can overlay a still image and more accurately correct interlaced video. A preview window is also present. Push button target we call the output format selection window (Fig. 15). In addition to the formats present in TMPGEnc Xpress, encoding in Raw, QuckTime, WM, DivX and MP3 is also available here, as well as optimization for WEB. Let's choose MPEG1-VCD-PAL, after which a window with output file parameters is displayed (Fig. 16). Here you can set its quality and proportions. If we need to fine-tune the conversion process, then using the button Advanced you can call up a window where all available settings are shown in full (Fig. 17). For convenience, they are organized in a hierarchical structure, which allows you to quickly find the parameter of interest to us by common criteria. A very convenient option is Target File Splitting(the ability to split the output file into parts), this feature is similar to Overspan in WinOnCD, and is absent in TMPGEnc Xpress (in this program, in order to cut a file into two parts, you have to convert the file twice, cutting first the first half, and then the second).
Clicking on a button Convert calls the encoding window, where, as in the case of TMPGEnc Xpress, you can set the action after encoding is completed or register the current task for batch encoding (Fig. 17). Batch encoding is done using the included task scheduler Job Queue Manager.

Rice. 14. Canopus Pro Coder, Source Stage 
Rice. 15. Canopus Pro Coder, output format selection window 
Rice. 16. Canopus Pro Coder, Target Stage 
Rice. 17. Canopus Pro Coder, Target Stage, Advanced Options Window 
Rice. 18. Canopus Pro Coder Stage Convert
Now that the MPEG-1 file is ready, you can start burning it to a CD. For this purpose, any program that can burn Video CD discs is suitable, for example, the widely used Nero Burning ROM, or the same WinOnCD. The recording procedure is quite simple - we create a project in VideoCD format and simply move the file we converted to MPEG format into it.
Title (English): Virtual CD File
Title (Russian): Virtual CD File
Developer: H+H Software GmbH
Description: VCD aka Virtual CD File is a virtual CD file format. The format was developed by the software company H+H Software GmbH. A VCD file is an image copy of an optical media CD or DVD. Such images are used for the same purposes as physical discs, that is, for storing and playing recorded content. The difference between the two is that VCD images need to be software mounted. In this case, the mounted image is recognized by the operating system as a regular optical disk. You can use a program such as Virtual CD to mount VCD image files. IsoBuster, PowerISO and some other similar applications are also suitable for viewing the contents of VCDs.
Format 2
Title (English): FarStone Virtual Drive
Title (Russian): FarStone Virtual Disk
Developer: FarStone
Description: VCD otherwise FarStone Virtual Drive is a FarStone virtual disk file format created by FarStone VirtualDrive Pro. The VCD format was created by FarStone Technology, a company specializing in the development of software for protecting and recovering data in Windows. A VCD file is an exact copy of an optical CD or DVD disc. Such images can store various data - documents, software, multimedia files. Typically, information written to a VCD image is stored in a compressed form. In addition to the native program, you can open the VCD image with UltraISO or MagicISO applications.
To open (edit) a file of this format, you can use the following programs:
Format 3
Title (English): Value Change Dump File
Title (Russian): VCD data file
Developer: No data
Description: VCD or Value Change Dump File is a VCD data file format. A VCD file is a dump generated by logic simulation software. VCD file data is stored in a text format, and the file may include headers, initialized variables, and changes to values for given variables. Depending on what type the variable has, the values can be scalar or vector. The VCD dump can be opened and viewed using Altera Quartus II. On Linux, you need to use the GTKWave application for this.
VCD File Summary
The VCD file extension has one type(s) of file(s) and is associated with five different softwares, but mainly with MPlayer, developed The MPlayer Team. They are often presented in the format Virtual CD. The bulk of these facls are classified as Disk Image Files.
The VCD file extension can be viewed on Windows, Mac, and Linux. They are supported primarily on desktops and some mobile platforms. The popularity rating of VCD files is "Low", which means that these files are rare.
However, be aware that there is a lot more information to know about VCD files; the following are only the most important details regarding these file types. If you are having trouble opening these files, or would like more information, please see the details below.
Popularity of File Types
File Rank
Activity
This file type is still relevant and is actively used by developers and application software. Although the original software of this file type may be overshadowed by a newer version (eg Excel 97 vs Office 365), this file type is still actively supported by the current version of the software. This process of interacting with an old operating system or an outdated version of software is also known as " backward compatibility».
File Status
Page Last updated
VCD File Types
Main VCD file association
Virtual CD access the contents of a CD or DVD without the need to expand the physical Drive.VCD file is used by JVC, Sony, Matsushita and Philips to store VHS quality video on optical discs.
Softwares that open Virtual CD:

Compatible with:
| Windows |
| Mac |
| linux |

Compatible with:
| Windows |

Compatible with:
| Windows |

Compatible with:
| Windows |

Compatible with:
| Mac |
Try Universal File Viewer
In addition to the products listed above, we suggest you try the FileViewPro universal file viewer. This tool can open over 200 different types of files, providing editing functionality for most of them.
License | | Terms |
Troubleshooting Opening VCD Files
General problems opening VCD files
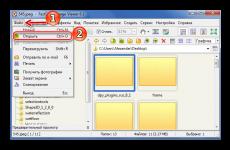
MPlayer not installed
By double-clicking on a VCD file, you can see a system dialog that says "Can't open this type of file". In this case, this is usually due to the fact that MPlayer for %%os%% is not installed on your computer. Since your operating system doesn't know what to do with this file, you won't be able to open it by double-clicking on it.
Advice: If you know of another program that can open the VCD file, you can try opening the given file by selecting that application from the list of possible programs.
Wrong version of MPlayer installed
In some cases, you may have a newer (or older) version of the Virtual CD file, not supported by the installed version of the application. If you do not have the correct version of MPlayer (or any of the other programs listed above), you may need to download a different version of the software or one of the other software applications listed above. This problem most often occurs when working in an older version of the application software from a file created in a newer version, which the old version cannot recognize.
Advice: Sometimes you can get a general idea of the version of a VCD file by right-clicking on the file and then choosing Properties (Windows) or Get Info (Mac OSX).
Summary: In any case, most of the problems that occur while opening VCD files are due to the lack of the correct application software installed on your computer.
Install optional products - FileViewPro (Solvusoft) | License | Privacy policy | Terms |
Other Causes of Problems Opening VCD Files
Even if you already have MPlayer or other VCD-related software installed on your computer, you may still encounter problems while opening Virtual CD files. If you still have problems opening VCD files, the reason may lie in other problems preventing these files from being opened. Such problems include (listed in order from most to least common):
- Invalid links to VCD files in the Windows registry ("phone book" of the Windows operating system)
- Accidental deletion of description VCD file in the Windows registry
- Incomplete or incorrect installation application software associated with the VCD format
- File corruption VCD (problems with the Virtual CD file itself)
- VCD infection malware
- Damaged or outdated device drivers hardware associated with the VCD file
- Lack of sufficient system resources on the computer to open Virtual CD format
Quiz: Which of the following files is a vector image file?

Right!
Close, but not quite...
The unique thing about vector files like AI and EPS is that graphical details (such as object sizes and shapes) and text remain editable. This allows you to save and re-open them in Illustrator and edit text or other elements in the graphic.

File extension device breakdown (desktop/mobile phone/tablet)
Event of the day
A common image format, TIFF (Tagged Image File Format), was first developed for use with scanners in 1986 by Aldus Corporation. This format was created to solve many of the problems that came from too many incompatible proprietary formats in the technology industry.
How to Fix Problems Opening VCD Files
If your computer has antivirus program can scan all files on the computer, as well as each file individually. You can scan any file by right-clicking on the file and selecting the appropriate option to scan the file for viruses.
For example, in this figure, file my-file.vcd, then you need to right-click on this file, and in the file menu select the option "scan with AVG". Selecting this option will open AVG Antivirus and scan the file for viruses.
Sometimes an error can result from incorrect software installation, which may be due to a problem that occurred during the installation process. It may interfere with your operating system associate your VCD file with the correct software application, influencing the so-called "file extension associations".
Sometimes simple reinstall MPlayer may solve your problem by correctly linking the VCD with MPlayer. In other cases, file association problems may result from bad software programming developer, and you may need to contact the developer for further assistance.
Advice: Try updating MPlayer to the latest version to make sure you have the latest fixes and updates.

This may seem too obvious, but often the VCD file itself may be causing the problem. If you received a file via an email attachment or downloaded it from a website and the download process was interrupted (for example, by a power outage or other reason), the file may be corrupted. If possible, try getting a fresh copy of the VCD file and try opening it again.
Carefully: A corrupted file can cause collateral damage to previous or existing malware on your PC, so it's important to keep your computer up to date with an up-to-date antivirus.

If your VCD file associated with the hardware on your computer to open the file you may need update device drivers associated with this equipment.
This problem usually associated with media file types, which depend on the successful opening of the hardware inside the computer, for example, sound card or video card. For example, if you are trying to open an audio file but cannot open it, you may need to update sound card drivers.
Advice: If when you try to open a VCD file you receive .SYS file related error message, the problem could probably be associated with corrupted or outdated device drivers that need to be updated. This process can be facilitated by using driver update software such as DriverDoc.

If the steps didn't solve the problem and you are still having problems opening VCD files, this may be due to lack of available system resources. Some versions of VCD files may require a significant amount of resources (eg. memory/RAM, processing power) to open properly on your computer. This problem is quite common if you are using fairly old computer hardware and a much newer operating system at the same time.
This problem can occur when the computer is having a hard time completing a task because the operating system (and other services running in the background) can consume too many resources to open VCD file. Try closing all applications on your PC before opening Virtual CD. By freeing up all available resources on your computer, you will ensure the best possible conditions for trying to open the VCD file.

If you completed all the above steps and your VCD file still won't open, you may need to run hardware upgrade. In most cases, even with older hardware versions, the processing power can still be more than enough for most user applications (unless you're doing a lot of CPU-intensive work like 3D rendering, financial/science modeling, or media-intensive work) . In this way, it is likely that your computer does not have enough memory(more commonly referred to as "RAM", or RAM) to perform the task of opening a file.
Try to upgrade your memory to see if that helps open the VCD file. Today, memory upgrades are quite affordable and very easy to install, even for the average computer user. As a bonus, you you will probably see a nice performance boost while your computer is performing other tasks.

Install optional products - FileViewPro (Solvusoft) | License | Privacy policy | Terms |