How to make a presentation in power point. What program can you use to make a presentation? Create presentations in PowerPoint
Microsoft PowerPoint is a powerful set of tools for creating presentations. When you first learn the program, it may seem like it's really easy to create a demo here. Maybe so, but most likely the result will be a rather primitive version, which will be suitable for the most minor displays. But to create something more complex, you need to dig deep into the functionality.
First of all, you need to create a presentation file. There are two options here.


Now that PowerPoint is running, we need to create slides - frames of our presentation. There is a button for this "Create slide" in the tab "Home", or a combination of hot keys "Ctrl" + "M".

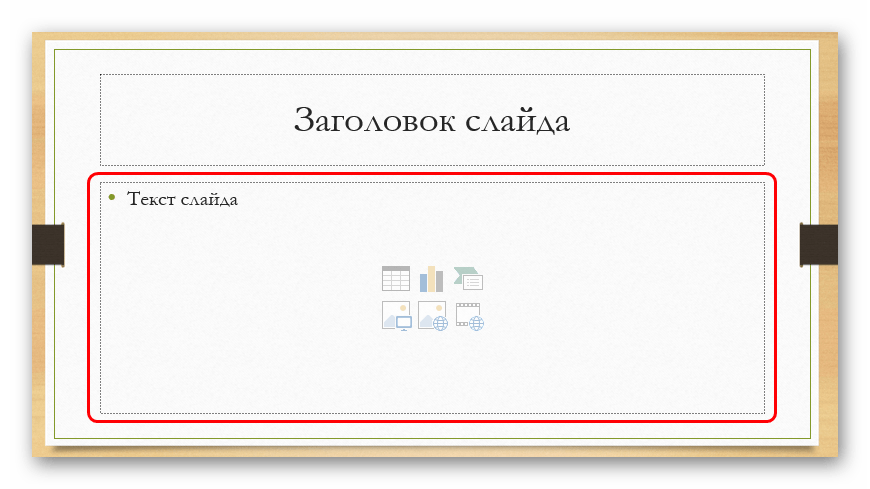
Initially, a title slide is created on which the name of the presentation topic will be shown.

All further frames will be standard by default and have two areas - for title and content.

A start has been made. Now you just need to fill your presentation with data, change the design, and so on. The order in which you do it doesn't really matter, so the following steps don't have to be done sequentially.
Customizing the appearance
As a rule, the design is customized even before filling the presentation with data. For the most part, they do this because after customizing the appearance, existing website elements may not look very good, and they have to be seriously reworked finished document. That’s why most often they do it right away. To do this, use the tab of the same name in the program header, it is the fourth one from the left.
To configure you need to go to the tab "Design".

There are three main areas here.
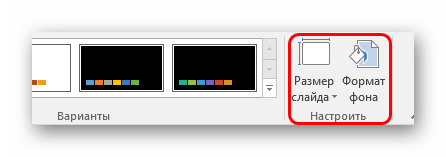
It’s worth talking about the last option in a little more detail.
Button "Background Format" opens an additional side menu on the right. Here, if you install any design, there are three bookmarks.


These tools are quite enough to make your presentation design not only colorful, but also completely unique. If the presentation does not have the specified standard style selected by this time, then in the menu "Background Format" there will only be "Fill".
Customizing your slide layout
As a rule, before filling the presentation with information, the format is also set up. There is a wide range of templates for this. Most often, no additional layout settings are required, since the developers provide a good and functional range.


If, nevertheless, there is a need to create a slide in a layout that is not provided for by standard templates, then you can make your own blank.


When all work is completed, press the button "Close sample mode". After this, the system will return to working with the presentation, and the template can be applied to the slide in the manner described above.

Filling with data
Whatever is described above, the main thing in a presentation is filling it with information. You can put anything into the show, as long as it fits harmoniously with each other.
By default, each slide has its own title and a separate area is allocated for this. Here you should enter the name of the slide, the topic, what is being discussed in this case, and so on. If a series of slides talks about the same thing, then you can either remove the title or simply not write anything there - the empty area is not displayed when showing the presentation. In the first case, you need to click on the border of the frame and press the button "Del". In both cases, the slide will not have a title and the system will mark it as "nameless".

Most slide layouts use "Content Area". This area can be used both for entering text and for inserting other files. In principle, any content added to the site automatically tries to occupy this particular slot, adjusting its size independently.
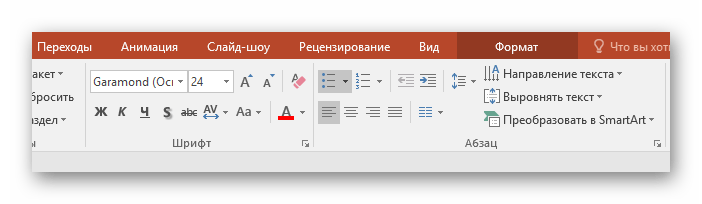
If we talk about text, it is easily formatted using standard means Microsoft Office, which are also present in other products in this package. That is, the user can freely change the font, color, size, special effects and other aspects.
As for adding files, the list is wide. These could be:
- Pictures;
- Mathematical, physical and chemical formulas;
- SmartArt diagrams, etc.
To add all this, the most different ways. In most cases this is done through the tab "Insert".

Also, the content area itself contains 6 icons for quickly adding tables, charts, SmartArt objects, pictures from your computer, images from the Internet, and video files. To insert, you need to click on the corresponding icon, after which a toolkit or browser will open to select the desired object.
The inserted elements can be freely moved around the slide using the mouse, manually selecting the required layout. Also, no one forbids changing sizes, position priority, and so on.
Additional features
There is also wide range various features that improve the presentation, but are not required for use.
Setting up a transition
This point half relates to the design and appearance of the presentation. He doesn't have that of paramount importance, as an external setting, so it doesn’t have to be done at all. This toolkit is located in the tab "Transitions".

In the area "Go to this slide" presented wide choice various animation compositions that will be used to transition from one slide to another. You can choose the one you like best or that suits the mood of the presentation, and also use the customization function. There is a button for this "Effects Options", each animation has its own set of settings.
Region "Slide Time" no longer has anything to do with visual style. Here you can adjust the duration of viewing one slide, provided that they change without the author’s command. But it’s also worth noting here a button that is important for the last point - "Apply to all" allows you to avoid manually applying a transition effect between slides on each frame.

Animation settings
You can add a special effect to every element, be it text, media, or anything else. It's called "Animation". The settings for this aspect are located in the corresponding tab in the program header. You can add, for example, animation of the appearance of an object, as well as its subsequent disappearance. Detailed instructions on creating and setting up animation is in a separate article.
Hyperlinks and control system
In many serious presentations, control systems are also configured - control keys, slide menus, and so on. All this is done by setting up hyperlinks. Not in all cases such components should be present, but in many examples it improves perception and systematizes the presentation well, practically turning it into a separate manual or program with an interface.
Bottom line
Based on all of the above, we can come to the following most optimal algorithm for creating a presentation, consisting of 7 steps:
- Create the required number of slides
It is not always possible for a user to say in advance how long the presentation will be, but it is best to have an idea. This will help in the future to harmoniously distribute the entire amount of information, configure various menus, and so on.
- Customize visual design
- Distribute slide layout options
To do this, either existing templates are selected, or new ones are created, and then distributed to each slide separately, based on its purpose. In some cases, this step may even precede setting the visual style, so that the author can adjust the design parameters exactly to the chosen arrangement of elements.
- Enter all data
The user enters all the necessary text, media or other types of data into the presentation, distributing it across slides in the desired logical sequence. All information is edited and formatted immediately.
- Create and configure additional elements
At this stage, the author creates control buttons, various content menus, and so on. Also, often individual moments (for example, creating slide control buttons) are created at the stage of working with frame composition, so that you do not have to manually add buttons each time.
- Add secondary components and effects
Setting up animations, transitions, musical accompaniment and so on. Usually this is done at the last stage, when everything else is ready. These aspects have little impact on the finished document and can always be abandoned, which is why they are dealt with last.
- Check and correct defects
All that remains is to double-check everything by running the preview and make the necessary adjustments.

Additionally
At the end I would like to mention a couple of important points.
- Like any other document, a presentation has its weight. And it gets larger the more objects are inserted inside. This is especially true for music and video files in high quality. So you should once again take care to add optimized media files, since a multi-gigabyte presentation not only poses difficulties in transporting and transferring to other devices, but can generally work extremely slowly.
- There are various requirements for the design and content of a presentation. Before starting work, it is best to find out the regulations from the management, so as not to make a mistake and not come to the need to completely redo the finished work.
- According to the standards of professional presentations, it is recommended not to create large piles of text in cases where the work is intended to accompany a speech. No one will read all this; all the basic information must be spoken by an announcer. If the presentation is intended for individual study by the recipient (for example, instructions), then this rule does not apply.
As you can understand, the procedure for creating a presentation involves much more possibilities and steps than it might seem from the beginning. No tutorial will teach you how to create demos better than just experience. So you need to practice, try various elements, actions, look for new solutions.
Today, not a single report in the field of economics is complete without presentations.
It is obvious that such presentation of information helps to present in detail all the necessary graphs and calculations.
What is a presentation
A presentation is a set of slides with text, graphic, audio and video information.
It is absolutely natural that a speech from a page cannot interest and give free rein to the imagination as an illustrated demonstration.
Therefore, many people try to create a beautiful presentation, believing that it is enough to fill it with pictures, text and animation.
What is the beauty of a presentation?
A) Availability of various illustrations and diagrams.
B) Structured information.
C) Attractive design - background, fonts, colors.
Below we will tell you what to avoid when designing presentations.
Presentation requirements
A) Color scheme – do not use too bright colors. They quickly tire your eyesight.
Looking at a neon screen, you see, is not very pleasant. Three colors are enough to start with.
B) It is best to leave the text color black, and the background color on which the text is located white.
But it is acceptable to use pale shades as a background.
C) The presentation should be informative, but not overloaded with text.
The presentation is designed to assist the presenter, not to replace him.
Brief explanations written in an easy-to-read font are acceptable: two to three sentences per slide.
D) It is advisable not to use more than three fonts in a presentation - this includes fonts with and without serifs, fonts of different sizes, and colors.
The Calibri font is most often used for text and headings, but this font is not installed on all computers, so the standard font must be replaced with Times New Roman, Tahoma, Arial.
The font size must be chosen so that all listeners can read the text.
Presentation creation process
1. Open Power Point and select the title page of the presentation.
(Figure 1)
1.1. You can select a page layout by right-clicking on the page and selecting Layout.
For the title slide, select a slide with one title.
Using the mouse, move the title to the center of the sheet and enter the title of the report in the frame.
2. Create another slide on which the table of contents will be located.
To do this, right-click on the empty space on the left and select Create Slide.

(Figure 2)
3. From the Layout menu, select Heading and Object.

(Figure 3)
3.1. In place of the title, enter the text “Contents”.
3.2. At the bottom we enter the text “introduction, main part and conclusion”.
Please note that the titles of the parts of your report may be different.
Their number is also not strictly limited.
We put everything on them necessary information, diagrams and illustrations.
In place of the slide title, as a rule, they write either the title of the report or the name of any part of it.
5. To place a picture on a slide, go to the “Insert” tab and click the “Picture” button.
In the window that opens, select the path to the image file and click the insert button.

(Figure 4)
5.1 If necessary, you can change the size of the picture and its location using the mouse cursor.

(Figure 5)
6. Let's move on to color design presentations.
6.1. Power Point already has several standard themes, the colors for which you can choose yourself.
To do this, go to the Design tab and select the theme you like.
6.2. Color selection can be done using the Colors menu.

(Figure 6)
7. In the "Fonts" menu, select the desired font.

(Figure 7)
8. Let's move on to designing the slide show. Slides can scroll independently at certain intervals, or can be scrolled at the click of a mouse. The second option is in some cases much more convenient. But let's consider both.
9. Go to the Slide Show tab and select “Slide Show Settings”.
9.1. In the window that opens, you can choose to show it manually or at intervals.
9.2. You can also set the number of slides shown and slide show options.

10.1. To do this, click "File" - "Office icon" in the upper left corner.
10.3. Select the saving method:
Power Point 97/2003 presentation if the presentation will be on a computer with Office 2003 or lower (it cannot be opened in pptx format);
- “demonstration”, if we do not plan to edit the presentation (suitable for publication on the Internet).

(Figure 9)
11. Specify the path to save the file and its name. Click Save.

(Figure 10)
12. To show the slides, just open the presentation and press the F5 key.
13. To end the display, press the Esc key.
What to do to make the presentation better and more interesting
Try not to spray yourself large number transitions and animations;
Don't expect quick results, every mistake, every success carries lessons.
Create 10-20 presentations on a free topic or to order.
Start evaluating your experience only from the 21st.
Many of the presentations we make are often better than previous ones.
The main thing is to approach the creation of a presentation responsibly, with interest, accepting all difficulties as a reason to learn something new.
Instructions for creating presentations
More and more aspects of our lives are interactive. Gradually, from pure “entertainment”, the Internet and the computer are becoming a way to do business or make a living. For example, for a successful presentation today it is no longer enough to simply present information. At a minimum, a visual image is required, and it is better if it has video and audio accompaniment. How to present the required information, describe the essence of the proposals, insert the required diagrams and documents? Using presentations, which consist of a sequence of slides that illustrate and explain information. To date, a fairly comfortable software, which allows you to make not only slides or static pictures, but also insert video materials of various formats. Some of them are simple and accessible, some will take time to master. In any case, you first need to decide in what format you want to create a presentation, then choose a program and master it.
Brief overview of programs for creating presentations
For those who have Microsoft Office, it makes sense to pay attention to Microsoft Power Point. This fairly convenient program with a familiar, understandable design allows you to create slides various types, edit and insert video files (we’ll look at how to work with it below).

Kingsoft Presentation was created by analogy with it. It has both paid and free version. Its main drawback is the lack of a Russified version. If you know at least a little English, this is not a problem: the design is very similar to Microsoft programs and is easy to understand by analogy. If you don’t know English, but have experience creating presentations, then it won’t be difficult to figure it out without the language; in addition, there are online translators, so the essence of the option can always be understood. As for the capabilities, it is clear that the paid version has wider functionality, but also free option has a sufficient arsenal of tools: you can insert both sound and video, easily add diagrams and graphics.

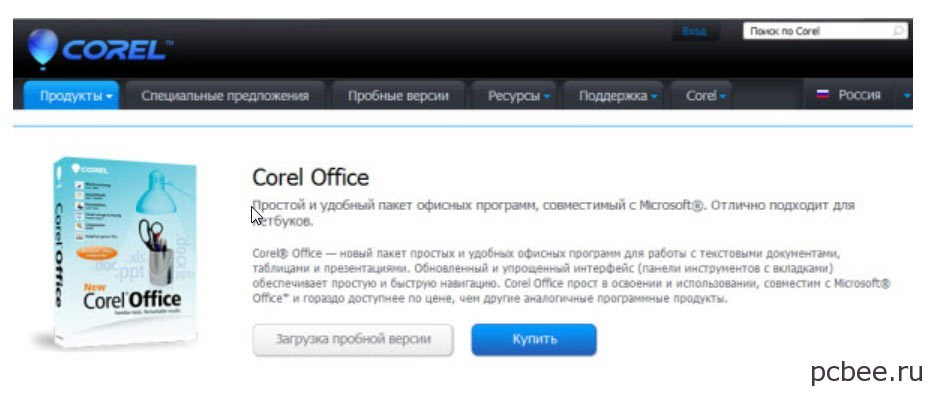
Another program is Corel Show. This is just part of the Corel office suite. It is distributed for a fee, but its cost is very reasonable. It will be easy to work with: the design is very reminiscent of Microsoft office programs. Same liner strip and quick access panel. Among the features is the ability to synchronize information with Dropbox file storage (very convenient if you use this service). Another feature of this program is that some functions appear in the tab or toolbar only if there is an opportunity to use them. Although this principle of organizing the process is not new, but, firstly, it allows you not to clutter up the management, and secondly, possible at the moment operations.
There are a number of other programs for creating presentations on a computer, but OpenOffice.org Impres and LibreOffice Impress are worth special mention. The programs are completely free and do not have wide functionality, but they are quite suitable for creating good presentations.
Where to start
Which presentation software? best question personal preferences and preferences, but you probably still need to start with Microsoft Power Point. Most PCs have their office suite installed, which means this program is also available. Well, after all, Microsoft’s developments are more polished and developed, they have a familiar control panel and are quite easy to learn. I have Office 2010 installed, so I’ll tell you how to work with the program of this version. Its other versions (2007 and 2003) have some differences, but it will not be difficult to figure it out.
How to create a presentation on your computer using Microsoft Power Point
Let's start with where to look for this program. If you have Microsoft Office installed, everything is simple. In the lower left corner of the screen there is a “start” button, click it, and in the list that opens, select the line “all programs”. In the new list we find the line “Microsoft Office”. After its activation, a list of office programs appears, including Microsoft Power Point. When you launch it, the start window opens.

Getting Started: Creating a Presentation
All actions in this program are simple and obvious. To create a new presentation, in the window that opens, select “File” in the upper left corner, then click on the “Create” sub-item in the column that appears on the right. To create a presentation, double-click on the “New Presentation” icon.

Create a new presentation
Creating slides
In the window that opens, you will see the standard slide form. There may be several such forms. By clicking on the “Create Slide” icon in the upper left corner, you will find a schematic representation of them. Choose the format that suits you best and click. The slide appears expanded. It is already available for editing. Fill out the fields, insert the necessary text explanations, pictures, diagrams or video files. This is very easy to do: in the center there is a schematic representation of all six possible inserts:
- table;
- diagram;
- SmartArt graphic;
- drawing from file;
- picture-illustration;
- multimedia clip.

If the schematic image doesn't tell you anything, hover your cursor and you can read what kind of objects are inserted through this icon. Select the desired item, follow the simple steps that the program prompts, and the slide is ready.
Everything is so simple and obvious that it won’t be difficult to figure out what, why, and why to do it. For example, you need to upload an illustration saved on your computer. Select the icon called “Insert picture from file” (bottom left), click, the insert picture window opens, in which you select the desired image, “click” on it, and the picture is already copied to the slide. This takes a few seconds. It's really very simple.


It's just as easy to insert tables and charts. Filling out a table is no different from working in Worde: you also set the number of rows and columns, and filling and editing content is the same. Simply enter the required information.
With diagrams everything is more interesting, but not at all more complicated. By selecting the “Add Chart” icon, you will see a chart on the slide. At the same time, a window with a Microsoft Excel table opens on the right, which contains the data displayed in this diagram. In Excel you can change all data: both numeric and alphabetic. All changes are immediately displayed on the diagram, so the results of the work are very obvious. After experimenting a little, you can easily figure out what's what.

By the way, each new slide created is displayed on the left side of the screen, and you can return to any of them at any time and start editing.
Changing the design
The slide background and font type can be changed. To do this, select the “Design” tab on the top panel. The available styles appear in the window that opens. Simply by hovering your cursor over the design you like, you can see how your slides look in this design. They don’t all have to be designed the same way (although this has a certain meaning: too colorful design confuses and distracts attention). In order to assign a certain type and background to a slide, select it in the left part of the window, then move the cursor over the design option that seems most suitable to you, right-click to bring up a menu where you select the “apply to selected slides” item. Everything, the background and design of the selected slide have changed. In the same tab you change colors, fonts, effects, background styles (all icons are located in the upper right corner of the screen). Everything is familiar and understandable to someone who has worked at least a little in one of the Microsoft office programs.

Animation Features
Animation is very interesting feature, which allows you to use various visual effects. You can use the most different options, which will help draw attention to a particular place on the slide, image or inscription. To do this, go to the “Animation” tab, select the slide with which you will work (for clarity, take a picture or drawing for the first time), select the “animation area” tab on the panel, and then select the part of the slide that will be subject to the effect (the first Just try it with a photo or picture - it’s more clear). In the now active panel (various stars are shown, under which the names of special effects are written), select the item you like. Then in the lower left corner you set how many seconds it will last, click on the slide element to which the effect will be applied and observe the result.

Transitions between slides
For a more spectacular slide change, you can use special effects. In the main tab, select the “Transitions” item, in the panel that opens, select the required type of transition (you can try what it looks like), set the “Effects Options”, the presence and type of sound, how the slide will change - upon click or after a certain period of time (set using “checkmarks” or changing numbers in the corresponding box). In order to apply the selected special effect to all slides, click on the corresponding icon. And let's see how it will look.

These are just the basics of how to make a presentation on a computer. There are enough possibilities in each of the options. Each time you create a new presentation, you will open up new possibilities. But, as always, moderation is important in everything. Don't overdo it with colors and special effects. Slides should explain and illustrate the speech, and not distract attention from it.
To create a presentation on your computer using Windows control 7 and above is required installed program PowerPoint, written and error-checked text, pictures good quality, video materials. It is worth noting that PowerPoint is available on all PCs that have Microsoft Office installed.
Creating slides
The creation of the first slide is where work in Microsoft PowerPoint begins. To create an initial slide, follow these steps:
- Click “Start”, “All Programs”, select “Microsoft Office”. We look for the desired program in the list.
- PowerPoint will open. The first slide is created automatically. It consists of a title and a subtitle.

- Let's fill in these fields. Enter a title and subtitle.

- In order to create a new slide, just select the corresponding function on the toolbar or right-click in the left menu and select “Create Slide”.

- The next slide will have a different structure: title and slide text.

- If you need to change the structure of the slide, you must click on the “Slide Layout” button and select suitable option.

This way you can create any number of slides. All these slides can be designed accordingly. White background can be replaced in the following way.
- Go to the “Design” tab and select a suitable theme.

- All slides will automatically change their design.

- If you want a specific theme to be applied to individual slides, you should right-click on the theme and select the appropriate option from the list. For example, “Apply to selected slides.”


- As you can see, the first slide has a distinct design from the second.
Working with text
The text should be prepared in advance. It needs to be proofread and checked for errors. Only in this case can you prepare a high-quality presentation.
To work with text, the PowerPoint editor has special text blocks. The text in them can be printed or copied and pasted in the standard way (Ctrl+A – select, Ctrl+C – copy, Ctrl+V – paste).
You can format the pasted text. To do this, on the toolbar you can select the font type and size, spacing, text orientation, bulleted and numbered lists.

It's also worth noting that you can insert a WordArt object instead of a title. To do this, go to the “Insert” tab and select the letter “A”, which is responsible for WordArt objects.


In this way we add text for all slides.
IMPORTANT! Don't put too much text on your slides. All material should be presented concisely. The person who will watch the presentation should not be busy reading. He should have time to listen to the speaker.
Adding pictures and working with them
If you add a picture to your presentation, it will become more interesting. However, we recommend using no more than two high-quality pictures for one slide. Overcrowding one slide with images would be inappropriate.
There is a whole block in the PowerPoint editor for inserting an image. Just go to the “Insert” tab and select “Drawing”, “Picture”, “Snapshot”, “Photo Album”.

It is worth noting that no matter which method you choose, you will need to indicate the storage location for the image.

After selecting a picture and adding it to the slide, the position and size can be changed. To do this, you should use the dots in the corners of the picture.

Also, if the picture is in the way, you can specify its location “in the background.” In this case, the text will be superimposed on top of the image.

Adding tables and graphs
If you need to prepare a business presentation in which you need to use statistical data, the program has a function for inserting tables and charts. You can insert a table from Excel or draw and fill it out in the editor.
In the first case (insert from Excel), you should do the following:
- Select “Insert”, “Table” and “Insert with Excel”.


- Next, select the filled cells from the original table, copy and paste them into the presentation table.
If there is no completed table, you should click “Table” and select the number of rows and columns. During selection, the table dimensions will be displayed in the presentation window. However, they can be adjusted.

Then fill out the table with the necessary information.
You can also add graphs and charts to your presentation. To do this, in the “Insert” tab, you need to click on the “Diagram” button or select the same icon on the slide itself.

Then select the chart type.

The Excel file will open. Filling the table with data.

After filling out the table, we return back to the presentation. A diagram will appear here.

Thus, the presentation can be used to provide reports and compare data.
IMPORTANT! After closing Excel file the diagram will not disappear.
Working with video and audio
You can also add video and audio to your presentation. To add a video. You should do the following:
- Go to the “Insert” tab and select “Video”. Next, indicate “From file” or “From website”.

- Next, we indicate where the video is located. Select the video and click “Insert”.

- It will take some time to insert the video. Do not click the “Cancel” button. How more file, the longer it will take to load.

To add audio, click on the “Sound” button and point to the file.

If you want the sound to last throughout the entire presentation, in the “Playback” tab, in the “Start” section, set the value to “For all slides”.

You can also adjust the volume of the music. To do this, just click on the “Volume” button and specify the sound level.

To prevent the sound icon from appearing on slides, check the “Hide when shown” checkbox.

Adding special effects
By special effects we mean transitions between slides, the appearance and disappearance of text. To add special effects, you need to select the first slide, its title and go to the “Animation” tab. Here we click “Add animation”.


Specify “On click” or set the time range for the animation to occur.

It is worth noting that animation will have to be set for each title and text separately. All animated elements will be indicated by numbers.

You can also set an output for each element. This is a special effect with which a title, picture or text will disappear. This function is located in the same section as the input, you just need to scroll the slider down.

After designing the first slide, you should move on to the second and set animation for each element separately.
Saving and viewing a project
After designing all the slides, you need to set up the presentation. Go to the first slide and press “F5”. The project preview will start. We look and study the shortcomings. Let's fix them. Then go to the “Slide Show” tab and click “Demo Settings”. We indicate how the slides will change (by time or manually), display parameters, and the order of the slides.


You can launch the presentation by double-clicking.
Watch the video to see how to create a presentation:
Knowing how to competently present your work is a high art. That's why it's so important to know the intricacies of creating a presentation on a computer. But if you have never encountered this “beast” before, we will tell you in detail and show you how to make a presentation in Word (as well as in Powerpoint) with step-by-step instructions.
What kind of presentation can you make yourself?
In an office package (namely Microsoft Power Point), which most students have most likely already mastered, you can make a very decent presentation - from several sheets (slides), with sound effects, with graphs and diagrams.
But before you start, you’ll have to stock up on the essentials—those without which no presentation will work:
- high-quality text - it is better to write it yourself, taking into account the characteristics of the audience to whom you will give your presentation. A little humor (the main thing is not to overdo it) and beautiful design– and the presentation will go off with a bang!
- high-quality pictures, graphs, diagrams, diagrams - it is best to use personal photos or drawings. But if there are none, feel free to use stock images with good resolution. If you don’t know which program is best for making drawings for presentation on a computer, use graph - it does an excellent job of creating graphs. If all this is too complicated for you, ok: take a piece of paper and a pen, draw it yourself, take a photo and paste it into a presentation as a drawing!
- video (if necessary). If you don’t know how to shoot high-quality videos, then it’s better not to use them at all. In addition to filming, you also need to be able to process the footage well. However, long live youtube, where you can find a lot of useful things that have already been filmed by someone.
And of course, the most important thing you need to create a powerpoint presentation is a plan! No matter how beautiful your own presentation may seem to you in your thoughts, without a plan and a logical sequence of thoughts, it will be just a set of text, pictures and graphs. Carefully consider your target audience, as well as the time you will have to meet it.
Invaluable instructions on how to make a presentation in powerpoint

Here you can create and delete slides, change their places if necessary, and give them titles.
If installed view presentation you are not satisfied with, play around with the selection of slide layouts. Just right-click on the slide on the slide itself. An action will appear on the left where you select the “layout\...” setting. 
Now is the time to work on appearance powerpoint presentations. You can select a theme by opening themes - find the “Design” button in the toolbar and select “Themes” there. 
By the way! For our readers there is now a 10% discount on
Do you see how the presentation has immediately changed? Now let's move on to the content of the slides.

After you have chosen desired type diagrams, the program will open a window for you in which you will need to enter the main indicators to be displayed in the presentation. This is what it will look like: 
It’s also easy to work with tables - in the tools, select “Insert/Tables”, immediately select required quantity rows and columns (everything is like in Word) and fill it out to your health! 


We agree to the condition of the program that while viewing the slide, the video will play automatically and that’s it.
You can also play with different types animation, framing and other “tricks”, but we are looking at the basic creation, so some other time.
- Presentation directly. To start viewing your presentation, just launch it and press F5. Another way is to start the presentation, click “Slide Show” and select “Start Show Over”.
So you have created the simplest, but quite attractive presentation that will help you achieve the desired effect. If you don’t have the opportunity (well, let’s say, a computer) or the time to write it in Power Point yourself, you can always turn to !