Do-it-yourself dovetail connection - step-by-step photos. Tenoned dovetail joints How to make a dovetail joint
It is believed that the dovetail lock has maritime roots; the dovetail was used to secure ships with a wooden hull. This connection turned out to be the most resistant to wet wood and multidirectional loads caused by rough seas. The main advantage of the technology is reliable docking wooden parts Without the use of additional fasteners, the reliability of fastening is ensured by the lock of the original trapezoidal shape. The tools of ship carpenters included a special saw called a “dovetail.”
Traditionally in Rus', the crowns of a log house were placed “in a bowl”; such coupling was cut out with an ax. With the advent of high-quality carpentry tools, the log house began to be laid “in a paw”; the joint had a rectangular tenon. A further improvement to this lock was the use of a dovetail tenon with a trapezoidal profile.
The dovetail technology for fastening beams has become the main one in industrial housing construction; standard sizes and connection features are determined by GOST 30974-2002. The introduction of the standard created favorable conditions for the development of low-rise housing construction, domestic wooden houses industrial production The quality is not inferior to Finnish samples.
The standard establishes the types of dovetail joinery:
- Connection "in the paw";
- Deaf “frying pan”;
- Open “frying pan”;
- Fastening with a trapezoidal key.
A distinctive feature of these types of fastenings is the tongue-and-groove design, which has a trapezoidal shape with a straight base.
Fastening the timber “into the paw” is the easiest way to build a log house; reliable grip is ensured by a trapezoidal tenon, which is cut out at the end of each row of the crown. A correctly made and assembled lock reliably fixes the crowns of the log house in all planes. The fastening is universal, it is used for the construction of a log house from timber and rounded logs; the “claw” connection is most often used in shrinkage construction.
The design is distinguished by the absence of ends protruding beyond the corners of the building; such a lock is called a “clean corner”. The spike in this design is load-bearing element and bears the main load. To build a log house in a “clean corner”, it is recommended to use timber of the maximum standard sizes, with a side of at least 250 mm.
Making dovetail fasteners with your own hands is quite difficult; to avoid mistakes, use a full-size dovetail tenon template for timber; the sample can be cut out of tin or thick paper. The template is applied to the end and outlined, the boundaries of the cuts are marked with a hammer and chisel. The cuts are made with a hand-held circular saw. The easiest way is to make inclined cuts every 10-15 mm, squeeze out the trim with an ax and clean it with a chisel.
The advantage of the technology is the ability to work with lumber of natural moisture; in this case, the tenon is made with an allowance of 5-7%. The allowance will lead to the formation of gaps between the rims, which will be eliminated naturally during the shrinkage process.
Disadvantages and features of dovetail joints:
- A “clean corner” has through gaps that can expand over time;
- The log house does not have closed crowns, the masonry on each wall is shifted by half a beam, the structure must be reinforced with dowels;
- The corners of the building have an unpresentable appearance and do not decorate the facade;
- The developer is limited in choosing the standard size of lumber.
According to the technology, a dovetail log house is built country houses economy class, bathhouses and outbuildings, such construction is low-cost and accessible to mass developers.
Blind frying pan

This method in construction practice makes it possible to fully use the advantages of trapezoidal fastening; a special feature is the hidden T-shaped groove-tenon connection. The size of the tenon does not exceed half a beam and is completely recessed into the body of the beam. The corner of the house assembled using this technology was called “ warm corner" The lock provides reliable grip into the crown without through gaps during processing construction sealant creates a completely sealed space. The beam is built up in the same way if its length is less than the length of the wall.
Sawing of the profile is carried out according to the drawing using a circular and axing saw. A rectangular blank for the tenon and groove is cut out using a circular saw, and the given shape is given with a special hand saw. For cutting a groove you can use hand cutter, the workplace is easy to equip yourself.
Advantages of the blind “frying pan” fastening technology:
- Improved thermal insulation of the building;
- You can use lumber of any size;
- The castle is “hidden”, the facade takes on an attractive appearance;
- During construction, you can use timber with a smaller profile;
- Ensures economical use of building materials.
The main feature is the increased requirement for wood moisture content - lumber should have a moisture content of no more than 20%. The technology is widely used by manufacturers finished houses"Full construction".
Open frying pan

This method is used in the construction internal partitions from timber, laying floor joists and ceilings. The groove is cut across the entire width of the beam. The lock resembles a “claw” connection in the T-shaped version and ensures fixation of the structure in the horizontal plane. This mount is simple and can be cut with a circular saw and processed with a chisel.
A simplified version of a frying pan lock is a profile in the shape of a rectangular trapezoid; the fastener is called a semi-frying pan. This fastening is designed for damper wood and is popular with individual developers.
Fastening with trapezoidal key

The dovetail connection scheme was further developed in a keyed connection. A butterfly dowel formed by two trapezoidal shapes is made from hardwood. The groove is cut on modern milling machines. With a dovetail keyway, the fastening dimensions are minimized, but this design ensures reliable fastening of wooden structures of any complexity and allows the production of wood products to be streamlined.
Features of keyway technology:
- Requires precise wood processing using modern technology and devices;
- Minimizes resource and material consumption;
- Maintains an attractive appearance of wood texture;
- Allows you to make wooden structures of any complexity.
Dowel fastening is used by manufacturers of ready-made wooden houses from expensive laminated veneer lumber and allows you to implement the most complex projects houses.
Conclusion

Dovetail joints of timber in house construction are a reliable way of fastening wooden parts. With the advent of modern carpentry tools, this technology has become available for mass use. This type of fastening is widely used in interior design and the manufacture of small architectural forms. In a miniature version, such fasteners are used in furniture production.
If you want to make furniture from solid wood, you will have to take certain measures to prevent the wood from warping. The list of such measures includes the selection of an appropriate connection.
There are many known ways to connect wooden parts so that they do not become deformed in the future. One of the most effective is the dovetail. The parts are connected to each other in such a way that it is almost impossible to separate them even without glue. Each thorn is clamped as if with pincers. The strength of the connection is also enhanced by the fact that the area of the joining areas covered with glue is much larger than with a simple connection without spikes.
In addition, the dovetail joint can rightfully be called decorative, since it can decorate any piece of furniture, of course, provided that all the teeth are made carefully and accurately. And this will require painstaking work with a saw and chisel. All grooves and tenons must fit exactly together, and all reveals must be equally narrow. Such accuracy is hardly achievable the first time: first try to gain experience by processing simple boards.
Many interesting and beautiful examples of dovetail joints can be seen when looking at old furniture.
The dovetail connection is considered the most beautiful, reliable and durable corner connection. It's not that easy to do.
It's done like this
- Cut out parts of the boards to the required length.
- Mark tenons and grooves on one of the boards.
- Transfer the markings from the front side of the board to the end and then to the back side.
- Saw the grooves and cut them out with a chisel.
- Using the treated board, mark the location of the tenons and grooves on another board.
- After processing the second board, try to connect both parts without glue and, if necessary, make corrections.
- Apply glue to the joint areas, carefully connect the parts and hold under pressure until the glue sets.
WHAT YOU'LL NEED
Materials:
Wood blanks Glue.
Tools:
- Ruler.
- Pencil.
- Awl or knife.
- Square.
- Tenon saw.
- Chisels of suitable width.
- Crafting table.
- Clamps.
- Hammer.
- Mallet.

Shape of grooves and tenons in a dovetail joint

The beauty of this box lies in the harmony of the material and the corresponding design using a dovetail joint.

Homemade device for marking tenon bevels: cut a template from a thin metal sheet and give it the appropriate shape.
Perform markings on parts that have the required length
Before marking the tenons and grooves, measure the part again, it should have the required width. If the width of the part is greater than expected, then the marking will be inaccurate and, therefore, unusable.
Choose the right chisel
Before you start cutting the grooves, check that the chisel you have is the right size for them. Take care of suitable tool in advance if you plan to make very thin tenons. Chisels come in different widths - from 4 to 40 mm.
The bar protects from damage


When joining parts, never hit the wood directly with the mallet. Use a small block of wood to protect parts from damage.
Learn more about dovetail joints
When making a dovetail joint, both parts are interlocked using a special tooth shape. The vertical board shown in the figure has tenons that are driven into the grooves of the horizontal board. The boards can be connected and separated only with the tenons in a vertical position. Otherwise, this cannot be done.
Boards connected in this way react differently to the load. And therefore, it does not matter in which part the grooves are made and in which the tenons are made.
In drawers, the tenons are made on the front board, and the grooves are made in the side walls. Since the greatest load on the box occurs when it is pulled out, the connection will be most durable with this arrangement of the tenons.
IN hanging shelf the maximum load falls on parts located horizontally.
They should be with tenons that will hold the shaped grooves in the vertically located parts.
The tenons should always be narrower than the grooves, especially when using dense and durable wood. The peculiarity of the dovetail connection is also that the tenons and grooves in the finished product look different than when unfolded - as shown in the figure below.
Uniform distribution
Products with dovetail corner joints are not coated with colored varnish. Therefore, the arrangement of tenons and grooves must be uniform across the entire width of the parts. The outer spines may be slightly wider or narrower. All other tenons and grooves must be the same.
Drawing dovetail spikes
Experienced woodworkers can distribute the teeth almost by hand. For those who are just starting to master this method of joining parts, we recommend using a ruler.
For boards up to 15 cm wide, mark, for example, four tenons and three grooves or five tenons and four grooves. For boards up to 20 cm wide - five tenons and four grooves or six tenons and five grooves. The approximate distribution scheme is as follows: the ratio of the average tenon thickness to the average groove width is 1:2.
You can very accurately draw the tenons and their bevels according to the diagram shown in the pictures on the right.
Other division methods are also possible. You can choose, for example, a smaller width of the studs. In the so-called English connection, the tenons are very narrow and the grooves are wide. However, in any case, the tenons should not have too large bevels so as to damage the narrow parts of the grooves.

Mark on the part parallel to the end edge the thickness of the board, then half the thickness and then draw a line, the distance to which from the end is equal to the thickness of the board multiplied by three. To now accurately distribute the four tenons and three grooves, apply marks on the oblique auxiliary line, the distance between which is a multiple of 10. Then transfer this division to the marking lines.

Here, the dashed lines show the middle lines of the grooves: the points of their intersection with the auxiliary line at a distance of “triple thickness” of the board are very important for the final marking.

From the points of intersection of the middle lines of the grooves with the auxiliary line, draw lines through the points on the marking line “half the thickness of the board”. This way the tenons and grooves will be marked very accurately.
Marking
So, you have marked the tenons and grooves on the face of the board. Now you need to transfer the markings to the end side.
To do this, you will need a square and a well-sharpened pencil, an awl or a knife. Depending on the type of wood, it may be useful or even necessary to cover the end side of the board with chalk: the markings will be more visible on a white background. From the end side, the markings are transferred to the back of the board.
The marking will be more accurate if the part is secured to the workbench.
Markings from symmetrical elements on one part should be applied simultaneously, so that, for example, the contours of tenons in the corners drawer coincided.

Using a sharp pencil (or awl) and a square, marking lines are transferred from the front face to the end side of the board.
Cutting grooves
After transferring the marking lines, before you start sawing, shade the missing areas on the part - the spaces between the tenons. This way you won’t confuse anything during further cutting and working with a chisel.
The part should be fixed on the workbench in such a way that the marking lines of the bevels parallel to each other take a strictly vertical position. This is easy to do if you use a square. First saw through the grooves on one side, then turn the part over, secure and saw through the remaining bevels of the grooves.
Place the saw not on the marking line, but close to it on a falling section of wood. From time to time, check on both sides of the board to see if the saw is pointed correctly or if the cut needs to be corrected.
The grooves are cut with a chisel, which should be held strictly vertically. In this case, the position of the part itself must be horizontal. It is possible to guide the chisel more accurately when another board is fixed on top of the part, the edge of which runs along the line marking the depth of the grooves.
First, the grooves are processed with a chisel on one side of the part. After a notch of approximately half the thickness of the board has been made, it is turned over and the processing of the grooves is completed. This method allows you to avoid cracking of the board, as well as inaccuracies in the processing of grooves.

Fasten the part so that the marking lines take a strictly vertical position. Check with a square.

To cut the grooves with a chisel, secure the parts on a workbench in a horizontal position. The part should not slide.

Saw only the sides with the same slope. Turn over and secure the part, saw through the other sides.
Spikes
Experienced woodworkers prefer to make the tenons first and then cut the grooves on another board. But you can do it differently: use the finished grooves to mark tenons on another board.
At the same time, it is also recommended to cover the end side with chalk so that the marking lines do not get lost on dark wood with eye-catching growth rings. The latter must be carried out very accurately. To do this, you can use an awl or a well-sharpened pencil.
Transferring marking lines
The marking lines from the end side of the board to the front and back sides are transferred strictly at right angles to the end. The length of the tenons depends on the thickness of the board with grooves. These marking lines must also be completely accurate. It is better to mark the depth of the tenons not using a board with grooves, but by measuring the length of the tenons from the end edge and transfer these dimensions to the corresponding part. Otherwise, the spikes may end up longer than necessary.
When marking, keep in mind that the front one should be the most best side boards, and the marking lines are as accurate as possible.

It is advisable to cover parts made of dark wood with chalk so that the marking lines are better visible and the cuts are more accurate.
Compound
To cut tenons on the part, it is again clamped firmly, but this time the position of the board should be strictly vertical, as well as the cuts, which are only slightly beveled in another plane, either to the left or to the right.
Securing the part
To make cuts, the saw is also placed close to the marking line on the falling section of wood. After completing the work with a saw, the part is fixed on the workbench in a horizontal position and they proceed to processing the intermediate areas between the tenons with a chisel. As when processing grooves, a notch is made only half the thickness of the board, after which the part is turned over and the “excess” wood is removed from opposite side. At the same time, you can slightly correct the cuts if there is more wood left between the marking lines than necessary.

First, make cuts only on the left or right side of the tenons, then make parallel cuts on the other side.

After cutting out the intermediate areas between the tenons, carefully trim the cuts with a chisel.
Gluing
Before applying glue evenly and thinly to all tenons and grooves, lightly treat the surfaces to be glued sandpaper without rounding the edges. Then try connecting the parts without glue. You will immediately see if they fit together and what else can be corrected.
Carefully connect the boards so that the tongues and grooves do not split. Keep in mind that grooves are especially prone to cracking.

The glue is applied evenly in a thin layer over the entire surface of the tenon. To do this, use the spout of a bottle of glue or a thin brush.
Carpenter's putty will help correct mistakes
With an ideal connection of tenons and grooves, all joining seams are very tight, without the slightest gaps, which not only reduce the strength of the connection, but also spoil appearance products. However, even experienced carpenters do not always achieve perfect results, so you should not be discouraged if the connection needs correction in some places.
Proceed as follows. Spread the film under the workbench and shake off the sawdust onto it. Make carpenter's putty from sawdust and glue, which will help you make small adjustments.
Although ready-made carpentry putties and mastics of various colors are available for sale, homemade putty has advantages: it contains sawdust from the wood you are working with. this moment work, that is, this putty will completely match the tone of your product.
The putty must be applied carefully, in small portions, filling only the cracks. It is better to compact and level the puttyed areas with a chisel blade rather than a spatula.

Homemade putty will help you correct errors such as broken chips or inaccuracies in work.
Sample
Wedge-shaped tenons can be cut quickly and accurately with a milling cutter if you use a special drill attachment and a template. In this case, during one working operation, two parts are processed at once, installed with a slight offset to each other. True, their connection is noticeably different from the dovetail connection made traditional way, because at machining parts, all the tenons and grooves are the same. For this reason, the connection cannot be considered decorative, but it is also beautiful in its own way, and most importantly, very reliable. The distribution of tenons and grooves in such a connection depends on the size of the cutter used.

You can quickly cut tenons with a milling cutter if you use a special drill attachment.

This is how a template is used to cut tenons with a cutter attached to a drill.
For a long time, inventors have been inspired to make discoveries not even by the principle of their action, but by their appearance alone. The snail inspired the development of a pump with the same shape as its shell. It is quite possible that the round celestial bodies became the prototype of the wheel. Even the dovetail found a use. Its characteristic bifurcation with an angular cutout is recognizable; it became the prototype for many technical and theoretical solutions. Some of them are discussed below.
How to make a “non-pull-out” bracket?
For wall mounts, there is often a need for a bracket that is subject to multidirectional forces. If a support is simply hammered into the wall like a nail, it is possible that under the influence of loads it will come out of its place and fall out. To prevent this from happening, they often use a simple, but original solution. In a bracket (for example, a piece of plate or metal corner) do lengthwise cut, and the resulting ends are unbent in opposite directions. All that remains is to cut a hole in the wall and embed it in it using mortar design, which received the name “dovetail” for its bifurcation. The fastening is very secure, it is difficult to pull out such a bracket. This method is used especially successfully for walls made of soft calcareous stone, for which other methods or chops) are ineffective.

Construction and wooden architecture
In Russia, and not only, ecological housing construction has recently become widespread. Log houses, huts, and traditional wooden houses meet safety requirements, they are environmentally friendly, retain heat well and, finally, can simply be very beautiful. The logs that make up the walls can be joined at the corners in several ways, but most often builders use the so-called “dovetail.” The fastening is based on a beveled groove, which prevents the component parts of the structure from leaving their places under the influence of external forces. The advantage of this method is that it does not require fastening metal products (staples or nails - “crutches”), and therefore the cost is reduced, and if necessary, you can move the structure by disassembling it in the reverse order of assembly, removing each beam one by one . Dovetail- a method of erecting towers “without a single nail.” It was mastered perfectly by ancient Russian architects, who created true architectural masterpieces. Some of them are presented in the museum under open air in Kizhi, where they were transported from all over the country in disassembled form due to the fact that they can withstand an almost unlimited number of disassembly and assembly cycles.

Furniture and accessories
Trends in furniture design change cyclically, like any other fashion. One thing remains unchanged: quality is always highly valued. The “aerobatics” of a highly qualified carpenter (also called a cabinetmaker) is considered to be a manner of work in which the articulations of the constituent parts of a table, chair or cabinet are not hidden, but are, as it were, exposed. Here, they say, is how the bureau drawer is made, no fiberboard or plastic, wood is everywhere, and the accuracy of the fit can be visually assessed. To prevent the walls from creeping apart during transportation and simple operation, the good old “dovetail” is often used. The fastening looks quite organic in expensive furniture, especially when the shades of the rocks contrast. General principle the same as in the construction of wooden log houses, however, grooves are made using special equipment in a structurally integral element, a board.

Carpentry equipment
The dovetail machine is in no way similar to bird plumage. It looks like a kind of combination of a metal comb and wooden base. But with its help, a qualified carpenter-furniture maker will make high accuracy incoming teeth and counter slots in such a way that they connect at right angles and with minimal gaps. It is difficult, if not impossible, to achieve this effect manually. At its core, this machine is a milling machine; to work with it, special cutting attachments (mills) are used, which form tenons and corresponding grooves in the wood with uniform frequency and high quality.

How did the shipbuilders do it?
Requirements for rigidity, strength and reliability have always been placed on watercraft. The blows of the ocean and sea waves can shake the strongest hull of a ship, especially if it is made of wood, as in ancient times. The dovetail type of connection of parts was very often used, for obvious reasons, by shipbuilders. It is worth mentioning that this industry has always been characterized by the most advanced technologies. For cutting large protrusions and recesses in solid wood, there is even a special dovetail saw, which itself is completely different from the forked silhouette of a bird. On the contrary, the cutting part of this tool is straight and smooth. The hacksaw saw got its name from its purpose; it is convenient for cutting grooves and teeth with inclined edges. It is used in combination with other carpentry tools, the most important of which are the chisel and chisel. A hacksaw of this type is today used only in limited areas of production, for example, in eco-style or luxury housing. Real carpentry masters, as a rule, have this tool.

Walls of the ancient Kremlin
Yes, yes, the Moscow Kremlin, and many other medieval ones, have had the same “dovetail” on their walls for many centuries. It is enough to carefully examine any of the battlements crowning the fence of the heart of Russia to notice the bifurcation of its specific outline. It is difficult to say how unique this form is; similar decisions were made in other European fortresses of that time. For what? It is possible that the architects were motivated by practical considerations, and the forked recess served as a support for arquebuses or cannons, although the gaps between the teeth could be sufficient for these purposes. Or maybe this was a peculiar architectural fashion. However, similar merlons (teeth) decorate the walls of the Kremlin in Tula, as well as the fortresses of many European cities (Pisa, Florence, Pistoia, Lucca, etc.). It is unknown who was the first to come up with the idea of decorating fortifications with “swallow tails”. Most likely, the fashion for them was brought to Russia by architects invited from Italy (for example, Pietro Solari took part in the construction of the Moscow Kremlin at the turn of the fifteenth and sixteenth centuries).

Trailer
For transportation Vehicle and other equipment that cannot be transported under its own power (from broken cars to tanks), use trailers. They are also called “dovetail”. The trailer has characteristic retractable or elevating structural elements, sometimes equipped with guide sides designed for the passage of wheels of loaded machines. During transportation, these “tails” rise. It’s clear why this name stuck: retractable or raised ramps are two parts, similar to the forked plumage of a swallow.

Tripod use
The dovetail movable joint method is indispensable for tripods. This connection can be found on various optical tripods for a wide variety of purposes (from telescopes to movie cameras) and other devices whose design requires high-precision translational mobility. Among its advantages are minimization of backlash, ease of movement along a given line, and the ability to install a measuring scale that can be equipped with a bearing bar. “Dovetail” is in this case a fixed guide with side cutouts (in cross section angular), and a carriage moving along it, equipped with a counterpart of the appropriate shape. Great importance It also has the ability to unify similar tripods. The distance between the side parts may differ, the main thing is that the angle of the edges coincides. For pairing different devices with one base, a dovetail adapter is used, the design of which has adjusting threaded elements that allow you to change the base of the supporting part.

Every hunter wants...
Every shooter knows that the essence of aiming is to align three points: the slot of the bar, the top of the front sight and the place where you want to hit. Only if the distance, wind and lead are taken into account correctly (if the object of the hunt is mobile) can one hope for a hit. The design of weapons, and therefore sights, may differ. There are semicircular, rectangular and those called “dovetail” slots. A sight of this type allows an experienced shooter with certain skills to quickly calculate the distance to the target.

And the method of mounting it is often the same as on tripods of optical instruments, and what it is called is not difficult to guess. In general, it is almost difficult to imagine modern weapons without a dovetail.
"Tails" in other areas of knowledge

The term turned out to be so figurative and successful that it is used to designate almost any diverging (or converging) figure. Mathematicians call “dovetails” graphs of intersections of complex curved surfaces, mechanics - a special type of gear kinematic pairs, physicists - dependencies of ambiguous parameters. Even economists believe that charts of exchange rates or investment expectations sometimes resemble dovetails. This happens in cases where the spread of data decreases or increases over time. In general, this is the name for everything that diverges in two, or, on the contrary, is joined together from two parts.
This decorative joint is much easier to make than you might think.
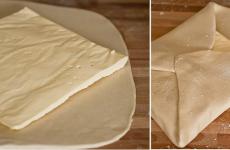
If we admit that dovetail connection is the calling card of a true master, then the double dovetail indicates pure professionalism. Also known as an inlay dovetail, this joint is made by cutting and assembling a regular dovetail, sawing and sanding the tongue and groove pieces flush, and then routing and assembling a second dovetail. But don’t let the apparent complexity of manufacturing scare you. You can produce such impressive semi-concealed joints with the Inkra router table system. Here's how it's done.
DOUBLE THE TAILS
A functional feature of the Inkra milling system is the step-by-step movement of the guide and installation of groove connection templates (see photo below), allowing you to produce thirty-eight various types connections, including seven double dovetail options. The main thing is that Inkra has already done all the mathematical calculations for you. Let's start by selecting a connection from those shown in diagrams in the user manual.
It indicates the type of cutter, the thickness of the workpiece and other helpful information. Another table will help you choose the width of the workpiece depending on the choice of a particular template - so that you get a symmetrical connection (you only specify its length). Having decided on these parameters, cut the workpiece according the right size. In addition to the four walls of the box (here made from birdseye maple), you will need a piece of wood in a contrasting color for the inlaid joint (cherry in this case), at least 200mm long.
You will also need three pastry cutters (two for the walls and one for the encrusting strip) to fine-tune the cutter's release height and center the guide relative to the cutter. Saw off all the pieces of the same width, equal to the walls of the box. Now step by step we create a double dovetail.
Although we use the full-featured Incra system (1245 S plus the cost of the router and cutters), to make double dovetails you will only need to purchase Incra's LS Positioner fence and an oversized tabletop (this will cost approximately $515). ). Strengthen them on milling table or workbench and use any milling machine or structure with a lifting device for the router).
DOVETWAIL WITH YOUR OWN HANDS - STEP-BY-STEP DESCRIPTION
Set the cutter release height according to the selected diagram in the user manual. Use a clamp to attach two test pieces of wood to the rectangular clamp. Position the guide so that it covers half of the cutter and move the silver ruler to zero. Cut a half-width socket through both test pieces, move the guide 3mm to the right (away from the bit) and cut the socket full width. Remove test pieces, turn one over and check the fit of the joint.
An ideal connection (on the right) should have no gaps, and its parts should fit into each other with moderate hand pressure and not fall out of each other under their own weight. To make the connection tighter, raise the cutter slightly; to loosen it, lower it. Set the cutter release height once and do not adjust again. All passes with the cutter should be made at the same height setting.
Now align the cutter exactly in the center relative to the workpiece. Rout a dovetail groove along the entire length of a test piece of wood, then turn it over with the other end, rout a couple of centimeters and turn it over with the groove facing up. If the second pass is offset in relation to the first, adjust the cutter, that is, fine-tune the guide by half the amount of discrepancy.
Make a few more test cuts and adjustments until the groove is perfectly centered. Then set the template to the position indicated in the instructions for centering your workpiece (in this case, 6B). Don't adjust the template anymore.
Route the tails, round 1. Set the guide so that the cutter extends only 0.8 mm beyond the face of the guide. Set the ruler zero to the guide pointer, making this mark the starting point for all future cuts of the cutter. Using a clamp, press the two boards on which the tails will be against the rectangular clamp, and mark the end of them that is adjacent to the guide (so that all subsequent passes will be made with the same settings).
Mill the tails, setting the guide to each “A” mark on the scale to the left of zero and each time moving the boards forward relative to the cutter. The second pass along each groove (photo on the right) will overlap the first (photo on the left), thereby widening the cut. This will create wider grooves for tenons with inlay.
Mill the blanks with inlaid spikes. With the guide approximately 100 mm from the cutter, cut the slots for the tails to the point where the “B” mark coincides with the zero mark on the scale.
Sawing off strips for inlay. Attach the optional guide to the bevel saw attachment circular saw and make a mark on the side of the cut at a distance equal to the thickness of the board with tails. Move the inlay board about 0.8mm beyond this mark and saw off. Repeat this operation four times (it would be a good idea to make a spare one in case one board splits during assembly).
Glue the first tenons to the grooves. Apply glue to the inlay strips and join them to the tail boards, centered in thickness. Secure firmly with clamps and let dry.
Cut the resulting blanks. Sand or plane the workpieces so that the inlaid parts are flush with the face of the main board. Draw a line along the width of the workpiece at a distance of 2.4 mm from the tops of the light tails. (Some of the joints mentioned in the instructions specify an offset of 3.2 mm.) Saw off the unwanted portion of the board, gradually approaching this line in two or three passes.
Make bevels on the tails. Pressing each workpiece vertically against the guide, mill a bevel 5 mm deep with inside. Make three or four test passes to avoid tearing out the wood. This operation will reduce the thickness of the tails to match the depth of the tenon board nests.
Mill the tails, round 2. Place the blanks together, grooves facing out, press them against the guide and against the rectangular clamp. This way you will prevent breakouts from outside tails. Place the “C” mark on the template to the left of the zero and rout new tails across the boards.
Route the final tenons. Take the blanks with tenons and mill out the corresponding grooves for the tails, setting the “D” mark on the template to the left of the zero. Use the guide stop to set the routing depth - usually equal to the diameter of the dovetail bit. Work your way up to this depth by sliding the stop about 0.8mm behind the bit and then retracting it if necessary.
Cut a groove at the bottom. Before final assembly For double dovetail boxes, cut a narrow groove for inserting a bottom panel into each side. The groove should be located under the tail so that it is not visible after assembly. Set the saw blade at a height so that it does not touch the tail. Cut out the bottom panel and then assemble the entire box.
DOVETWAIL WITH YOUR OWN HANDS – VIDEO
 GD900 Thermal conductive grease paste silicone heat sink patch connection 5...
What is a dovetail joint?
Very often, novice developers ask what is dovetail and how to apply it in practice? We are happy to explain all the most important aspects of this type of timber connection, i.e. connecting beams into a dovetail.
In fact beam joining can be produced different ways, but the most effective and elegant will be the so-called “dovetail”. Its design is capable of rigidly preventing the penetration of direct air flows into the premises. In terms of strength, such a connection is considered the most reliable, since it is very rigid, it is impossible to break it even with a high deformation load on the building. Houses made of dovetail timber can withstand a strong earthquake (tested in practice).
A properly cut (sawing) joint is very tight. True, wood natural material, and it tends to undergo natural thermal expansion. During the drying process, timber can repeatedly absorb moisture and release it back into the atmosphere. Naturally, the percentage of humidity gradually decreases and eventually returns to the norm of natural shrinkage. To increase the density of connections, in place beam joining use inter-crown insulation made of flax, jute or tow.
The dovetail connection has been tested over the years and has a quality standard.
By using a dovetail as a beam connection, you will already partially solve the problem of heat loss through the walls of a house made of timber, because you will get a high-quality warm corner. The regulations for the use of this connection are established by GOST 30974 - 2002 “Corner connections of wooden cobblestones and log low-rise buildings. Classification, designs, sizes." This fact is significant and convincing, since we are still accustomed to trusting government agencies in the field of quality control and operational safety.
Application options for joining beams in a dovetail
Even despite some difficulty in performing the work, do connection of beams into dovetail no problem. Here you need to make a dovetail template and mark the cut points using it. The template must be made in advance from a sheet of tin or plastic. It is more convenient to cut with a chainsaw with a short bar.
Let's list the options for joining timber that dovetail can be used:
1. Dovetail is effective when joining timber along the length.
Dovetail jointing of timber along the length
Dovetail
2. Dovetail is often used to join beams when joining interior wall to the outside.
3. In the corners of a house made of timber, a half-dovetail joint is used (photos are clickable).
Gusset timber
Corner dovetail beam connection