How to restore old furniture with your own hands. Do-it-yourself wooden furniture restoration Do-it-yourself polished furniture restoration
Do-it-yourself furniture restoration is often done not only in order to save a little money. Some things made of wood have a unique charm of antiquity, others are just so familiar that you don’t want to get rid of them. In each case, the repair and alteration of old furniture has to be approached differently. Most often, the main task is to preserve the functionality of the item.
Do-it-yourself furniture restoration is often done not only in order to save a little money
Before you update old furniture, it is worth determining whether it is too valuable antiques. In this case, its sale can be much more profitable than restoration. You can determine how valuable an ancient piece of furniture is by the presence of the master's mark on the back of the cabinet or the inside of the seat of the chair. If your nightstand or chest of drawers bear the same hallmarks on the bottom of the drawers, it makes sense to contact professional antique appraisers.
But in the event that you want to keep antique furniture for yourself, prolong its life and give it a chance to serve more, you should clean and inspect the thing, identifying defects. In the most simple cases it can be mechanical damage to the legs, doors, surfaces. More complex ones will require upholstery re-upholstery, restoration of the inlay pattern or carved pattern, strengthening loose joints. Each case requires a personal approach and specific tools. But most often you may need:
- drill and drills, screwdriver;
- end planer;
- files and sandpaper;
- Screwdriver Set;
- jigsaw;
- sharp knife;
- pliers and round-nose pliers;
- furniture stapler with staples;
- furniture fabric;
- sewing accessories and scissors;
- brushes, paints and varnishes, furniture wax and more.

If updating furniture will consist in decorating it with decoupage elements, then only the necessary images (napkins, special sets, etc.), PVA glue and a soft hair brush will be required. For craquelure, you need to buy a special varnish, if desired, metal powder for gilding or silvering. For decoration, self-adhesive film for precious wood or stone, plastic moldings and furniture fittings can also be useful.
There is another interesting material for decorating old furniture. It is called linkrust and is a thin film with three-dimensional embossing. By applying metal powder to the convex parts, you can even make a work of art out of an old wall.
In some cases, it is required to disassemble the item into parts. This usually happens if the furniture repair is not only in the external decor. When reupholstering upholstered seats, restoring lacquered furniture at home, you will need to separate at least the main parts. In order not to confuse parts when assembling complex assemblies, you should photograph the disassembly process.
Gallery: restoration of old furniture (25 photos)


Restoration of old furniture (video)
Stylish DIY furniture
The easiest way to repair old furniture is to decorate surfaces in a modern spirit. With the help of simple tricks, things that have served can be given a modern look in different styles. Homemade kitchen sets and chests of drawers from the 30s and 40s of the last century will always have a place in country, shabby chic, Victorian and similar interiors that imply not quite modern details. Soviet products 50-70 years. fit perfectly into a minimalist modern interior. You just need to slightly change their standard appearance and restore the furniture in accordance with their requirements.
The new life of an old bedside table can begin with the removal of dirt and old paint. Some Amazingly Fine Exclusive Items self made over the years of service, it was repeatedly repainted. This completely deprived them of the attractiveness and charm of antique furniture. It is best to remove the paint completely, before pure wood.
 Before you update old furniture, it is worth determining whether it is too valuable antiques.
 The same should be done if the cabinet was varnished. As a rule, the coating is in very poor condition. The easiest way to remove both paint and varnish sharp knife, file and sandpaper. Loose and poorly closing doors are best removed to replace the fittings.
If cracks and potholes are found on the furniture, then you need to make a special putty based on wood glue or acrylic resin. For 1 part of the binder, you need to take 3-4 parts of small sawdust (if possible, even sift them). Cover the defects with this composition, capturing the undamaged areas around the recess. After the mastic is completely dry (up to 48 hours), treat the surface with an emery cloth stretched over a flat wooden block.
A beautiful pattern of peeled wood can suggest finishing ideas without painting. In this case, you need to cover the product with a stain for valuable species. Dry the bedside table, add decor to your taste (painting, decoupage) and cover all parts with transparent varnish. Install door and drawer handles in regular places; if necessary, you can replace them with more modern ones or, conversely, corresponding to the style of noble antiquity.
 The easiest way to repair old furniture is to decorate surfaces in a modern spirit.
 How to update large furniture?
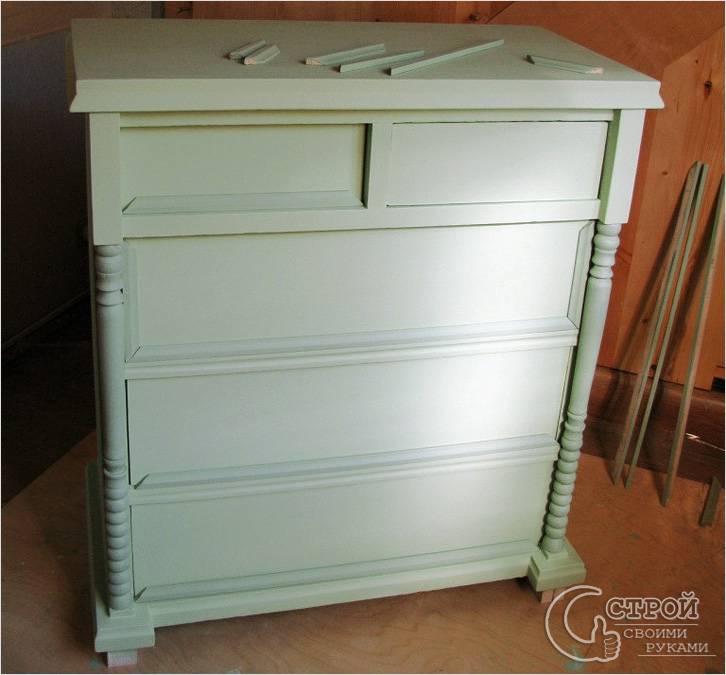
You can restore an old chest of drawers or wardrobe in a similar way. Large pieces of furniture often contain many drawers that swell or shrink over time. Restoration of an old wardrobe, bureau, chest of drawers should begin with checking the integrity and ease of movement of these parts.
If necessary, you can disassemble the boxes into their component parts. Connections (usually a tenon-groove in different options) clean off the old glue, process with a file and glue thin pieces of wood into the grooves. To do this, you can take a cheap veneer or use one of the layers from plywood. Having sealed in this way, apply glue (carpentry, PVA, instant) on the surface and connect the details of the boxes. You can use thin screws.
If it is necessary to replace the handles, cover the holes from the old fasteners with a crack repair compound. After drying, clean the surface with sandpaper. Make new holes and strengthen the fittings.
The front wall of the box can be fixed on wooden dowels. If during the parsing process it was not possible to save them, then it is very simple to make new ones from a round stick of a suitable diameter (kebab skewers, for example). The remains of the old dowels need to be drilled out, pour a little glue into the recess and insert a small piece of stick there. Just make reciprocal holes and put the wall in place.
As a rule, the restoration of dried out boxes also solves the problem of their movement along the guides. If interference remains somewhere, you can examine the rubbing surfaces and grind off part of the wood with a file.

When pasting with any thin film, you need to remember that surface defects under it will be noticeable. Chips, cracks, peeling coating must first be leveled. Wipe wood defects with putty, and remove the old coating. On large surfaces of chests of drawers and cabinets, this is easiest to do with a grinder. A nozzle on a drill in the form of a round brush with metal components is also suitable.
It is advisable to use a respirator and goggles during work to prevent dust from entering the eyes and respiratory tract. Cleaning large furniture paintwork it is better to produce in non-residential premises or on the street. The dust remaining on the furniture after processing must be thoroughly washed off with clean water.
Ideas for decorating a closet or chest of drawers
The master himself should decide how to restore old furniture at home. It depends on the style of the interior of the room. Reconstruction can be done in different ways:
- pasting film;
- coloring and decoration;
- varnishing.
Restoration of Soviet furniture flat surface and without unnecessary decor can be made using fabric or thin leather (leatherette). Depending on preferences, the front walls of the drawers can be covered with such material or pasted over with a metallic color film. This is usually how the restoration of chipboard furniture is performed, which does not imply the preservation of the pattern of valuable wood.
The sides of the chest of drawers, its countertop can be painted in contrast: in dark colors for a minimalist style or hi-tech, in cheerful, but soft beige, blue, pink shades for country and similar interiors. Appropriate fittings can complement the finish. IN furniture stores And construction firms there is always a rich selection of moldings that imitate stucco or have strict graphic outlines. Decorative overlays on pieces of furniture that are free from pasting will give the updated chest of drawers or wardrobe a resemblance to antique carvings. Handles of the appropriate design will help to complete the look of the transformed object.

Furniture with a slight wear effect is very fashionable at the present time. This does not mean at all that you can put a cabinet or chest of drawers with a coating that has peeled off in places. The shabby chic style is characterized by imitation of well-preserved, but old furniture. Therefore, any chair, cabinet or bookcase is prepared for repair according to general principles: removing the old coating as much as possible.
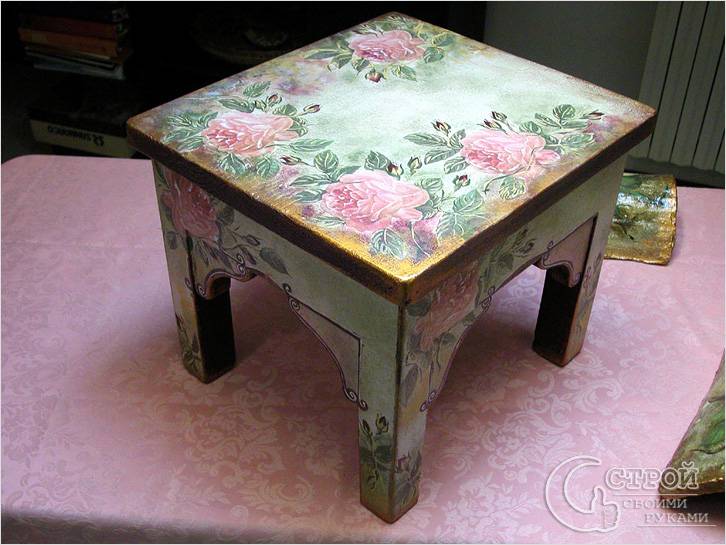
The processed products are torn with a thin layer of furniture wax in those places where wear is needed: on the convex parts of the relief, on the corners and edges, near the handles. Surfaces are painted with light acrylic paint. After drying, it is enough to remove its layer on waxed places. Restoration wooden furniture it also implies decor either by painting, if the master has the ability to draw, or by decoupage.
To do this, use ready-made drawings, pages of old books or notes, napkins with the desired pattern. A layer of PVA glue is applied to the furniture, the picture is pressed and smoothed with a soft brush, removing air bubbles. After drying, the edges of the pattern can be treated with a paint sponge to mask the transition from paper to the painted surface. Do-it-yourself restoration of a chest of drawers can be considered complete, and to protect the surface pattern, it must be varnished.
How to restore old furniture (video)
How to update upholstered furniture?
Compared with the alteration of wooden things, the restoration of upholstered furniture with your own hands seems quite complicated. But it is possible to cope with this task. Most often it is necessary to change worn out upholstery and filler.
To re-upholster an old chair with your own hands, you will have to pick up furniture fabric. For modern headsets, flock or velor is also suitable, but they can deprive an old thing of its inherent solidity. For fancy chairs with carvings and bent parts, you will have to look for a quality furniture tapestry.
Dismantling upholstered furniture of the last century, you can find inside spring block or foam rubber, most often beyond repair. They can be replaced with modern foam rubber high density. It is best to choose a thick plate of a denser material, and on top of it make a thin (about 2 cm) pad of soft foam rubber. For greater preservation of the filler, burlap or other dense fabric is placed on top.

If the chair or sofa was not completely soft, but contained polished parts, then before restoring the furniture with your own hands, you need to restore the coating with varnish. Polishing is done with GOI paste.
The restoration of the chair continues with the laying of the filler:
- grease the base of the seat with glue and lay thick foam rubber on it;
- press evenly over the entire surface;
- smear the surface of the foam rubber with glue and lay a thin material;
- lay a rough burlap upholstery on top of the foam rubber, attach it with stapler staples;
- glue the armrests and back, if necessary.
Depending on the design of upholstered furniture, it may be necessary to make a relief on the filler. Details protruding above the surface must be cut separately and glued.
In conclusion, you will need to sew new covers. For patterns, you need to use the old upholstery. Put the finished cover or furniture fabric inside out near the edge of the polished part, attach with a stapler along the edge.
Turn over on the face, covering the soft filler, pulling the cover over the armrests and backrest. Attach on the underside of furniture, under armrests, etc., restoring the upholstery as it was laid before. If there were overheads on the chair wooden details over the fabric, they are installed in place last, when the upholstery is completely replaced.

On some models of old furniture there are overhead pillows. Their filler must be inspected and, if necessary, replaced. Covers are easy to sew on patterns taken from old upholstery. With these details, there is much less work than with the constriction of the sofa or chair itself.
Restoring old furniture is a very creative process. Even restoring its ancient appearance, you have to use both new skin and modern technologies, spending a lot of time and no less imagination. But when looking at a sofa restored at home, carved or polished furniture that can be used for a long time, the master does not have regrets about the efforts spent.
Attention, only TODAY!
13.10.2015Have you inherited a furniture set from the beginning of the last century, or is there dusty chairs and chests of drawers in the house that you are sorry to part with? Congratulations! You have the opportunity, and most importantly, a suitable texture in order to minimal cost update old furniture and interior, thereby transforming your home. You only need a couple of hours and a small set repair materials. With their help and with the desire to create, you can achieve great results easily and quickly!
Before starting work, you need to prepare the necessary materials. In order to update old furniture, it is convenient to use paint in cylinders. In this case, you will only need a few aerosols of the desired shades. No need to purchase rollers different sizes, numerous brushes and thinner. So, before we start painting, we carry out preparatory work. This stage cannot be neglected, because the quality of painting and its durability largely depend on it.
- First of all, we clean the surface that we will paint from dirt and dust, after which we wipe it dry.
- We process sandpaper lacquered furniture.
- Before painting, it is desirable to cover the surface with a special primer. In this way, we will achieve the best adhesion of the paint to the coating.
- We cover the area that we do not want to paint with old newspapers or plastic wrap, and also protect the surrounding area from excess paint when spraying it.
- We use painter's tape to seal parts of the furniture that cannot be painted, as well as to obtain a smooth edge of the area to be painted.
- We protect our hands with gloves.
- Shake the bottle vigorously for several minutes before using. Spraying is carried out from a distance of 25–30 cm from the surface to be painted.
- Designers advise boldly using bright contrasting shades, decorating the surface with drawings, as well as decorative elements, colored film and various moldings. The main thing is not to be afraid to fantasize, be creative and implement your most unusual ideas!
Well, a selection of our photos will help you look at old furniture in a new way!

1. In order to turn an old dark chest of drawers into an original dressing table, it is enough to update it with bright paint. You can purchase new handles for doors and drawers, or clean the finish of old ones with special means for cleaning metal products.

2. New interior design is not a reason to replace furniture. With the help of paint, you can change the shade of a table or chest of drawers, perfectly fitting them into the surroundings. By pasting the area around the moldings with masking tape, you can easily paint them in the desired color. In this case, golden trims and handles perfectly decorate the white chest of drawers.

3. A dull, unsightly chest of drawers that you would like to push into the darkest corner in the country can become a real decoration of the living room. To do this, all its elements are painted with white paint. Gray moldings will perfectly highlight the drawers and contrast with the main color. The color composition will be complemented by original silver handles.

4. Wood is an excellent texture for creating decorative effects. This chest of drawers was painted white, after which the drawers were pasted over with colored film and highlighted with moldings. The new fittings complete the composition, renovating the old furniture and making it the perfect addition to the light-coloured interior.

5. Do not rush to get rid of the battered desk. The white shade will refresh and allow you to update old furniture. And with the help of masking tape, you can experiment and create a pattern on the boxes that will help fit the table into environment. In this case, the color shades of the drawers are ideally combined with the decorative shelves on the table top.

6. An old cabinet can be repainted white in an hour and a half and creatively decorate its door with black squares. We process the internal space using an aerosol can with yellow paint. Unusual handles will perfectly complement the new image of your pedestal, which will decorate the hallway.

7. An old Soviet-era lacquered nightstand gets an updated look with two contrasting hues. Their bold combination is perfectly complemented by thin moldings painted with golden paint. The handles on the doors are processed in the same way.

8. In order to update an old grandmother's chest of drawers, you can paint its frame white and make the drawers gray. Then, using a stencil and white paint, we create a magnificent openwork effect on them. New accessories complete the look. By the way, the boxes can be swapped, after which your family will definitely decide that you have purchased new furniture!

9. You can make a great serving table out of an old cabinet. Spray paint will help create smooth color transitions that look spectacular through a combination of contrasting shades. A minimum of work - and such a great result!

10. The updated chest of drawers organically combines light and dark shades. With the help of masking tape on the boxes, an original decorative element. The fittings look like new after applying golden paint.

11. Using stencils, you can easily update old furniture, making it fashionable and stylish. This chest of drawers with the original drawing of the ship will now decorate the nursery. Contrasting color combinations look great here.

12. Old wooden chairs can be easily restored by painting the frame with bright paint and replacing the seat upholstery. In this case, the yellow paint is in perfect harmony with the golden pattern of the fabric. Original, practical and inexpensive!

13. You can make a bright designer chair! We paint the frame of the ancient exhibit with bright paint, change the upholstery of the seat and make striped covers to match the main shades. A small contrast pad - and harmonious image completed!

14. Here is such a creative coffee table can be made using a stencil. First, we paint the entire structure with white paint, wait for it to dry completely, and then apply the stencil to the countertop and spray a bright blue tint. The new table is ready and fits perfectly into the interior!

15. A shabby wooden chest of drawers is a great opportunity to create something special with your own hands. Bright sunny hues, interesting color combinations and new fittings will help to update old furniture and turn it into an original decoration for your bedroom.

16. An excellent solution: the green drawers of the chest of drawers are visually highlighted with the help of thin moldings painted in white. Using painter's tape, it's easy and simple to paint delicate furniture parts in the color you want. New handles on the drawers complete the attractive look of the chest of drawers.

17. The old bedside table has been changed beyond recognition with the help of bright green paint and a decorative film that covered the table top. Used old hardware - it was removed and painted black. Stunning decoration of the original interior!

18. Skillful hands turned the old bed into a small sofa, while its headboard became its back! The structure is painted white, the seat is upholstered in an attractive fabric, and cute cushions complete the new look.

19. From an old grandmother's chest of drawers, an elegant dressing table for a modern bedroom turned out. Delicate pastel colors are complemented by an original pattern of decorative film, which is pasted over the doors. Updating old furniture can be very easy, getting great results with minimal effort!

20. A section of an old Soviet slide has been turned into a great storage cabinet. The base is painted white, the doors are pasted over with a decorative film of pleasant colors and decorated with new fittings. Simple Solutions– and global restoration!

21. If you can draw, you can decorate the white dresser drawers with bright designs or intricate designs. To create them, choose colors that match the shades of the interior.

22. This folding table is given a makeover with yellow paint and an original pattern on the top. Using stencils, you can create a variety of color compositions, which will perfectly fit your updated furniture into the environment.

23. An old shabby desk began to look stylish and modern. Unusually shaped legs give it a graceful look, and bright hues refresh and renew.

24. Updating old furniture, or rather this bedside table, is easy and simple. It is enough to cover it with white paint, and draw a pattern on the doors with an ordinary marker with a thick pen, and then fix the result with a colorless varnish. You can complete the work by installing new fittings. After all, manufacturers today offer a huge variety of handles and loops of all shapes, colors and sizes.

25. If you don't like your new coffee table, go get some paint! With the help of aerosol cans, we change the color of the frame - and now the updated piece of furniture pleases the eye.

26. After painting with bright colors, this garden group looks fresh and festive. A combination of contrasting shades looks advantageous, as well as bold accents created using multi-colored pads. Such garden furniture can decorate any terrace.

27. We clean the surface of the old chest of drawers with sandpaper, removing the peeling varnish. After that, we apply a primer and cover with paint. In our case, the old fittings only emphasize vintage style updated interior. Fashionable, creative and tasteful!

28. With the help of paint, you can update old furniture and combine a table and chairs from different groups into a single composition. We paint the table white, and we cover the seats of the chairs with a white cloth. Fresh furniture pleases the eye!

29. Wanted something new? The kitchen cabinet can be changed beyond recognition by repainting its frame and drawers in one color, and the countertop in another, as well as installing new handles. Feel free to experiment with colors and accessories!

30. Do not rush to send the old Soviet-era table-book to the landfill. With the help of stencils and paint, you can create a fancy pattern on the furniture, after which you won’t even need a tablecloth on such a table.

31. Children's furniture should be bright and attractive! You can update old furniture and create unique interior together with the child by painting the table and chairs. Add more colors and contrasting combinations, entertaining patterns and patterns. At such a table, your baby will sit with great pleasure.

32. Old chairs will look like new after painting and reupholstering. Minimum effort and great results!

33. This shabby stool began to look bright and fresh. Pleasant contrasting shades allow you to update old furniture, creating its new image. A comfortable and practical stool will become a real decoration of the kitchen or dining room.

34. And this is how you can update a stool for a nursery. With the help of bright shades of paint, old and shabby furniture has become fashionable and creative. Agree, such a beautiful stool - a place in the new nursery!

35. The white color of the interior is one of the newfangled current trends. Light furniture looks light and elegant. At the same time, there is no need to spend significant funds - you can update the chest of drawers with your own hands using quality paint, making it a spectacular element of a fashionable interior.

36. ancient mirror frame After painting it will look like new. A spectacular shade will help her regain her former chic, and you - to refresh the interior!

37. color accents very important for creating a modern interior. You can decorate the room in two primary colors, and the third - to emphasize the details. To give objects the desired shade, say golden, paint in spray cans will help.


38. 39, 40. Bright doors will become a real decoration of the interior, emphasizing the excellent taste of its owners. With the help of masking tape and high-quality paint in cans, you can give the canvas and door frame any, even the most daring shade, as well as create a spectacular combination of contrasting colors.

41. Feel free to experiment with contrasting shades! Such furniture will be a reflection of your individuality and creativity.


42, 43, 44. Bright colors, interesting combinations shades, new fittings - and a shabby chest of drawers is unrecognizable! Updating old furniture is easy and simple with the help of spray paint. The point is small - choose colors, add fantasy and create the interior of your dreams!

45. Designers do not have the concept of "outdated furniture" - only vintage, which means it is certainly fashionable! Add fresh shades - and create an original interior!

46. Masking tape will help you create creative geometric compositions on your furniture. Add accessories to the tone of the selected shades - and enjoy the new image of your home!

47. Bright, bold shades will transform old furniture, which in turn will refresh the room and fill it with inspiration. After all, after painting a shabby table, you will want to change everything around!

48. You can paint the rack on the outside in one color, and its inner space- others. It will turn out bright, bold and original!

49. With the help of spray paint and your imagination, you can easily and easily update old garden furniture. The most unexpected decision is sometimes the right one. Choose a creative way to create original garden compositions!
![]()
50. Bright fresh shades of updated furniture will fill you with positive and return the magnificent Summer mood. With Motip spray paints, the world around becomes more beautiful!
When it comes to updating furniture, don't be afraid of minor difficulties that you may have to face. After all, an excellent result will be a reward for your efforts and will inspire you to create a unique original interior for your home!
To buy new furniture, you will need a decent amount, which not everyone has. In addition, the repair itself and the new finish were expensive. How to solve the existing problem? The answer is very simple - the second life of old furniture. It is enough to devote a little time and effort, as well as to use inexpensive materials. Thus, any inconspicuous element will become exclusive and original, which will allow it to fit into the new one. Do-it-yourself restoration of old furniture is carried out in accordance with the recommendations and rules. All the subtleties of the process will be discussed in this article.
Furniture preparation is the basis of the process
Any kind of work requires careful preparation in order to improve the final result. This also applies to the restoration of furniture: before proceeding with the decoration, it is worth carefully preparing the surface, regardless of whether it is wooden or soft. Since the main part (body) is made of wood, then Special attention given to her.

To spend proper training you need to follow a simple algorithm of actions:
- Carefully inspect the surface for defects and damage. It is necessary to take into account not only major damage, but also scratches.
- Washing off dirt and dust with warm water and detergents. Drying.
- Parsing wooden furniture into pieces, to the maximum. For example, when restoring table legs, they need to be disconnected from the tabletop - this will facilitate the process. In addition, the remaining elements that are not involved in the alteration will not get dirty or deteriorate.
- If it is impossible to separate the part that needs to be changed, then it is necessary to seal the remaining parts with tape and film. Experts recommend using masking tape, which will not leave marks on the surface when peeled off.
- With soft objects and details, you must be extremely careful. The upholstery is removed carefully so that it can be used to make a pattern from the new material. The stuffing is also removed and replaced.
Note! In order not to forget anything and completely eliminate defects, it is worth writing them down on a piece of paper. This will allow you not to forget even the smallest scuffs that will affect the overall look.
Polishing layer removal technology

If it is necessary to remove the polishing layer from furniture during its restoration, it is necessary to prepare in advance:
- special composition for removing polishing;
- metal wool;
- sandpaper (large fraction);
- paper towels or napkins;
- natural bristle brush;
- putty knife.
Note! Compositions for removing the polishing layer can be of two types: thick and liquid. Thick compositions are used in the restoration of vertical surfaces. Liquid will be absorbed into the most inaccessible corners and carved elements.
For example, consider the technology of removing polishing using a thick composition:
- The binder is poured from the bottle into a mug or other utensils with a wide mouth. Using a brush, apply a thick layer of the mixture to a wooden surface.
- Wait for the time indicated by the manufacturer on the package. The top layer should soften, after which it is removed. It is necessary to scrape strictly in the direction wood fibers with a spatula. If the polishing did not come off the first time, then the procedure must be repeated. In hard-to-reach places, the layer is removed with an old toothbrush.
- The remnants of the thick composition and polishing are cleaned with metal wool: a thin layer is applied to the surface, and wiped on top with a paper towel.
- Cleaning and correction of irregularities is carried out with sandpaper of medium grit.

It is very important to follow safety rules when restoring old furniture. Carry out work only in a well-ventilated area. For respiratory protection, wear a respirator, and rubber gloves on your hands.
Note! When applying a thick composition, it is important to adhere to the technology, that is, follow only one direction. This will allow the layer to lie evenly.
Removal of damage and deformation

After polishing is removed, defects and damage in the form of deep cracks and scratches may appear on the surface. Before proceeding with the restoration, it is necessary to eliminate them. Each of them has its own technology and means.
- Cracks are covered with soft wax, which must be rubbed into the surface (select the appropriate shade).
- Chips and deep gaps are eliminated with wood putty. It is applied with a spatula and the residue is removed with it. After 24 hours - that's how much time is needed for complete drying - the surface is cleaned with sandpaper.
- Before applying the paint layer, it is necessary to carry out a primer, which will strengthen the connection with the wooden surface.

Note! Experts recommend using putty on polyester or water based.
Restoration of an old dresser

A chest of drawers is part of the furniture set for a bedroom, children's room or living room. It can fit in a large number of of things. When changing the interior, it may not fit into the room, so as not to throw it away, it is enough to carry out restoration. To do this, you need to choose a tool such as:
- sandpaper (coarse and fine fraction);
- protective equipment (goggles and a respirator);
- screwdriver or screwdriver;
- rag;
- brushes of different sizes;
- paints.
- If possible, the chest of drawers is disassembled into separate elements.
- The varnish layer is removed with coarse sandpaper. To facilitate and speed up the process, you can use a grinder with a special circular nozzle. Thus, they reach the wood layer.
- All surfaces of the dresser are cleaned, fine-grained sandpaper is used. The result should be smooth surface without serifs.
- Use a damp soft cloth to wipe the chest of drawers - this will remove dust and small particles of debris.
- After complete drying, the wood is primed to ensure better bonding with the paint layer.
- The final step is painting. It is best to use enamels with a glossy color. It is best to apply paint with brushes along the wooden fibers: the layer must be thin, otherwise streaks form. To obtain a more saturated color, a second layer of paint is applied in a day. After complete drying, the elements of the dresser are twisted and the fittings are fixed.
Note! When restoring a chest of drawers for a children's room, you can use stencils. The result is bright and original item that the baby will love.
This is what the restoration process looks like:


Video
And here is a video on the restoration of the chest of drawers:
Restoration of chairs and stools
Furniture in the kitchen wears out the fastest, as this is where people spend most of their time. Due to the high price of headsets, not everyone can afford to buy new ones every 5-10 years, and the old ones do not fit into the interior after repair. In this case, it is also worth using various methods and methods of restoring kitchen furniture.

For example, despite the fact that stools lose their attractiveness over time, they are still functional. It is enough to devote a little time and effort to carry out the update. You can do this by following the step by step instructions:
- A stool with a soft seat must first be carefully disassembled, the upholstery removed. It will be possible to cut out new material on it, and foam rubber is also cut out according to the size of the filler (the desired thickness is 5 cm).
- After all the elements of the chair are disassembled, it is possible to clean, remove the old paint layer and remove defects. As in the case of the cabinet, sandpaper, putty and a spatula are used.
- Prepared and primed surfaces are opened with varnish or paint to match the kitchen finish.

- The soft part is upholstered with a new fabric using a construction stapler.
- After complete drying, everything is re-fastened. Experts recommend using new fasteners.

There is another way fast restoration chairs with backs are covers made of any textile. To do this, you need to take measurements, make a pattern and sew a cover on it. This restoration is called draping with cloth.
Note! When upholstering the soft part of stools or chairs for the kitchen, it is recommended to use dense textiles or artificial leather. They are the least susceptible to wear and tear, so they will last longer.
Basic techniques for restoring wooden furniture
To carry out the final stage of decoration during the restoration of furniture, you can use not only paints and varnishes. So, today designers and furniture makers use various techniques restorations, with the help of which it is possible to turn a nondescript element into a vintage and exclusive one.

Painting with paints. The most affordable and simple method of restoration is staining. paintwork materials. To do this, a thin layer of the main color is applied to the prepared surface, which should match the color of the room or other decor elements. After complete drying, using stencils or carbon paper, you can apply the contours of any pattern, and then paint. You can find such patterns on the Internet.
You can decorate using this technique together with children, as it is very simple and interesting. So, various patterns are cut out of fabric and paper, many use napkins for this purpose. The resulting elements are placed on the surface, for example, a table, and then glued, not forgetting to smooth it well. Then covered with a layer of varnish.

The technology combines two methods at once: decoupage and varnishing. With its help, you can give the furniture an antique look. To do this, apply a layer of varnish, and until it is completely dry, cover with craquelure varnish on top. When drying, small cracks will form, which imitate the surface of antiques. In the future, they can be filled, for example, with gold paint. The most interesting is the combination of contrasting colors of paintwork materials.
Veneering. This technology got its name due to the main material - veneer. It is presented in the form of thin sheets of wood of various species. Elements are cut out of sheets according to pre-measured measurements. So, with the help of ordinary PVA clerical glue, they are fixed on a pre-prepared and primed surface. For smoothing it is necessary to iron the surface with a hot iron.
Note! The combination of several techniques will look most advantageous on one piece of furniture. For painting a wooden surface, experts recommend using acrylic paints. For lacquered furniture, you can use automotive paint in cans.
As you can see, all elements of wooden furniture that have not lost their strength and functionality can be updated with various technologies. Thus, restoration can be carried out during repair work and each time the old cabinet will look more spectacular and better than the previous one. In addition, it will fit well into the existing interior.
Video
See how to restore the old wooden chair in decoupage technique:
Before talking about the methods of restoring wooden furniture, I would like to clarify that this procedure is only suitable for quality products. In other words, if the master in the process of making a thing put his soul into it, then saving such an item is a matter of honor. Breathing a second life into a flimsy Chinese chipboard table will only be a waste of your time and effort. The magic of restoration is able to turn a thing crippled by time into an elegant work of art that will delight for several generations of its owners.
In Italy there is an interesting custom - under New Year old things fly from the windows of houses into the street: tables, chairs, vases, cabinets and even appliances. This tradition goes back to the Middle Ages, when people believed that starting new life follows from a completely clean slate, getting rid of all the junk in the house. Modern Italians are more economical and rational, so today you can not be afraid that on New Year's Eve someone's stool will fall on you. On the territory of the post-Soviet space, the situation is much more serious - people who have been accustomed to living in a deficit for years are simply unable to get rid of their own old furniture. Resourceful craftsmen deftly repair crooked cabinets, polish scratched tables, and things regularly serve their owners for many years to come.
Restoration of old wooden furniture is not just the correction of defects, but a true transformation and return to the object of its former gloss and luxury. Naturally, this applies only to high-quality furniture made of precious woods or beautiful carvings, the works of talented masters of the past, or simply things made to last.
Scratches and abrasions
Small “injuries” in the form of scuffs and shallow scratches on furniture can be dealt with in no time. If the interior item was not used as an exhibit, but was used for its intended purpose, then such defects are completely natural - worn corners of the chest of drawers, scratches on the tabletop, etc.
In this case, special retouching markers and pencils are used for restoration, which simply paint over the defects. You can buy them in specialized hardware stores or order online.
Types of retouching markers and pencils:

Deep scratches and chips
Furniture wax effectively helps to cope with deep scratches and small chips. There are many varieties of wax, ranging from soft transparent products to hard colored samples. To apply wax to the surface, you must first warm it up. Then, with smooth movements, rub the product into a scratch or chip.
If you use transparent wax to restore wooden furniture, then the damaged area must be painted over with enamel or tinted varnish. If you have valuables at home vintage furniture or just wooden things that you cherish, it would be useful to stock up on a jar of transparent wax. It is not so expensive, and working with him quickly and pleasantly. In addition, it is always better to immediately eliminate the defect than to wait until a whole “bouquet” of them accumulates in order to spend more than one day on restoration.

If there are deep chips or dents on the furniture, then ordinary wax is indispensable here - you will have to buy wood putty. You can buy it in almost any hardware store, choosing the option that suits the cost and color. Putty should be applied very carefully in several thin layers. Apply each subsequent layer only after the previous one has completely dried. When a chip or dent is level with the surface, and the defect is eliminated, treat this place with fine sandpaper, wipe with a rag and cover with a layer of varnish.
Spots
Very often, ugly stains are found on old polished furniture. This is especially true for kitchen furniture or coffee tables– traces of accidentally spilled coffee or wine, oil stains, etc. Most often it is difficult to find out the origin of the stain, especially if you bought rare furniture from a junk dealer. In this case, gasoline will help you.
No, we will not burn dirty furniture, but we will try to clean it. Gasoline is an excellent solvent for stains of unknown origin.
Cleaning steps:
- Dampen a rag with gasoline and wipe the stain.
- If after drying it still remains, repeat the operation and wipe the stain at regular intervals until it disappears.
- Wipe the polished surface to a shine with a cloth rag.
- Repair damaged polish by rubbing the furniture with a mixture of linseed oil and denatured alcohol.

With stains from hot objects (kettles, irons, pots, etc.), ordinary alcohol or vodka will help to cope.
Cleaning steps:
- Soak a swab or rag in alcohol and wipe the damaged area. If necessary, repeat the procedure several times, waiting for the alcohol to dry.
- Restore the polished surface with a mixture of linseed oil and denatured alcohol.
- With severe "burns" it is necessary to make a mixture of drying oil and alcohol. Wipe the damaged area with the resulting composition until the stain disappears. Then wipe the area with pure alcohol and polish with a cloth.
Complete restoration of wooden furniture
If varnish and putty are not enough to restore its former beauty, it is necessary to proceed with the complete restoration of wooden furniture with your own hands. In this case, the effect will be simply amazing, and a nondescript wreck will become a real pride of its owner.
Removing old paintwork
To get rid of the previous coating, whether it be varnish or paint, you need to purchase a special wash. As a rule, for the repair and restoration of furniture made of oak, cedar and other valuable species, emulsion washes are used. They are characterized by low toxicity and are not able to harm the tree. In addition, the risk of ignition of such compounds is close to zero, which is especially important if you work in your apartment.

Washing tips:
- The wash will “corrode” the old coating at a time, just apply the composition to the surface with a flute brush and wait for the right time (indicated on the package). Usually to eliminate polyester varnish coating it is necessary to wait one and a half to two hours, and in the case of nitrocellulose or alcohol varnish, you can start cleaning as early as 20-30 minutes after applying the wash.
- Before covering the polyester coating, it is recommended to scratch it so that the composition penetrates deep into the surface quickly and evenly. Use an ordinary nail or awl to scratch a mesh with cells with a side of 15-20 mm.
- Washing consumption is from 300 to 500 grams per square meter surfaces. After application, cover the furniture with waxed paper.
- After the specified time, remove the remnants of the old paintwork with a conventional spatula and rinse the surface with a solvent.
It remains to dry the furniture for one and a half to two hours, and then sand it with sandpaper No. 5 or No. 6. When you brush off the dust with a damp cloth, you can start disinfecting.
Disinfection
Furniture restoration involves not only updating the coating, but also competent handling of the structure. So, if a thing has been gathering dust for a long time in an attic or balcony, if you bought it at a “flea market” in wet weather, in general, if an item has been in a place with temperature and humidity changes for a long time, it needs to arrange a gentle adaptation period. If you immediately start sanding and varnishing such furniture, then after a while it may dry out (cracks will appear), and all your efforts will go down the drain. To prevent this from happening, the thing needs to be kept at room temperature for a day or two. Imagine that you suddenly find yourself in a tropical country with an unusual climate. You will need time to adapt to new living conditions. In the same way, furniture needs to “come to its senses”.

"Acclimatization" is the first stage of disinfection. When the furniture has dried, you can begin to strengthen it and fight against fungi. There is no doubt that there are fungi. If a thing has been in the above-mentioned places with a changeable climate and questionable sanitation for a long time, then there will definitely be pests inside it. Special antifungal drugs will help get rid of them.
Means for disinfecting wood at home:
- pentachlorophenol;
- stain;
- sodium pentachlorophenolate;
- "Drevotoks" (from the grinder beetle);
- sodium fluoride;
- antifungal drug "Pentabos".
There are many other drugs that you can buy in specialized hardware stores.
To carry out high-quality disinfection, it is necessary to completely disassemble the furniture.
Stages of disinfection:
- First, “minor” parts are removed that do not affect the structure of the frame, then fittings, decorative details (cornices, pilasters, etc.).
- Fasteners (nails, self-tapping screws, screws) are removed, glue residues are removed. To easily remove the adhesive, you can fill it with a small amount ethyl alcohol and wait a couple of minutes. Then the connection can be easily separated and the glue cleaned.
- A proven disinfectant is stain. It kills harmful fungi and gives the tree a pleasant "warm" shade. Today you can find a stain for every "taste". If you are working with rare valuable breed wood or are engaged in the restoration of oak furniture, you can buy a water-based stain - it is the least toxic. For other cases, alcohol stain is suitable.
- If there are rusty metal elements on the furniture, treat them with a special cleaning solution. In this case, you can use purchased formulations or experiment (if the situation allows, and funds do not allow) with Coca-Cola or Pepsi. As you know, these drinks do an excellent job with limescale and rust, you just need to put the damaged thing in soda for a few minutes, and then clean it with Goya paste or a wire brush.
- Dry disinfected wooden elements needed for outdoors, but in no case under direct sunbeams. Drying takes 2 to 4 days.
Finishing
For painting furniture, acrylic is mainly used or alkyd enamel. Some prefer sprays, as they allow you to apply paint in a thin, even layer and even go into hard-to-reach places. For high-quality painting, it is necessary to make two or three "entries", applying each subsequent layer after the previous one has completely dried.
If it is necessary to glue structural elements, use a two-component epoxy adhesive. Lubricate both surfaces, wait a couple of minutes and press firmly against each other. Leave the thing for a day until the composition has completely hardened.
Furniture restoration is a unique opportunity to express thanks to the craftsman who made this thing for his wonderful creation. This is magic available to many, and now to you!
How pitiful it is sometimes to get rid of old, shabby furniture, the thought that you will have to throw out what you remember from childhood becomes unbearable.
But ... shabby chairs do not fit into the interior of the living room and even in the kitchen they look apart, lonely among the modern kitchen set. As they say, you have to throw it away. Or... you don't have to.

Furniture restoration. What does it mean?
Restoration will help save the situation. The word is familiar to many, but it is best understood by people associated with culture and art. However, isn't it an art to give old chairs and stools their former beautiful look, to tidy up a sideboard or wardrobe? Carry out a few simple procedures and make them look like they just bought in a store.

Especially if you think about new purchase, then even with the most conservative estimates, a pretty decent amount will come out. So is it worth it to spend money if it’s enough to use inexpensive materials and spend quite a bit of time doing the restoration of furniture with your own hands.


As a result, you can become the owner of an exclusive, original furniture, perfectly combined with the new design of the room or kitchen.

Preparation as the basis of work
Any business needs careful preparation, this is necessary for a high-quality result. This also applies to furniture restoration. Before finishing, always prepare the surface.

Since the body is more often woody, the following steps are carried out during preparation:
- Carefully inspect the surface for the identification of various large and small defects.
- Wash off the warm howl of pollution by applying detergents. Dry the surface.
- Disassemble furniture. This greatly facilitates the further process and keeps intact the elements that are not subject to alteration.
- If the part that needs to be corrected does not separate, then everything else is covered with a film and sealed with tape. After that, the remaining part can be safely restored without fear of spoiling the rest.
- Restoration of upholstered furniture requires a more careful approach. The upholstery is removed very carefully. On it then make a pattern using new material. The stuffing is also removed and replaced.

Removing the polishing layer
If there is polishing that you need to get rid of, you need:
- Use a special liquid composition.
- Use paper towels or napkins;
- Work with a brush made of natural bristles;
- Use metal wool, coarse sandpaper and a spatula.


During the work itself, the binder is poured into a mug or into a dish with a wide mouth. A thick layer is applied to the surface with a brush with a mixture. After a while, it softens and is removed. With a spatula, carefully scrape off the remnants, always along the wood fibers.

The procedure is repeated until the entire surface is completely cleaned. At the same time, metal wool and sandpaper are additionally used. At such a moment, it is better to have rubber gloves on your hands, and in order not to inhale harmful fumes and not clog the respiratory tract with fine dust, wear a respirator.

Detected cracks are masked with soft wax, matched by shade, rubbing it into the surface. To smooth out chips and gaps, putty is used, after complete drying, the surface is sanded with sandpaper. The varnish is applied only after the entire structure has been carefully processed and primed.

If the work is to be done by a beginner, then it is best to use visual aids on a specific topic. Carefully study all aspects, view photos of the restoration of old furniture.

Basic techniques
At the last stage of decoration at the time of restoration, they resort not only to painting compounds and varnishes. Currently, many professional designers and furniture makers like to use various techniques in this matter.

With their help, they sometimes manage to produce absolutely vintage and exclusive items from completely nondescript objects. The following are distinguished as such methods:

Painting with paints
The most accessible and simple method. In other words, painting with paints and varnishes. The color is selected according to the general background of the room in which the restored object or a certain decor element will be located.

A thin layer of paint composition is applied to the prepared surface. The work uses a stencil with a specific pattern or pattern. After drawing the contours, the stencil is removed, and the drawing is painted.


Decoupage
A simple and interesting technique that even children can do. Various shapes are cut out of fabric and paper and glued to the surface, for example, of a table. Then varnished.


Craquelure
Here there is a combination of two methods at once: decoupage and varnishing. Furniture thus trim antique. To do this, a varnish layer is applied, and left to dry completely, then craquelure varnish is applied on top.

After drying, small cracks form, very similar to antique ones. At the last stage, they can be gilded with gold paint.

Veneering
The name of this technology comes from the main material - veneer. These are thin woody sheets from different species. From them, according to preliminary measurements, elements are cut out.


Using a simple PVA clerical glue, they are glued to the surface that has been prepared and primed. A hot iron is used to smooth the surface.

Patting
This method allows you to betray old furniture nobility. The birthplace of this concept is Italy. The basis is the formation of a specific plaque, similar to the formation after the oxidation process on bronze and copper objects.


Currently, the main colors used to give the effect of wear to wooden furniture are gold, silver and copper.

Restoration items
For the most part, old sideboards, chests of drawers, cabinets, tables, high-backed chairs, stools and all other items that have a life span of decades are subject to restoration. It is not surprising that over time they become unusable. Having studied all the methods of restoration, many people come to the aid of their "dumb household"

The old sideboard is cleaned of peeling varnish, freed from all defects and, after carrying out already familiar operations, returns to a new life. Since the surface is very wide, in such work they sometimes use not only brushes of various widths, but also a roller. The main thing is to make sure that there are no all sorts of smudges and small bubbles.


Restoration of chairs and stools
Everyone knows that kitchen furniture wears out the fastest, because in this place many people like to spend most of their time. Here, unfortunately, sometimes you don’t have to wait several decades at all to understand that upholstered furniture needs repair.

And if you try hard, she can regain attractiveness. Moreover, it still performs its functions perfectly.

To tidy up a stool with a soft seat, you must very carefully remove the upholstery from it. If the upholstery of the furniture is good enough, then you can leave it and, having acted as already described above (protect all elements of the stool that are not subject to restoration), proceed to restore the legs.


In the event that the old fabric or leather of the seat is no longer suitable for use, patterns are cut out of them in similar sizes. Also, a piece of foam rubber is cut to the size of the seat, which is then attached to it with small nails.

At the end, the furniture is reupholstered with either fabric or leather. The result is an updated kitchen and, most importantly, at no cost.

Photo of the restoration process of old furniture