Joining boards in quarters. How to splice rafters along the length: analysis of options and technological rules. Miter corner connections
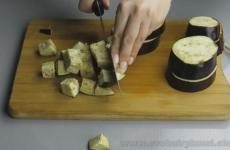
Splicing boards is not easy to do; a bunch of boards are put together so that the panel looks like one whole and flat board. The color must match, the wood structure of one bar must merge in structure with another bar, the joints of the bars must be almost invisible. If the panel looks like a set of blanks, it attracts attention and worsens the appearance of the entire product. And that's only half the battle. While there are a number of difficulties in the manufacture of laminated wood, a wide piece of workpiece, not The best decision. With humidity changes external environment a wide piece of wood can take the shape of a bowl or bow. Glued solids can also become deformed, but if the bars are selected and glued properly, this can be avoided.
Selection and selection of blanks for joining boards.
The very first step is choosing wood. Selection and selection of boards into panels have important, choosing a straight and even board makes the gluing process much easier; in any case, the workpieces have minor flaws that are not difficult to eliminate. Do not use a twisted board, as it will continue to be subject to deformation in the future. After selecting the lumber, I lay out the boards as they will be arranged in the array.
APPEARANCE.
First, selecting the colors in each piece, move and turn them over until the wood grain patterns match. The straight structure must work next to the straight fibers. The curved grain of the wood should blend with the curved grain of the wood.
FIBER DIRECTION.
Before gluing the array, the workpieces must be leveled using a grinder, jointer or manually with a plane. Determine the direction of the wood grain by looking at the edge of the board joint, see fig. 1, selecting a wood structure with smooth curves, as well as straight ones, also gives a beautiful result. Advice: Draw an arrow on each board in the direction of the grain, see fig. 1. This will be a pointer on the board later on.
FIBERS FROM THE END OF THE BOARD.
A CIRCULAR SAW.
If you don't have a jointer, you can prepare the joining edges circular saw, see fig. 6. Make a parallel straight board, then make a pass of the board on a circular saw using only half the thickness and height saw blade, see fig. 6a. This method does not cause arson and gives clean, smooth edges... 
STICKING.
There is no need to take any risks when gluing, at this point a lot of time and energy has been invested in selecting and preparing the splice boards for the solid. So, to make sure there are no surprises, assemble the panel dry before gluing. When preparing the glue, make sure it has good viscosity.
APPLYING GLUE. Some craftsmen apply glue only to one edge of each board. This is quick, but not practical, applying glue to two edges will remove air during gluing and fill all the pores. Note:
If the coated surface does not look glossy, then the glue has been absorbed into the wood and needs to be added.
REMOVING EXCESS GLUE. Many people suggest removing excess glue with a damp cloth. Do not rush to do this; removing the glue will open the joining seam in the bars and break the seal at the joint. Leave the panel for several hours or even overnight, by which time the glue will dry and can be scraped off. 
SCREAD.
When assembling the array, I use clamps from 3/4″ pipe to level, apply pressure and prevent the formation of a cup, see fig. 7.Note: metal pipes can leaving rust stain on wood. Add duct tape spacers under each clamp to prevent this from happening.
ALIGN THE PANEL.
There are two ways to level the panel. If in the middle of the array the joint of the board bulges up, take a hammer and wooden spacer, lightly tap with a hammer through the gasket on the array, see fig. 8. The boards are heaving downwards, place spacer bars along the edges of the array and clamp them together with the panel with clamps, see fig. 9. (Note: Be sure to use wooden spacers under the clamps to prevent the clamps from leaving dents.)
All photos from the article
In this article we will review what options are available for joining wood products. And such ways a great many, from a simple butt connection to the most complex connection " dovetail" It is important to remember that not all of them can be done independently, but the information below will definitely not be superfluous.

Reliable coupling is the key to strength and reliability for any design
We list the valid options
All of them are distinguished by their strength and complexity, for example, the cabinet body is assembled with a seam or butt joint, less often they use a “grooved” or “mitered” combination. But for production door frame or the panel will benefit from tenoning skills.
Connection methods are listed below wooden parts.
Butt connection of parts
Butt registration is called securing the edges. For this purpose, fasteners and glue are usually used. But the butt joint is not very reliable, so it needs to be strengthened, which is not so difficult to do.

It is advisable to strengthen the butt joint metal fastening: corners and screws
This method is usually used when assembling the front frame of a cabinet, where strength does not play an important role, since the frame parts are securely attached to the cabinet itself. Compound wooden structures“Butt joints” are usually reinforced with lamellas or dowels, which are able to align the individual parts during gluing.
Fastening parts “in a mustache”
This combination has some differences from the previous one. When gluing the surface, the parts are beveled at an angle of 45° relative to the axis. The miter connection of wooden parts also needs to be strengthened using additional fasteners.
For your information! Typically, this method of combining is used when it is necessary to connect two pieces of molding in a corner.
Strengthening the connection of wood parts
As mentioned above, it can be strengthened using ordinary wooden dowels. Dowel reinforcements are usually made using two dowels glued into one and the other end of the crossbar, into vertical posts, and into their corresponding sockets. There are specific instructions for making such connections:
We mark the sockets for the dowels:
- For clear markings, it is necessary to attach the parts to be fastened to each other.
- Draw a line with a pencil, marking the places for the dowels.

- Continue the line to the edge of each piece using a square.
- Drill out the sockets for the dowels:
- In order for the nest to be located exactly in the middle of the wooden part, it is necessary to use a drilling jig.
- To make the socket of the required depth, it is necessary to use a coupling for the stopper.
Advice! If you don't have a locking sleeve, you can replace it by placing a small piece of tape over the drill.
- Collecting details:
- It is necessary to apply glue to the dowel and insert it into the corresponding slot of the first part.
- We connect the parts together.
- We clamp it.
- Leave for a while to let the glue dry.
Strengthening the connection using lamellas
If we compare the types of connections of wooden structures, the lamellar connection certainly wins. Although the price of such connections will be a little higher, they are very easy and convenient to work with.
Lamels are compressed wood in the form of flattened balls. The nests for such balls are cut out using a special lamellar machine. This results in a perfectly shaped hole. And due to the fact that the lamellas are slightly shorter than the socket, the alignment of parts when gluing is more accurate. It is very uncomfortable.
Nowadays, furniture made with your own hands from natural and environmentally friendly fittings is in great demand. To obtain such accessories, they often use furniture board. It is much more beautiful and practical than analogues such as MDF and chipboard, and has a number of advantages over them.
Beginners in furniture making often do not know where to buy furniture panels that suit them. Samples sold in stores are not always suitable for the planned design. And here experienced craftsmen always have on hand wooden boards. With their help, you can easily create a furniture panel yourself if you know the manufacturing technology.
To do this you will need glue, a lot of tools and knowledge of step-by-step instructions.
How to glue wooden boards into a board
To get it right glue furniture board, first you need to acquire special equipment:
- Planing machine;
- Circular Saw;
- Hammer;
- Thicknesser for drawing marking lines;
- Long ruler, tape measure and pencil;
- Clamps or homemade tools for tightening boards;
- Surface grinding and tape machine for stripping wood. Instead, you can use sandpaper, screwing the wood onto the block, but cleaning will take more time;
- Electric planer;
- Wooden boards.
- Glue.
To successfully glue boards, it is important to choose high-quality and reliable glue:
- Isofix G818. Professional wood glue made on the basis of polyvinyl acetate. It does not contain solvents, is characterized by high moisture resistance and powerful fixation, and is used for interior and exterior work, gluing any type of wood. Becomes transparent after drying. Product cost: 232 rubles per 500 ml package.
- Joiner or Moment Super PVA. Heat-resistant, quick-setting and high-strength adhesive designed for gluing all types of wood, chipboard, MTF, DVM, veneer, plywood, fittings and laminate. After drying it becomes transparent. Cost: 330 rubles per 750 ml package.
Instructions - how to glue a shield without clamps and clamps
Once you have all the equipment, tools and suitable glue ready, start gluing the shield. This process consists of several stages.
Preparing the boards
The wood for making shields must be of the same type.
Types of wood that are used to make furniture panels:
- Birch;
- Pine;
- Clear;
- Larch;
- Aspen.
The wood must be dry, smooth and free of knots. Best buy finished timber and saw it at right angles into pieces required sizes. If there are any unevenness on the bars, use a planer.
The thickness of the boards should be several millimeters greater than the final parameters of the shield, since after gluing and drying they will need to be refined by sanding. To do this, select a workpiece with a width to thickness ratio of 3:1. The boards should be no wider than 15 centimeters so that excessive stress does not arise in them during drying.
Preparation for gluing
Before connecting all the boards, they must first be adjusted so that you get a beautiful shield:
- Build flat surface, so that it is convenient to glue the shield from the boards. For this, it is best to use a chipboard sheet;
- Attach the strips to the two edges of the chipboard, adjust their height in accordance with the height of the workpieces;
- Place the boards between the planks so that they fit snugly together. If there are gaps, remove them with a jointer. Carefully examine the wood grain of each specimen. The lines of adjacent blanks should connect smoothly and then the shield will turn out beautiful. To adjust the lines, move the boards along the length;
- After placing the blanks on the chipboard sheet, mark them or mark them with figures so that you can quickly put the board back together.
Gluing process
Once you have adjusted the boards, glue them together one by one.
- Cover the surface to be glued completely with glue. It is important not to apply too much glue, otherwise it will cover the seams. But do not neglect the glue - its deficiency will negatively affect the strength of the shield;
- Press the greased boards firmly one to the other;
- Attach two more planks perpendicular to the two planks located on both sides of the chipboard and secure them with self-tapping screws. This will avoid bending of the furniture board when gluing;
- To increase the adhesion of the bars, use wedges. Press the boards until the first drops of glue appear on their surface;
- Let the shield dry for about an hour. Then remove it from the surface chipboard sheet. Do not touch the material for another day.
VIDEO INSTRUCTION
Final stage
As soon as the homemade furniture board dries, the wood must be sanded, planed and traces of glue removed.
This will give you a smooth and even surface:
- Place in grinder coarse sandpaper for preliminary sanding;
- Then treat the surface of the shield with a surface grinder;
- If you notice lint, you can get rid of it with a small amount of water. Pour it onto the surface of the furniture board and wait until it dries. After this, the fluff will rise and can be easily removed with sanding equipment.
By following these instructions, you will create a high-quality furniture board that will become an excellent basis for the construction of bedside tables, tables, shelves and many other items for your home.

Wood is widely used in various areas human economic and household activities. Wooden structures are especially widely used in construction. However, any wooden structures consist of individual parts that must be joined together in one way or another.
There are several types of connections. But you need to learn one rule: before starting work, you need to carefully mark the future cuts and always follow the markings. In the final product, the parts must fit accurately and tightly.
Methods for connecting boards and bars of short length: 1 - “end-to-end” (butt); 2 - “groove and tongue”; 3 - “on the mustache”; 4, 6 - “toothed” adhesive; 5 - “half-tree”; 7 - “on the rail”; 8 - “straight lock” with overhead lock; 9 - “oblique lock” overhead; 10 - “straight” and “oblique” tension locks.
The simplest and relatively weakest connection is the “butt” connection. For this connection, the ends of the parts to be fastened are made clearly rectangular, and the ends are processed with a plane.
The miter joint is similar to the butt joint, but here the ends of the parts are beveled at an angle of 45°. For precise marking, a device called a yarunok is used. This connection is reinforced with a plywood overlay or a metal square. Strengthen the miter connection by fastening with inside square or triangular beam.
More durable connections include “overlay” connections by making cuts. If the parts to be joined are of the same thickness, then cuts are made on both parts to half their thickness. In the case where one part is thicker than the other, the cut is made only in the thicker part. To enhance strength, the parts are glued together and additionally secured with wooden dowels or screws.
If it is necessary to obtain a T-shaped connection, use a “half-tree” overlay. In this case, both parts are cut off if they are the same thickness, or a thicker part is cut off if the thickness of the elements being fastened is different.

The strongest connections that have come down to the present time from ancient times are those with through tenons, with two inserted round tenons, and with the method of middle knitting with a single tenon. Parts connected by a straight through tenon are additionally secured with dowels and glued together. To make a connection on two round insert tenons, use a template made of plywood or thick cardboard to accurately drill holes for the tenons. Middle knitting with a single tenon can be blind, if you need to hide the end of the tenon on the front side, and through, which is much stronger than blind.

For box joints, tenon joints with straight and oblique (“dovetail”) tenons are used. Despite the higher labor intensity, the connection with oblique tenons is more durable and reliable.
For reliability, all connections can be strengthened with dowels, gluing, nails, screws, bolts and a combination of these methods for strengthening joints.
The dowel is made in the form of a wooden rod with slightly pointed ends from hardwood. If the product will subsequently be painted or varnished, then the outer end of the dowel is recessed and puttied or a blind hole is drilled for the dowel.

Before gluing, the parts are thoroughly dried, the surface is cleaned of dirt, grease and oil stains, dust and roughened with a rasp for better adhesion. Moreover, parts made of hard wood are glued more liquid composition, and soft wood is denser because it absorbs moisture much better. The surfaces to be glued must be thoroughly coated with glue, which will significantly increase the strength of the joint. The glue layer should not be too thick or too thin. This will significantly degrade the quality of the connection. The glue is applied in a uniform, dense layer without breaks. For reliable bonding, the product must be left for at least a day before being subjected to further processing.
Carpenter's or casein glue is used for gluing. Wood glue is not waterproof and high humidity finished products may come apart. Therefore, it is recommended to use casein glue, which does not have this drawback. In addition, casein glue is somewhat cheaper, and in terms of bonding strength it is slightly superior to carpentry glue.

To achieve special strength, the joints of wooden structures are reinforced with nails, screws and bolts. The length of the nail or screw is selected 3–5 mm shorter than the total thickness of the parts being connected, and when connecting parts of different thicknesses, the length of the fastening hardware should be 2–4 times greater than the thickness of the thinnest part.
It should be borne in mind that screws and nails screwed or driven across the grain hold parts better.
The part of the bolt that extends beyond the parts being connected should be slightly larger than the thickness of the nut. Washers are placed under the bolt heads to protect the wood from crushing. The slots of the screw heads are parallel wood fibers. It is advisable to place the slots of all screws on the same straight line or parallel to each other. Before screwing in thin screws or driving in thin nails, it is recommended to make signal holes with a smaller diameter.

Connections with screws are considered the most durable. You need to be careful to prevent the wood from splitting. For this purpose, do not drive or drive screws and nails close to the edge or to each other.
Reliability and aesthetics complex structures made of wood largely depends on the right choice way to connect it components. This is especially true for frame products and load-bearing structures, where safety parameters come to the fore.
High-quality connection of wooden parts is the key to durability, the basis for an attractive appearance of the product, an indicator of the skill and professionalism of the carpenter and joiner.
Selecting the type of connection
In general, there are a huge number of types of joints of wooden blanks, so we can only talk about some of them, the most common.
One of the most simple ways to build up a wooden part (timber, log, board), to increase its width is an end connection. There are several options for its implementation. A simple and functional half-thickness (half-tree) method is often used. Depending on the expected load on the part, the cut can be straight or oblique. In some cases, the joint is strengthened using figured cutouts - locks. This type connection prevents stretching, twisting, bending. This is how the beams are spliced together for the purpose of lengthening.
Creating volumetric frames or wooden frames requires reliable connections at various angles. In this case, it is rational to use a tenon-groove or tenon-eye connection. The nodes at the junction of parts can withstand displacement, bending and compression loads. If designs are needed high durability for tearing, the cutouts are made trapezoidal.
Additional connections of frame products, which impart rigidity to the structure, are implemented using T-shaped or cross-shaped connections. The main load at the joints is compression, displacement and rupture. In special cases, the structure is further strengthened metal corners, screws or nails.
To connect boards together into box-shaped structures at right angles, it is convenient to use a special box groove. As the name implies, this method is often used to create three-dimensional structures, including furniture boxes. A high-quality box joint looks monolithic, has an attractive appearance and can withstand impressive loads. While creating wooden furniture the connection is often used on dowels, dowels and dominoes (when the groove has an oblong shape, as opposed to a round dowel).
Tenon joint (tenon and groove)
The simplest and one of the most reliable is the tongue-and-groove connection. It is widely used in carpentry. In a similar way, wooden parts of window frames are assembled into a single whole, a wide variety of cabinet furniture parts and plywood sheets are made. The essence this method consists in making a tenon at the end of one part being connected, which is inserted into the groove of another part and fixed in it.
For work it is convenient to use a special lamellar router; in the absence of one, you can get by with a simple hand tools. You will need:
- hand saw with fine teeth;
- electric or hand drill;
- several chisels of different widths;
- sandpaper;
- measuring tool, square and pencil.
First, the blanks are marked. The parameters of the tenon and groove depend on the parameters of the wooden parts and the configuration of the product, however, it is worth considering several general recommendations.
Important! The thickness of the tenon should be approximately a third of the thickness of the part, the width should be 70-80% of the width, the length should be equal to the thickness of the workpiece being joined.
The groove parameters must also meet these criteria. In any case, it is important to ensure that the dimensions of the tenon and groove match. The parts should connect easily, without pressure, but not fall out under their own weight. There should be no backlash, cracks or distortion.
The groove is cut out first, this sequence is due to the fact that the tenon is much easier to fit into the groove than vice versa. Cuts are made using a saw, excess wood is removed using a drill, the bottom of the groove and the walls are leveled with chisels.
In most cases, only wood glue is enough to fix the parts; screws or nails will help ensure maximum strength.
Half-tree connection
Quite often used in carpentry various options half-wood joints (simple or straight lock). This type of assembly of wooden structures is characterized by ease of manufacture and high reliability. The following varieties are distinguished:
- cross connection;
- half-tree - dovetail;
- gusset;
- on the mustache;
- half-tree splicing.
The first two methods are used to connect parts that intersect at right angles. Especially popular is the dovetail, in which the neckline is trapezoidal and the sides are not at right angles. The lock groove widens slightly from the end, providing a more reliable fixation. It should be noted that finger joint can also be called a dovetail if the spikes are cut in the form of trapezoids.
The second and third methods form a completed angle. Splicing is used if it is necessary to increase the length of the workpiece.
How to make a cross connection
One of the simplest is the cross connection. It is easy to manufacture; even a novice carpenter can master its intricacies. The work is performed in the following order:
- markings are made. The parts to be connected are placed on top of each other. Using a ruler, draw a cutting line. Thickness markings are applied using a thickness gauge;
- the first part is clamped in a vice. Hand saw, carefully, a cut is made along the lines to the mark left by the thicknesser. The workpiece rotates. A second cut is made;
- the workpiece is removed from the vice. Using a sharp chisel and a wooden mallet, remove part of the wood between the cuts;
- the second part is processed;
- planes are leveled using sandpaper or an abrasive stone.
Now you can join wooden blanks. The connection must be tight, without backlash or gaps. If the product is one-piece, the joints are coated with wood glue, and the structure is additionally reinforced with screws.
Forming miter angles
One of the best ways creating corners of various volumetric products is a miter joint. It allows you to create monolithic structure, hide the fibers of the end, thereby providing an attractive appearance. This method is suitable for a wide variety of products, but is most often used for the manufacture of frames and cabinet furniture parts.
To create a joint, cuts are made in each of the wooden parts at an angle equal to half the angle at which the workpieces meet. Most often, this angle is right, therefore, cuts are made at 45 degrees, however, the angle can vary widely. The work is performed according to the following algorithm.
First, mark out the details. It is important not to forget that the markings are made along the long side, otherwise you may not guess with the dimensions.
On the edges that will be connected, draw a line at the required angle. Using a combination square, the markings are transferred to each side of the workpiece. Then the cut is made, for which it is better to use an electric miter saw, but you can also work with a hand tool. When working with a hacksaw, it is important to control the cutting angle; it would be useful to use a block as a guide.
The finished parts are placed next to each other, checking the accuracy of the fit. Irregularities will have to be smoothed out with a hand plane, bring the angle using sandpaper. Wood glue is applied to both surfaces, and the product is fixed using clamps. Additional strength can be achieved using nails. When working with a hammer, it is important to control the impact force so that the workpieces do not move.
Particularly important connections are strengthened with the help of bars that are glued into internal corner. A joint that will not be visible can be additionally reinforced with a metal square.
The result of quality work will be a perfect seam. If a small gap has formed, it can be hidden by straightening the adjacent wood fibers using a smooth cylindrical surface. The shaft of a regular screwdriver is suitable for this.
Spike in eye
Angle and T-joints (example: T-joint window frame) intersections are conveniently performed using the tongue-to-ridge method. In this case, the eye is made at the end of the vertical part, and the cuts for the tenon are made in its horizontal component.
The work begins with marking the eyelet. The thickness of the workpiece is divided by three. With a thin hacksaw, cuts are made to a depth equal to the width of the other workpiece. Excess wood is removed using chisels, and the walls of the eye are smoothed with sandpaper.
Mark the second workpiece. The width of the tenon should be equal to the width of the first workpiece, the thickness should be equal to the thickness of the tenon. The cuts are made hand hacksaw, carefully control the depth and angle of inclination. Remove excess with a chisel.
The final adjustment of thickness is carried out using sandpaper. The parts should connect with light force and not fall apart under their own weight.
Thorn in socket
A more complex connection is the tenon-to-socket method. It requires more skill, but is much more reliable and durable. The scope of use is the same as in the previous case, namely T-shaped joints. The difference between this method is that the tenon is made at the end of the vertical part, and a socket is cut out in the body of the horizontal part.
This is one of the most common furniture connections. There are connections with a through tenon and with a blind one. The difference is that in the first case a through socket is cut out, in the second the slot is made to a certain depth.
Features of Japanese joinery
Japanese masters have reached unprecedented heights of carpentry art. Using traditional techniques, combining Various types connections, they create precise and reliable joints without the use of nails or other fasteners. The joining of various wooden parts is carried out solely due to the force of friction.
The reliability of these connections is based on precise cutting. The perfectly matched locking lines on both mating parts allow you to create a connection with impeccable precision. Complex lock configurations require a lot of experience, knowledge and ability to use the tool, but if you want, all this can be learned.
Placing the boards together
High-quality wood is expensive, buy good board with the necessary parameters it is not always possible, and not always necessary. To make, for example, a tabletop, it is not at all necessary to look for a table-wide board; with carpentry skills, you can create the ideal wooden canvas with the necessary parameters.
There are many options for bonding. A board with a tongue and groove, the so-called lining, is widely used. It allows you to create smooth wooden surfaces of a large area. A simplified version of it is often used - a board with a quarter joint.
Joining on a smooth fugue (butt)
The simplest way that does not require additional elements. The side edges of the boards are jointed; it is better to do this in pairs, clamping both adjacent boards in a vice and processing them at the same time. This treatment will create a precise surface on which the unevenness of one board will be compensated by the unevenness of the other. Both boards are coated with glue and fixed until it hardens completely.
Bonding load-bearing elements
Lengthen (increase) the board that is part load-bearing structure possible in several ways. The simplest and most reliable is a half-timber connection followed by overlaying reinforcing strips at the junction. Non-critical areas can be reinforced with plywood.
The same method is also used to join boards at different angles. Precisely made cuts of the jointed parts make it possible to do without reinforcing linings; it is enough to secure the boards at the joint with screws.
Cutting without residue means that the stacked logs will form an even angle, their ends will not protrude beyond the boundaries of the building; a separate type of it - warm corner. Cutting with the remainder, in turn, means that a weave of protruding ends will be formed at the corners of the building. The second method is more expensive in terms of the amount of material, but the building retains heat better and is more stable.
Exist various ways connecting wooden parts, the ability to determine the optimal one for a particular type of work will significantly diversify the range of products that a master can make. The correctly chosen method will provide an attractive appearance to the product and guarantee the reliability of the three-dimensional structure.