Installing a doorway. Installing an interior door yourself, video. Unpacking the door frame
Self-assembly interior doors does not require complex steps. To solve this issue, basic knowledge and skills in the field of repair will be enough. Do-it-yourself door leaf installation saves money cash, since you do not need to pay for the work of specialists.
Preparation for work
Installation of an interior door may be required during the repair work. The procedure is not as scary as it might seem at first glance.
Required Tool
The installation of a new door is carried out in several stages. As a rule, it is necessary to remove the old canvas, and then proceed to install a new one. At the end of the work, it is required to fix the extensions (if necessary) and platbands. In the process of replacing the canvas, it may be necessary various tools both manual and electric. Depending on the type of work performed and the accessories used, their list may differ.
The list of tools for replacing the door will depend on whether the box needs to be dismantled, as well as on the selected fittings.
Table: tools for interior doors
Drawing up a work plan
To replace an interior door, you should know how to measure the opening to order or purchase a product according to the specified parameters. Correct measurement involves the removal of the following indicators:

First of all, measure the width of the door. The standard opening in most cases is designed for a door of 80 cm. The easiest way to find out this size is to measure the distance between the vertical supports near the floor using a tape measure.
To obtain more accurate indicators, the measurement should be carried out even from above and in the center.
After determining the width, you need to measure the height doorway. Approximately it is 210 cm. To find out exact value, it is necessary to determine the distance from the floor to the top of the opening. If it is planned to finish the floor, it is recommended to install a new door after laying the material on the floor. In this case, it is not necessary to take into account the thickness of the finish or adjust the door components during installation. Doorway height is measured at several points, but the main reference point is the center. Measurements are taken inside the passage.
To determine the height of the doorway, it is necessary to measure the distance from the floor to the top of the opening with a tape measure
The width of the opening is determined in a similar way, while taking into account that the door structure (loot) must be several centimeters smaller to ensure technological gaps. In order for the door to move freely, small gaps must also remain between it and the box around the perimeter.
The width of the opening is determined by the distance between the two sides of the passage
A gap of 5 mm is left between the door leaf and the hatch on all sides, and 12 mm from the bottom.
Table: dependence of the size of the canvas on the width of the doorway
An important parameter for the smooth installation of the door is the evenness of the doorway. Verticality is checked using a plumb or level. Measurements are taken in the center, left and right. Next, using a tape measure, measure the diagonals - the distances from the upper corner of each side to the opposite corner from below. They should be the same, or at least not have significant deviations.
In addition, before you start replacing interior doors, it is recommended to draw up a drawing on which to put down the measurement results. This will speed up the work.
How to choose a new door
When it comes to choosing a new door, it is sometimes difficult to make the right decision due to the variety of models. From the outside, the doors look perfect, but inside, serious flaws are possible. It's all about geometry. If the door leaf has deviations of at least 1–2 mm from the values obtained as a result of measurements, this may complicate its installation. To avoid wasting time on refinishing, it is recommended that you measure the canvas in the shop. It is also important to ensure that exactly the door from which the measurements were taken was loaded and delivered. The next step is to choose a door frame. Most often it comes with a door, but sometimes it is selected separately. The installation of the door structure can be simplified if you purchase all the elements from one manufacturer. Then it will not be necessary to customize one part for another.
Installing a door in an old box
Sometimes there are situations when you need to replace a door without a frame. To do this, you will need to remove the old door leaf, adjust the new one according to the parameters, fix the fittings and install the product in place.
Removing the old door
The hinges on which the doors are attached are different. Therefore, the dismantling of the canvas can be done in different ways. The design of the canopy has two parts, one of which is fixed on the door, the second - on the loot. Some canopies have an axle fixed inside one of the parts. If you want to dismantle a door with such hinges, install a mount or some kind of lifting device from below and, with some effort, lift it up. The work is best done with an assistant who will support the door at the right time.
If the hinges can be separated along the axis, it is enough to lift the leaf slightly to remove the door
There are other hinge options where the axle goes into both parts of the canopy and is inserted through the top. To remove the door with such elements, you will need to remove the rods. The upper part of the pin has a kind of cap, which is pryed off with a screwdriver and they try to remove the element from the loop. It is best to start the procedure from the lower canopy, which will prevent the door from falling, as a result of which it is possible to tear out part of the hinge fixed on the loot. Damage should especially be avoided if the box is in a normal condition and its operation is planned in the future. After removing the door from the opening, the fittings are dismantled from it.
To remove the door from the hinges on a separate axis, it is necessary to remove the restrictive cap and remove the axis
Fitting a new canvas
Replacing a door without a frame involves fitting a new product to the old dimensions. To do this, the new product is placed horizontally, and the old door is placed on top. Both canvases are aligned along the upper and long side, where the handle will be attached. If the new canvas has big sizes, you need to remove the excess. A line is drawn with a pencil, according to which from the new door circular saw cut off the unwanted part.
The new door is adjusted to the size of the old one, cutting off the excess parts with a circular saw.
Hardware installation
After fitting the new product, it is necessary to mark the places where the hinges will be mounted. This is done in the following order:
- We put the old canvas on top of the new one, combine them with each other and, on the end side of the new door, make pencil marks at the places where the hinges are installed.
On the door leaf, we mark the location of the hinges with a pencil
- With a construction knife we make clear lines.
Clear marking lines can be made with a sharp construction knife
- We select the recesses for the tie-in of the loops with a chisel. To do this, we put the door on the end so that the side where the canopies will be located is facing up. We set the chisel on the line and strike the handle with a hammer. The sharpened edge of the tool should enter the material by no more than 2–4 mm, depending on the thickness of the metal of the hinges. These actions remove the extra layer of wood.
The recess for the loops is cut with a chisel
- We position the hinges so that the flat part is flush with the end part of the door.
- When the part clearly enters the selected recess, we drill nests through the holes in the canopy with a small-diameter drill for the convenience of screwing fasteners.
For the convenience of screwing self-tapping screws, we pre-drill holes with a small drill
- We fix the hinges to the door with self-tapping screws, after which we try on the canvas to the opening of the door frame. By fitting, you can determine the size of the gaps and how accurately the product fits into the passage.
Hinges to the door are fixed with self-tapping screws using a screwdriver or screwdriver
Video: tie-in loops with a chisel
After installing the hinges, you can start making seats for the locking mechanism and handles:
- The location of the fittings is marked by old door. It is important that all measurements are accurate. Otherwise, the hole will have to be moved, which will spoil the look of the door. If an old locking mechanism is used, all the necessary parameters can be measured on the old door.
On the new door, we make markings for the lock according to its location on the old canvas
- We drill holes from the end with a pen drill.
From the end of the door, a hole for the lock is drilled with a pen drill
- To make holes on the main surface of the door, we use a ring-type saw of the required dimension.
On the main surface of the door, we make a hole for the lock with a hole saw
- After drilling, install and fix inner part lock with a latch, and then we mount the handles.
After drilling the holes, install the lock and handles
Installing the door in the opening
The door is raised from the floor to the required height and a piece of board of the desired thickness is placed. After that, the canopies are combined and the pins are threaded into them, first into the upper part, and then into the lower one. When using loops of a different design, the suspension of the web will occur in a different way. The work is best done with an assistant, since the axles in the hinges installed on the loot must simultaneously fall into the holes located in the counterparts on the door.
Mounting the door with a hatch
If in the process of repairing an apartment or house it was revealed that not only the canvas, but also the box needs to be replaced, then it will be necessary to dismantle the entire door set.
Removing the old box and door
To remove the old door frame, you will need the following list of tools:
- mount;
- hammer;
- axe;
- hacksaw.
To dismantle the door hatch, you will need an ax, a hammer, a hacksaw and a mount
We remove the door frame in the following sequence:
- We remove the door.
- We dismantle the platbands. To do this, we drive the ax between the frame and the cashing and wring the casing from the box.
To remove the casing, it is enough to drive an ax between it and the box.
- In the resulting gap, you can see the nail with which the casing is attached. We start the ax under it and move the casing to the maximum. We move on to the next fastener and repeat the same steps. As a result, we remove the bar. To remove the remaining platbands, we carry out the same actions.
We bring the ax under the nail and move the bar away from the box
- We dismantle the door frame. It is fastened with nails 150 mm long. If it was possible to find the place of the lower fastener, we measure 20 cm upwards from it. Otherwise, we retreat from the floor 80 cm and saw the support.
We retreat 800 mm from the floor and saw the door frame
- We insert the ax above the cut into the gap between the wall and the loot and try to move the support inside the passage. Thus, we remove the nail that holds the rack at the top.
We move the vertical part of the support above the cut point with the help of a mount
- Dismantle the remaining lower part of the support in the same way.
- Remove the top of the box. To do this, we drive an ax between wooden element and opening, then move it down.
We dismantle the upper part of the box with an ax, pushing the beam down
- With the same actions we dismantle the remaining vertical support.
Door frame assembly and installation
The door frame can be assembled from profiled timber or MDF. The assembly process is independent of the material and consists of the following steps:
- We measure the parameters of the opening. To install the box, you need to provide a gap of about 3 cm. Using the hydraulic level, we control the horizontal of the floor at the corners of the doorway.
- We trim the elements of the box with a circular saw.
Trimming of elements is carried out with a circular saw
- We mark the horizontal beam of the box, for which we install it on top of the door with a gap of 2–3 mm and make marks with a pencil.
- We put the door on its side and mark the position of the hinges. They are recommended to be installed, stepping back 200 mm from the top and bottom of the canvas. We measure this distance, attach the canopies to the marking and outline their position along the length.
We put the door on its side and mark the places where the hinges are to be installed.
- We mark the place where the loops on the loot will be located. To align the parts on the side of the door, we put a vertical frame support, measure a distance of 10 mm from below for the gap between the floor and the door itself.
To mark the position of the loop on the loot, you need to attach the element and outline it with a pencil
- We cut the elements of the box according to the marks.
- We make washed down the boards of the door frame at an angle of 45˚.
The door frame boards are sawn at an angle of 45˚
- We choose recesses for sheds with a chisel or milling cutter.
- To hide the heads of the self-tapping screws with which the loot will be fixed to the wall, we make recesses for them under the hinges. For these purposes, we use drills of a suitable diameter and make holes for sweat.
- To assemble the elements of the box with a 5 mm drill, we make holes in the right support and in the left corner of the upper bar. Holes must be drilled at an angle of 90˚ to the facing surface to ensure that the elements are pulled together when tightening the fasteners.
- We join all the details of the box with each other with self-tapping screws 40–50 mm long.
We connect the elements of the box with self-tapping screws 40-50 mm long
Video: how to assemble a door hatch
After connecting the frame elements, you can install it in the opening. To do this, perform the following steps:
- We carefully install the door frame in the passage and temporarily fix it with cardboard, which we place between the loot and the wall. With a level, we check the verticality from the side of the installation of the loops. To accurately level the door frame and adjust the gaps, wedges of wooden blocks with different angles will be required.
Wedges must be used to accurately position the box in the opening.
- We install wedges in those places where the loops will be located. Here will be installed fasteners loot. For a more reliable retention of the structure in the upper corners, we additionally hammer in a wedge. The box must be level with outer wall rooms. It is necessary to ensure that the wedging elements do not extend beyond the surface of the wall.
Wedges are installed at the hinge locations
- We fix the box through the prepared holes, while it is important that there are wedges in the fixation points that will not allow the box to deform.
- To ensure the stability of the structure, we perform partial foaming of the cracks between the wall. On the side of the lock, we use foam only in one place to fix the vertical post, since the support will still have to be moved.
To make the door frame more stable, the space between the wall is filled with mounting foam
- We fix the fittings to the door. Having placed a bar of the required thickness under the canvas, we first fasten the upper, and then the lower hinge to the door frame. We close the door and accurately expose the feigned side of the box using wedges.
Having placed a bar of the required thickness under the canvas, we first fasten the upper, and then the lower loop to the box
- We foam the gaps between the wall and the frame on each side.
To avoid swelling of the elements, it is recommended to place spacers between the vertical supports using any materials at hand.
Since door hatches are sometimes placed with a threshold, assembly of this design should also be considered. Box elements can be connected not only at an angle of 45˚, but also at 90˚. In addition, a right angle provides a more reliable connection.
Video: installing the door frame and canvas
All preliminary procedures until the moment of assembly have practically no differences from the installation of a door frame without a threshold. The rest of the process goes like this:
- We saw off a horizontal bar along a length equal to the width of the door, and add 6 mm for gaps on both sides of the box.
We saw off the horizontal part along the length, which is equal to the width of the door leaf plus 6 mm for gaps on both sides of the box
- On vertical supports, remove the protruding quarter. Also, do not forget about the gaps on both sides. To make a selection of a quarter, it is necessary to attach the upper transverse element to the end side of the vertical support and mark the width as accurately as possible. According to the mark, we saw off the protruding quarter with an electric jigsaw to a depth equal to the height of the quarter.
We remove the protruding quarter on the door leaf with an electric jigsaw
- We remove a quarter from the end side of the vertical supports with a chisel. We repeat the same procedure on all sides of the structure.
With the help of a chisel, we remove a quarter from the end side of the vertical supports
- We place all the components on a flat surface and connect the upper part. In the frame, it is recommended to pre-make holes with a small drill for self-tapping screws.
- Before assembling the threshold, we check the correctness of the dimensions and its location. For these purposes, we place the assembled frame without a threshold on a flat surface and try on the door. We mark the position of the loops, check the gaps. As long as the threshold is not set, the vertical supports can be moved slightly. Once again we measure the distance, make corrections if mistakes were made.
- We prepare seats on the door for hinges and other fittings.
We prepare seats on the door for hinges and other fittings
- We fix the threshold to the vertical supports with self-tapping screws and insert the box into the opening.
The threshold to the vertical supports is mounted on self-tapping screws
- We mount the box in the same way as in the case of installing a structure without a threshold.
Installation of extensions
If the wall is thicker than the width of the loot, door extensions are used that allow you to close the wall and visually increase the size of the door frame. To install these elements, you will need to prepare the following list:
- level;
- roulette;
- pencil;
- hacksaw or jigsaw;
- plane;
- hammer;
- sharp knife;
- polyurethane foam;
- fasteners (self-tapping screws, nails or "liquid nails");
- trim strips.
Additional strips can be installed in a groove and without a groove, so it would be logical to consider both options.
Groove installation
If it is planned to use extensions, then the frame for the door leaf is best purchased with a special slot.
The presence of a groove in the door frame will facilitate the installation of extensions
Its presence will speed up the installation process, and will also allow you to move the additional bar, which will significantly increase the installation accuracy. The process consists of the following steps:
- We proceed to the installation of the elements after fixing the door frame in the aisle. We measure the distance from the frame to the edge of the wall. Slope measurements must be carried out separately and in different places. To the resulting width, add the depth of the slot in the vertical support. The final value will determine the width of the extension.
It is convenient to take measurements with a construction square
- With an electric jigsaw, we cut the additional bar to the desired size.
Additional strips are bought with a margin in width, and an exact fit is made during the installation process
- We insert the strips into the grooves of the box.
We insert additional strips into a special groove in the loot
- The dobor, which is located horizontally on top, is laid on the side elements.
The upper dobor lies on the side at a right angle
- Use masking tape to temporarily fix the door panels.
- The voids that have formed between the extension and the wall are sealed with mounting foam. To avoid extrusion of the planks, we use spacers between them.
To prevent the extensions from being squeezed out with foam, it is necessary to install spacers
- When the foam hardens, remove everything that came out with a knife.
After the foam has hardened, all excess is removed with a knife.
Grooveless installation
If there is no special groove for extensions in the elements of the box, their fastening is carried out end-to-end. With this installation, accurate measurements are required, as well as careful fitting of the strips. We perform the installation in the following order:
- We measure the width of the slopes.
To determine the size of the extensions, it is necessary to measure the width of the slopes
- We make extensions of the desired width. If after cutting the width turned out to be slightly larger, we remove the excess with a planer.
- We paste over the cuts with an edge tape, heating the edge with an iron until the glue melts and the tape firmly sticks to the bar.
To make the edges of the nails sharp, we cut the hats with side cutters
- We put the additions in place. First, we mount the vertical element, pressing it tightly at the bottom and tapping with a hammer to insert the nail into the vertical support of the box. Then we attach the middle and upper part. It is necessary to avoid the formation of gaps between the elements and the frame.
- We put the transverse bar on top of the vertical ones, measure the right angle and nail it with a hammer to the top of the box.
Horizontal extension is installed on top of vertical elements
- We also blow out the gaps between the planks and the wall with foam.
Video: installation of door extensions
Installation of platbands
When the extensions are fixed, and the mounting foam has hardened, the platbands are mounted.
Cashiers are decorative trim doorway, which is a figured profiled overhead strips.
To install the platbands, perform the following steps:
- We measure the height of the side elements. We also add the width of the platband in the upper part to the height of the doorway.
The side bar should be above the border of the doorway by the width of the trim in the upper part
- Cut off the top of the right casing at an angle of 45˚. We do this so that the edge of the bar adjacent to the extension is shorter. At the same angle, but only in a mirror image, we saw down the left plank.
The markup of the top element is best done in place.
- We saw down the casing from both ends at an angle of 45˚.
The ends of the platband are sawn in a mirror image
- We join the cashing elements and fix them with 5-6 nails for vertical strips and 2-3 for horizontal.
It is advisable to bite off the hats of the nails to make them inconspicuous.
When using self-tapping screws as fasteners, you will need to drill holes for the cap, and after screwing them, hide the heads with decorative plugs.
When installing platbands from below, it is not necessary to leave a gap under the plinth
The lower part of the platbands rests on the floor, while there is no need to leave a gap under the plinth.
Video: how to install platbands
You can replace the interior door yourself, but it is better to do this with an assistant. Professionals for such work use a large set of tools. However, for a one-time installation, you can get by with a simple list consisting of a screwdriver, a hammer and a chisel with a level. Following step by step instructions, it will be much easier to replace the door both individually and together with the box.
Doing the installation of an interior door on your own is not a difficult job. Below is a simple step by step diagram, starting from choosing the interior door you like in the store and ending with self-installation interior doors with step by step photos.
Interior doors can be divided into several types
Producers on the market door structures offer a fairly wide range. Finished interior doors can be made of different materials. The most common types of materials are:,,.
1. fiberboard - door: the frame is made of wood and sheathed fiberboard sheets with lamination. The advantages of such doors include: low cost relative to other types, low weight, which makes it possible to deliver them from the point of sale to the house on their own, ease of installation. Given these points, they are popular among buyers, thanks to which they wide range of most commonly found in stores.
Of the minuses, one can note the low strength of the fiberboard itself, which is why the door breaks and becomes unusable quite easily, poor resistance to moisture, the door can twist. Therefore, we do not recommend its installation in bathrooms with weak ventilation, this material loves dry rooms.
2. MDF - doors that are made from this type of material are the most suitable option when choosing the ratio of quality and price. Clear advantages compared to fiberboard doors - high strength and resistance to moisture, more high level soundproofing. The cost of such a door is several times higher than doors made of fiberboard.
Photo - Models of MDF doors
3. natural wood- Interior doors made of this material are the most durable. Their price directly depends on what kind of wood was used for their production. Doors made of valuable species of wood are used for installation in rooms with the author's design, they will perfectly fit into classic interior. The width of the interior doors is selected according to the size of your opening.
Photo - Models of wooden doors
The list of interior doors by type can be supplemented with steel ones, but these types are not very popular among the general population, so they are not included in the article for a detailed description.
Come here if you are interested in and.
Types of door frames for interior doors
The right interior door should be in a reliable box for the door, because its quality will depend on how long the door will last, as well as the design of the doorway of your room. Door frames can be divided into three main types.
1. Fiberboard box. It looks pretty decent, but when choosing a box made of this material, the strength of the entire structure will be questionable. The middle of the box bar sags from its own weight, not to mention the possible deflections from the weight of the door leaf itself. Since the main components in fiberboard, to put it simply, are glue and paper, it must be borne in mind that they are very fragile and not durable. It is not recommended to hang wooden and MDF doors on them because of their heavy weight.
Photo - Fiberboard box
2. Raw wood box. The cost is at the level of fiberboard boxes, but unlike the latter, boxes made from dry profiled timber have a higher strength. Therefore, when choosing between fiberboard boxes and raw wood boxes, we recommend choosing the latter. You also need to consider that you will need additional materials for the final finishing of the box.
Photo - Raw wooden box
3. Laminated wood box. It does not require final finishing, as it is already laminated with paper. And there's one here important point, when choosing such a box, the quality of lamination is very important. If thin paper was used for this, there is a high probability of scuffs, scratches, cracks, the coating loses its appearance. Perhaps a better option would be a box made of untreated wood with an independent finishing and painting.
Photo - Laminated wooden box
Also, the entire doorway of an interior door may require additional processing after door installation. Everything will whistle from your opening, its size, the location of the door in it, the interior of the room.
For such processing, you can use an additional bar and platbands. Required kits can be purchased at the store. We recommend that you decide on their need after the final installation of the door in order to understand which one final finishing you need. After all, the purchase additional materials These are additional costs that may not be necessary in the end.
An example door is considered with a fiberboard frame. If you need to install wooden boxes, you need to work on the same steps. Installation will be easier, as wood is stronger than fiberboard.
Step 1. Choice tools and necessary additional consumables. For installation you will need:
- saw;
- electric drill ();
- drills 3 mm and 4 mm for wood;
- drills 4 mm and 6 mm for concrete;
- screwdriver;
- roulette;
- pen;
- wood screws;
- dowels quick installation;
- mounting foam.
Step 2. We determine the scheme for fixing the box in the doorway of the interior door.
Photo - Scheme of fixing the door frame in the opening
The figure shows the scheme of fixing the door frame in the opening. As you can see, the interior door (2) is installed in the box (1), which is fixed in the opening with screws (3). Blow foam between the wall and the box (4). The process is as follows: we install the box in the opening, fix it to the wall, foam it.
Photo - Disassembled door frame and door before installation
If, after installing the door, its threshold cannot be hidden in the floor, for convenience, choose a box without a U-shaped threshold. It does not have a lower crossbar, so you will simply have nothing to interfere with walking.
Step 3. Assembling the door frame.
Photo - The door frame must be assembled for ease of installation
Loops must be attached to the purchased box. The door should have a cutout for the handle, as well as for door lock interior door. We begin assembling the door frame. It is necessary to connect all the parts of the box together and fit the size of the opening. The factory length usually comes with a margin of 5 cm.
The surest option not to make a mistake is to assemble the parts on the floor the way they should be in the doorway. Special attention needs to be addressed to metal bases hinges, they should stick up so that they can hang the door from above.
Choose the opening side depending on the rooms between which the doors are installed. From small rooms, such as a bathroom, pantry, it is better to open the doors to the outside, from large rooms to the corridor - to the inside.
Photo - The correct position of the end strips
We join top bar for self-tapping screws. The end strips (1) must lie in line. If there is no line, then the bar lies incorrectly and needs to be deployed.
Photo - Tighten the screws after pre-drilling
Given the structure of fiberboard and the characteristics of its strength, in the box, before screwing in, it is necessary to drill holes with a wood drill with a diameter of 3 mm. We carry out this action so that our box does not crack during the assembly process. For the same reason, screw fixing points should be located closer to the center, away from edges and corners.
Photo - Factory stock box
We will cut off the factory stock of the box (protruding edge). To fit the box, we accurately measure the dimensions of the doorway of the interior door. And we transfer it to the door frame, taking into account the gap minus 1-2 cm on all sides for the possibility of foaming. We recommend that you double-check yourself on the dimensions of the structure several times.
Photo - Measuring the height of the opening
Photo - Cutting line of the excess part of the box
The protruding surplus is best cut off hand saw. It is advisable not to use an automatic saw to avoid damage to the coating.
Photo - Trimming the excess with a hand saw
As a result of all the manipulations, we get a U-shaped door frame, ready for installation in the doorway of the interior door.
Photo - Wooden box assembly
Step 4. Installing the box in the opening.
We put the box in the doorway. Level up. We check the correctness and evenness of the assembly of the box by hanging the door on the hinges and closing it.
Photo - Checking the position of the box with a level
Photo - Drill diameter 4 mm for wood
The box installed in the opening must be fixed with self-tapping screws. We remove the end decorating strip and drill 7-8 through holes on each side. The distance between the holes is 25-30 cm.
Photo - Drilled box
The wood drill is not designed for drilling walls, we only drill a fiberboard box with it. After that, we again check the position of the box with the help of a level, since it could move during the drilling process. If there are no changes, start drilling the wall. Via thin drill on concrete with a diameter of 4 mm, through the holes in the box, we apply markings on the wall. It is impossible to completely drill the wall through the box, as it can be damaged. The hole diameter is 4 mm, if you make more, then the caps of the self-tapping screws will fall out. Next, we remove the box from the opening and begin to make holes with a drill with a diameter of 6 mm. If the wall is brick, the mounting holes should be in solid brick, and not in the masonry joint, in which the dowels do not hold very well.
Photo - Drilled brick wall
Photo - Dowels in solid brick
Photo - Self-tapping screws for quick installation - on the left, wood screws - on the right.
Dowels are mounted in the finished holes. We fix the box in the wall with self-tapping screws. For convenience, you can use a screwdriver or a drill with a nozzle for a self-tapping screw head. Do not screw in the screws completely, the deflection of the box is possible. In order to avoid deflection, wedge lining is possible. To check the evenness and absence of distortions, in the process of screwing in the screws, additionally check the box for level.
Photo - Lining wedges
At the end of the installation, the box is checked from the side of the room using a level.
Photo - Checking the box by level
Step 5. Installing the door on the hinges.
How to install an interior door? It is enough to put the door on the hinges
If this is a fiberboard door, given its weight, it is possible to do it alone. After its installation, we will try to open and close. In the closed position, the gaps between the box and the door should be about 3 mm.
Photo - Check for gaps between the box and the door
Photo - Closing and opening the door - easy, without distortion
The lock is inserted into the interior door. As well as installing a handle.
Step 6. Filling the seams with mounting foam.
An important step is to fill the gap between the wall and the box with foam. It must be carried out with the door installed. In the process of drying, the foam increases its volume. If you overdo it with its quantity, it can pull out the screws, bend the box and the door cannot be closed. You will have to cut everything and start the installation again.
Photo - Cardboard in the gap between the door and the box during foaming
Foaming seams is the easiest job. The vertical seam is filled from below. You need to be careful about the amount of filling. Foam is able to increase its volume when dried. Therefore, it is necessary to fill the third part of the space between the door frame and the doorway of the interior door. In case of overspending, damage to both the box and the structure as a whole is possible, since the foam can get on the front of the box and the door and spoil their appearance. Complete hardening of the mounting foam occurs within 24 hours, the required temperature is 20 degrees.
Photo - Finishing a wide opening with plaster
If a wooden door frame is installed, possible option finishes can be stucco slope (1). Cement-sand plaster will favorably emphasize your choice of doors from natural wood. But it is not recommended for fiberboard boxes, as they are not compatible with the high humidity of materials used for plastering.
Video on installing interior doors
Sent by our reader Herman.
Step-by-step installation of interior doors, not counting the preparation time, will take about three hours.
Door companies, suppliers and stores offer a wide variety of options for residential, commercial and industrial premises. Moreover, the cost of many of them is more than acceptable. However, the installation price does not always seem affordable to us, if only because there is an understanding that such a procedure can be performed independently. However, how to do it? How do you do it yourself, for example, to prepare an opening for installing an interior door? Let's try to answer these questions by offering recommendations regarding preparatory and installation work.
Advantages
We have already mentioned the cost savings with independent actions. But are there any other advantages of such a solution? Of course, if you have a high degree of responsibility and accuracy, then for sure, by following the instructions, you will be able to achieve a more accurate result than many professionals. After all, these qualities are needed, and experience is taken into account in the above recommendations. Therefore, you have everything to act.

Why do it
Consider why you need to do preparatory manipulations:
- Get the possibility of rigid fixation of the box in the opening. An unreliable option may be deformed during operation, which will cause damage to the canvas, floor or other interior elements.
- No gaps between casing and wall. Sometimes, such a gap remains, which can spoil the impression of the result. This can be caused by various factors that need to be addressed before the box is installed. Most often, you have to level the wall, at least in the door installation area.
- Attractive wall appearance. Sometimes the actual dimensions of the opening turn out to be larger than expected. This makes it necessary to supplement the space with some material. It can be mounting foam, drywall, wooden block or cement-sand mortar.
- Removing the need to cut the door in height. Sometimes, the canvas exceeds the height of the opening. In order not to cut it off (after all, this cannot be done or is associated with certain risks of spoiling the material), you can start preparing the opening by removing the excess part.

Action preparation
It is necessary to start the procedure with the preparation of funds personal protection. After all, the work will be associated with dust, dirt and solid elements, which can get into the eyes, respiratory organs, skin, hair and so on. To avoid unpleasant consequences, to protect yourself from possible injuries, it is recommended to wear:
- headdress;
- glasses;
- footwear and closed-type clothing;
- respirator.

Tools
Tools should also be prepared:
- perforator;
- grinder with a diamond disc;
- nail puller;
- hammer;
- chisel;
- roulette;
- pencil.

Dismantling
Preparation of a doorway for the installation of an interior door, as a rule, starts with the dismantling of the old one. First you need to remove the canvas. This can be done safely by unscrewing the screws holding the hinges. Next, you should remove the platbands. If there is a seal between the opening and the box, it must be removed. On all elements it is necessary to make cuts. First you need to break out the lower parts of the box, and then the upper ones. It remains to clean the opening from the remnants of the old box.

Features of preparation
- The doorway must be made larger than the box by 1-3 cm. The remaining space can be filled with mounting foam.
- The opening needs to be strengthened. The bars must be pressed so that they do not stagger, and bricks and plaster must be sealed with mortar.
- Along the entire perimeter, the depth of the opening must be constant. You may need to use putty, plaster or drywall.
- The contact of the floor coverings of the two rooms should be carried out in the middle of the canvas. Otherwise, both coatings will be visible on the one hand.
- If the opening is located near a perpendicular wall, it should be redone in advance, otherwise you will have to do more complex installation, for example, with trimming of platbands along. It is necessary to build up a wall from the side of a perpendicularly located wall, and also cut it off from the opposite one.
Process
Preparation of the opening for the installation of an interior door can be performed after determining its size. To do this, you need to measure the box. As already noted, the opening should be 1-3 cm larger.

Preparatory measures must ensure the shape, size and quality of the opening in order to perform the installation at the proper level. As a result of following all the recommendations, it should turn out that the size of the opening will be fully suitable for mounting the door. This applies to height, width and depth - all parameters must be brought to the proper level. At the same time, the required appearance must be ensured so that the interior of the room is not damaged after all actions.
Conclusion
There are no particular difficulties in preparing openings for doors, especially for those who at least once took part in the repair of the premises. As in any business, care and consistency are important here, so it is important to take into account the recommendations given, then the result will be of high quality and reliable.
What if the preparation doorways it seemed too complicated for you to install the doors, there are doubts, then you can call the experts. This solution will not require much effort from you, but money will be needed, since the work of professionals often costs a lot. However, in this case, the result will be exactly of high quality. Moreover, many provide guarantees, so the risks are minimal.
At installation of interior doors in an apartment should be carried out according to certain rules that customers should know. After all, about Mistakes in the repair and decoration of a room or apartment can seriously complicate installation and cost a pretty penny!
You will be able to reduce the cost of installation, avoid mistakes in the choice of doors and fittings, and help the craftsmen to do everything with high quality.
Door opening dimensions
- opening width
Door leaf usually 60/70/80/90 cm wide. The correct width of the opening is the width of the canvas +8 or +9 cm (if the thickness of the box in its narrowest part is from 1.5 cm to 2.5), or +10 cm (if the thickness of the box in its narrowest part is 2.5 cm and above ).
- opening height
For all occasions correct height opening is the height of the door leaf + 6 cm. from the finishing floor., i.e. 206cm. The doors to the bathroom can be 190 cm high, so the correct opening height is 196 cm.
Here are some examples of correct openings.:
- Canvas 80x200(cm) - opening 89x206(cm)
- 70x200 - opening 79x206
- 60x200 - opening 69x206
- 60x190 - opening 69x196
 The dimensions of the doorways must be determined in advance and it is very important to independently constantly monitor your team during the repair process.
Door width for different rooms
If you have the opportunity to plan the width of doors and openings in advance and have questions about what door width to choose, then follow these recommendations:
- doors in rooms are usually made 80 cm wide in order to be able to bring in / take out furniture. Width 90cm. it happens very rarely, since such canvases are heavy and can eventually sag on the hinges.
- the doors in the bathroom are usually made 60-70 cm so that washing machine 60cm thick. Keep in mind that 60cm. the door assembly has a clear opening of approximately 58cm. because of the porches in the door frame.
- the door leaf to the kitchen is usually made 70-80cm. It should also be taken into account that the handles on both sides can interfere with the passage to the kitchen.
- v dressing room usually make the width 60-70cm.
When do you need to install extensions?
When installing interior doors, if the wall thickness is greater than the thickness of the door frame, it is recommended to purchase. You can, of course, stick wallpaper on the ends of the walls, but it will look out of date, and there will be nothing to nail trim on the other side of the wall.
If installed, it will good decision, which will beautifully decorate the slopes. The color of the extensions can be chosen, for example, under the MDF panel: 
The width of standard extensions according to the warehouse program is usually 10/12/15/20 cm. If your walls are very thick (more than 20 cm), then the extensions must be spliced in width or non-standard extensions must be ordered at the factory, which will cost much more.
On which side of the door should the extensions be installed?
It depends entirely on how you planned the opening. Usually, if your door opens into a room, then the box is flush with the room wall, and the extension will be in the corridor, respectively.
If you do the opposite, the door will not open fully (it will rest against the extension). Sometimes they put up with this so that the doors look the same - ALL extensions to the corridor or all extensions to the rooms. Therefore, this is already a matter of convenience and design, taking into account the future arrangement of furniture in the apartment.
Scheme of opening interior doors
Usually, if in one corridor some of the doors will open into the corridor, and some into the rooms, the closed doors will look different due to the features of the door frame. If the doors are next to each other, and at the same time open one inward and the other outward, then the height of the upper trim will not match.
This is what the door looks like from the common corridor, which opens into the corridor, that is, towards us:  This is how the door that opens into the room looks like, that is, inside:
  It is necessary to ensure that the canvas does not cover the switch when torn off. It is highly desirable that the doors do not intersect with their trajectories. The bathroom must be provided with a 180-degree opening for quick ventilation after taking water procedures.
Make sure that a door opened 90 degrees does not block the opening of an adjacent door.
In order not to waste time coordinating the opening of doors with the masters during installation, make a diagram on a piece of paper in advance.
How high from the floor should the door be?
Standard height - 1 cm from the finished floor. As for the doors of the bathrooms, it is not recommended to do less than 1 cm so as not to disturb the air flow. If you have plastic windows, do not forget to make supply valves for air from the street so as not to increase the humidity in the apartment too much when the windows are closed.
Installation of interior doors during the repair of an apartment and the sequence of stages of work.
In order to protect the wooden parts of the doors from warping due to high humidity during repairs, it is necessary to do the installation after ALL finishing works, including the neighboring rooms.
Early installed doors may be accidentally damaged by tools during the repair process. Tile or wallpaper glue, especially plaster, dry for quite a long time, releasing moisture into the room. Humidity levels above 70% for several days increase the risk that doors will pick up moisture from the air, swell, and stop closing properly.
However, if you like to wash your bathtub or shower often, humidity is not a threat, as the bathroom is quickly ventilated.
Installation of interior doors should be done if you already have a finished floor!
Without doors, it is much easier to lay floor coverings, and then it is easier to install them, with a clear adjoining of the trim to the floor.
If you first install the box directly on the screed (main floor), then it is impossible to bring the flooring under the box, since it is already on the floor. In addition, it is difficult for the master to correctly calculate the lower clearance of the door from the subfloor, taking into account the future coating, especially if the floor has not been leveled.
If you did everything right and did the installation after laying the finished floor, it will not be difficult to replace the floor in the future - you just need to pull out the laminate or parquet from under the door pillars and slip a new coating. In this case, the racks will not fall, but will remain hanging.
What if the doorway is much higher (wider) than the box?
A common mistake of repair crews is too high openings, because the maximum height should not be higher than 208~209 cm, and 206 cm is better. from the floor covering.
Sometimes in new buildings standard opening can be 217-220cm high. This is due to the fact that many customers make underfloor heating and the height after their installation becomes standard. If no one paid attention to this during the repair, and a situation arose when the upper casing did not close the opening.
Solution: if your opening is higher than necessary, and there is no possibility to reduce the opening, glue the wallpaper lower before installing the doors, or order high capitals instead of the upper casing, but they are usually mounted from the side of the corridor. A more thorough way is to lower the height of the opening with drywall and wooden blocks and then glue the wallpaper.
Another option: if the platbands are flat, saw off at the joints at 90 degrees, and the upper platband is cut out of the wider extensions. Some customers get out of the situation this way. The disadvantage is that sometimes the additional strips are thicker than the casing, and that if you do this for all the doors in the apartment, it will look a little wild)).
If the opening is at least 2-3 cm wider than necessary from the sides, the foam joint will not have sufficient strength, and this is important, since the mounting foam helps maintain even gaps and ensures the overall resistance of the door to loads.
Solution: narrow the doorway with a wooden beam with a section of 3x5, 5x5 or at the repair stage using foam blocks and tile adhesive.
How to straighten a crooked doorway?
First you need to check the walls to the right and left of the opening for humps / depressions by attaching a long rule, an extension or a flat board to the wall. Especially often humps are found closer to the floor. Even one small hump will interfere with the tight fit of the casing to the wall.
To solve this problem, there is only one option: to plaster and level the walls. If you do not want or cannot level the walls in the entire apartment or wall, then do it only around the openings (about 50 cm wide) and paste the wallpaper.
Then you need to check the verticality of the walls using a laser or bubble level. The ends of the openings must be parallel, the walls must be even and strictly vertical. If the opening is curved, the walls are sloping, there are humps or depressions, act according to circumstances.
If you understand that the opening is a curve, and moves away from the vertical by more than 1 cm - you can level the walls with plaster according to the lighthouses, putting them on a vertical level and re-paste the wallpaper. As you already understood, this is the best and most difficult solution!
How to install a door in a curved opening?
But what if there is no way to level the wall? Suppose the wall into which the door is supposed to be installed is littered from the vertical by more than 1 cm per two meters of the height of the opening. Then you have three options:
- Install the door frame along the plane of the wall, the architraves will fit snugly against the wall, but the door will also be tilted and, probably, will close on its own, slam, etc.
- Install the box vertically in level, while the platbands fit in the upper part and move away from the wall by the amount of wall deviation from the vertical in the lower part (or vice versa), worsening the aesthetics.
- Buy a door with telescopic architraves and install it straight, deepening a little into the wall and pulling out, where necessary, the architraves from the grooves. This good decision problems, unless it is required to open the door 180 degrees, since opening the door leaf more than 100 degrees will pull out the hinges.
The choice is yours, in all cases there are minuses and there are pluses, because this is a compromise.
What if the door is close to the wall?

In such an opening, one wall is perpendicular to the other wall, and it is necessary to reduce the width of the architraves, and attach them close to the wall on both sides. But reducing the platbands in width, we still spoil the appearance of the door, see photo: 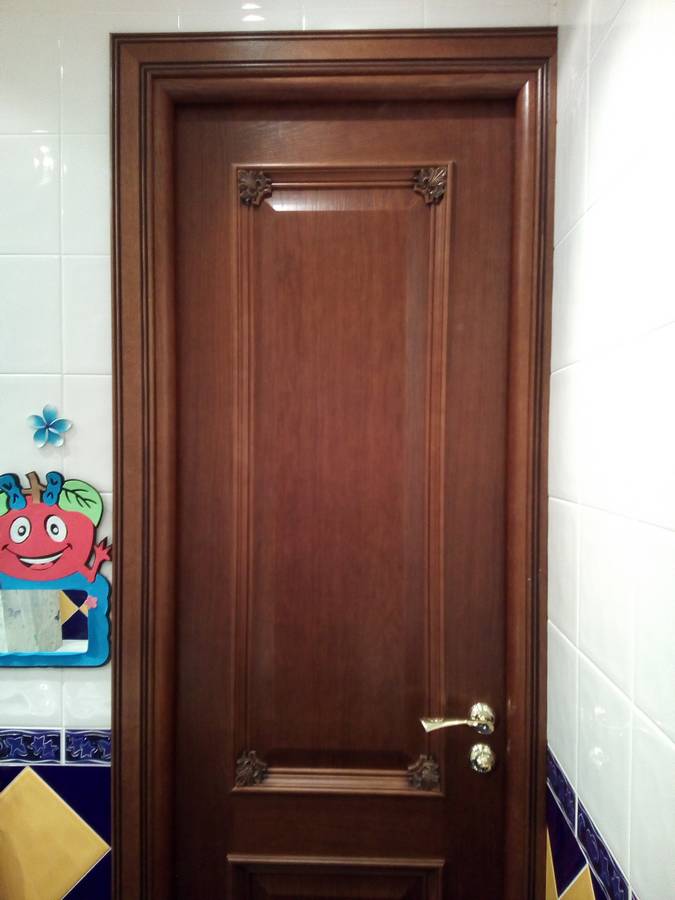 However, there are several other options for solving this problem:
- If the repair has already been made and wallpaper is glued to the walls, you can fasten a wooden bar with a section of 3x6, 3x4 or 4x4 (no more) to such a wall. It becomes possible to install a whole platband close to the wall.
- Increase the doorway at least 5 cm from the wall and cut off the same distance from the opposite wall of the opening at the repair stage. The platband will be located at a small distance from the wall, which looks much more beautiful.
- Increase the doorway at the repair stage by 5 cm on both sides and order doors 10 cm less wide, for example 70 cm. instead of 80cm..
Setting the interior threshold
The door leaf is located in the opening closer to that part of the wall where the door will open, so the threshold covering the floor joint with the door closed should be located under the door leaf and then it will not be visible when the door is closed, see photo:

A common mistake of repair teams is the wrong location of the sills! To avoid such a mistake, draw a scheme for opening all doors in advance and give it to the foreman before laying the finishing floors.
Installation of interior doors in the bathroom
For living rooms and kitchens, it is recommended to order doors 2 meters high. For bathrooms in new homes, a canvas 1 m high is often required. 90cm due to the presence of waterproofing and special high thresholds. If you missed this moment and did not order doors with a height of 190 cm, then you need to expand the opening in height or, alternatively, you can shorten the door.
If you increase the opening in height, then the upper mark of the doors to the bathroom and interior doors will be at different levels. If the door is cut from below, then the panel pattern is lowered. Therefore, sometimes it is better to order smooth doors for bathrooms.
A common mistake is the threshold to the bathroom from a wooden door frame, as aesthetics and ventilation are violated. wet room, and in the future, mold may appear.

Preparation of openings for interior doors
Mounting foam will not be able to stick if there is a lot of dust on the ends of the doorway. It is necessary to remove dust or prime the ends of the walls of the opening if they are covered with gypsum putty or if the walls are made of gypsum / aerated concrete blocks.
If there are open round cavities and voids at the end of the opening, they can be repaired with plaster, leaving marks with a pencil so that the master does not drive fasteners into them. Holes for door frame fasteners are drilled between these cavities into lintels.
If the walls of the opening are made of drywall, then in a metal profile at the vertical ends of the opening necessarily you need to lay a dry wooden block. It is needed for reliable fastening of doors to self-tapping screws through the hinges and the counterpart, and it also stiffens the walls in the area of the opening. Doors installed in openings without reinforcement are doomed to short-term operation and quickly sag.
If inside metal profile a bar is laid and the ends are not sewn up with anything, then this is not correct. Foam does not adhere well to galvanized metal. Over time, flaking is possible. To avoid this, GKL or GVL strips or plywood are screwed to the ends. Foam adhesion to these materials is excellent.
It is not allowed to leave voids between the sheets of drywall in the upper part of the opening. The fact is that the upper box is often strongly bent or bent when wedging, and to straighten it, for example, with the help of foam, a filled end of the wall is required.
Preparation of opening for sliding doors
For those who want to install sliding sliding doors opening height for standard door should be approximately 202 cm. and the width of the opening should be equal to the width of the door leaf or a couple of centimeters wider. In the process of finishing the opening with extensions and platbands under the portal, its dimensions should become smaller than the door leaf.
At a height of 207 cm. up to 212cm. there should be no voids from the floor in the opening, since a wooden bar with a section of 5x5 cm and a length of about 190 cm will be horizontally fixed here, to which an aluminum top rail with rollers will be attached.
Finishing the doorway (portal) in the apartment
If you do not want to install an interior door, you can install a portal instead. This solution increases the space in small apartment, so this is a win-win option for visually combining adjacent rooms: a hall and a living room, a corridor and a dining room, a living room and a small kitchen. A doorway without the usual door surprisingly transforms the room: 
Preparing the floor before installing doors
A common mistake of repair teams when laying floor coverings is when the gap between the floor covering and the wall in the area of the platbands exceeds the thickness of the platband. And you just need to remember to make it no more than 3 mm. in the area of platbands.

A recess (strobe) can be made in the wall near the floor to compensate for possible expansions of the floor covering.
Storing doors after purchase
To prevent deformation under the influence of gravity, the canvas, boxed timber and trim must be stored on a flat surface before installation. Doors can be placed on their side against the wall.
Doors, architraves and boxes can change their dimensions after changes in humidity. Due to the set of humidity after the cold in the warmth, before installation, it is necessary to store the door and the moldings indoors for several days. Do not remove the packaging from the doors in advance until the temperatures have completely equalized.
Which loops to choose?
- If the canvas weighs up to 20 kg., Then it is optimal to buy 2 loops of 10 cm high.
- If the canvas weighs from 20 to 30 kg., Then you need to buy 2 loops of 12-12.5 cm. tall
- If the canvas weighs more than 30 kg, then you need to buy 3 loops of 10 cm. tall
The hinges are hung at a distance of 20 cm from the top and bottom of the door leaf. The thickness of the metal and the absence of backlash are very important. If the thickness of the hinge metal is 3 mm, then these are good hinges, a thickness of 2-2.5 mm is much more common. It is very good if the hinges are made of brass, steel. Most common door hinges there are several types:
- universal hinges - these are traditional, mortise loops familiar to all of us. If the choice of hinges is not a fundamental point, buy universal hinges. They can open both to the right and to the left. In addition, universal loops have longer term services.
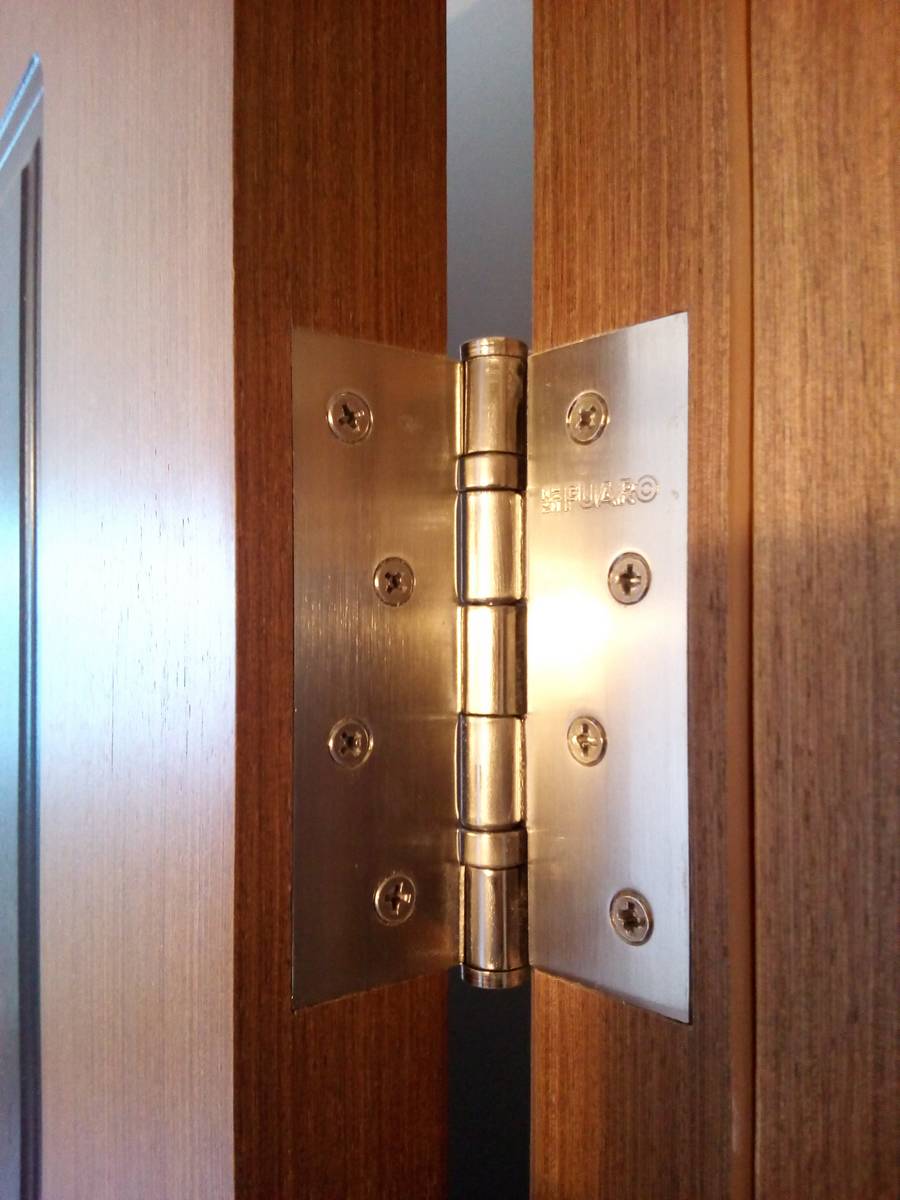
- - not mortise, overhead loops. Easy and simple to install. They got their name for a special unusual design - both of its elements in the open state resemble butterfly wings. In the process of closing the door leaf, one part of the hinge easily enters the other, forming a single whole. Usually such hinges are placed on lightweight doors.
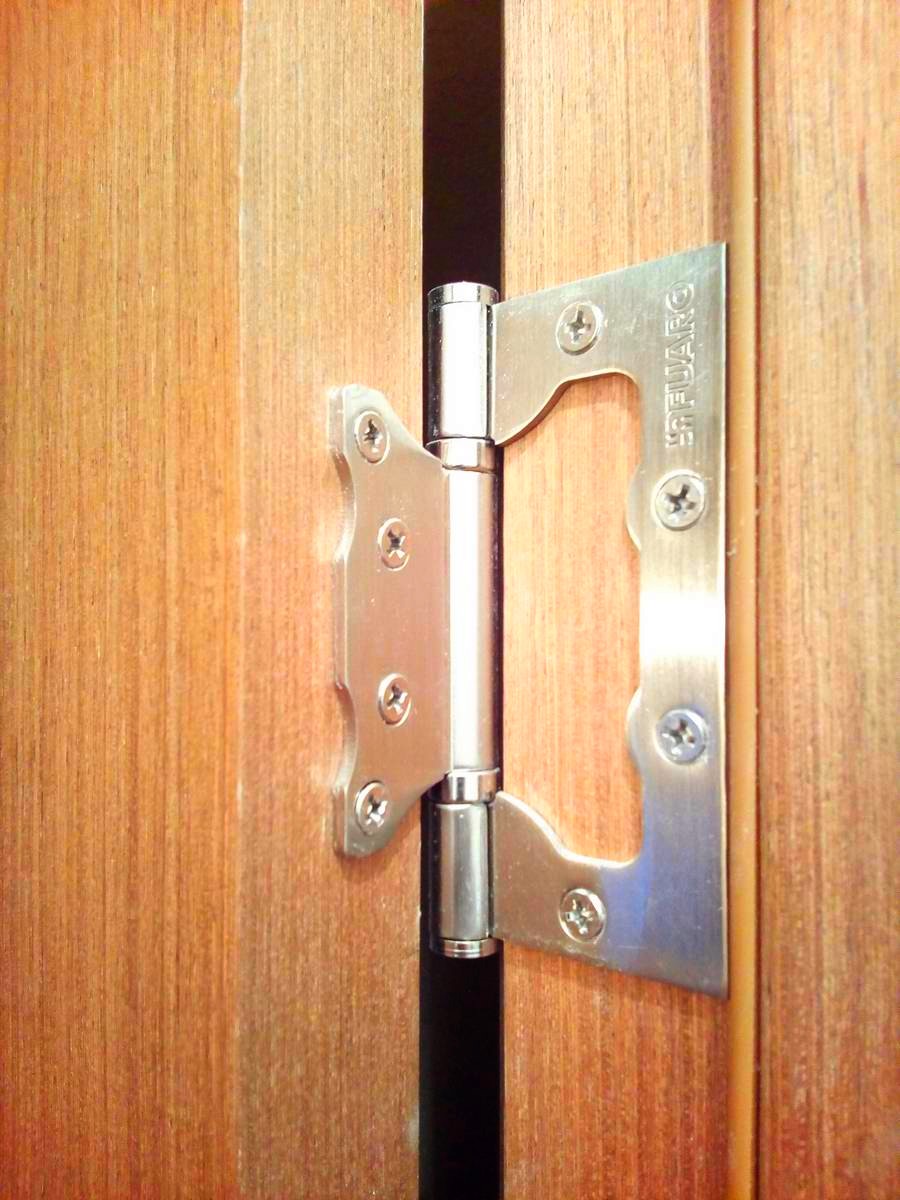
- - mortise hinges proven by time, the door with such hinges is simply removed if it opens 180 degrees. There are right and left depending on the opening of the door

How to choose locks and latches?
Locks and latches are best chosen based on the quietest operation of the mechanisms when opening and closing and their reliability. Magnetic locks are quiet, but not all, they need to be bought more expensive and preferably Italian, there are very quality options. Do not save on them, so as not to suffer later.

Cheap latches with plastic tabs are not always of high quality, here you must first ask around with knowledgeable people (not sellers), and not buy too suspicious options. It will work quietly for six months, and then it will suddenly start to rattle. Sometimes such cheap magnetic locks and latches do not work immediately after installation. Door installers are well aware of these models.
You can buy classic latches / locks. It is best to choose them with plastic reeds, as they are the quietest in operation and do not clang like metal ones.

Sometimes it happens that the new latch works hard. In this case, put a couple of drops of silicone grease on the lock tongue.
Door handle height from floor
For Europe - 95 cm. Many symmetrical doors are now being produced, in which the handle according to the design of the door should be located strictly in the middle of the leaf. Therefore, the standard handle height for Russia is 1 meter.
Almost all models door handles too long self-tapping screws are included in the kit, which, when screwed into the door, can jam the lock or lead to its unstable operation. Door installers almost always screw on the handles with their self-tapping screws.
How to choose the right master for installing an interior door and check the quality of his work?
 How to do right choice so as not to be left with hopelessly damaged doors? Will the work be done with high quality if the door installer is in doubt? Let's first find out how best to check the work of the wizard and analyze everything point by point.
How to check the work of the door installation wizard?
- Look at the quality of tie-in locks, joints of the box and trim, tie-in loops. The cracks must be absent.
- The tongue of the lock must fit into the striker without play.
- The canvas should fit evenly along the entire length to the porch or rubber seal. When closing the door, the elastic should not be jammed with the canvas
- The gaps between the door and the box must be even along the entire length.
- The box is fixed in the opening not only on construction foam, but also with fasteners
- The canvas should not close or open on its own.
- Hardware must rotate freely.
- The price may rise only because of the increased volume of work that cannot be foreseen in advance.
How to choose a door installer? Basic ways.
1. The master must narrowly specialize in installing doors! It is necessary to watch or see the work live (with friends in the apartment). The foreman or team must have at least 1 year of experience and give sawing table or manual Circular Saw, milling cutters, screwdriver, drill, puncher, hairpin gun with compressor, templates for accessories, etc. Read
The correct doorway will save you from problems when installing doors, save time and nerves, and provide the door with an impeccable appearance. V this material 5 problems will be described that may arise with an improperly prepared doorway.
After the doors are installed, you find:
Problem #1: Doors open less than 90 degrees and there is a danger of hitting the side of the door handle
This situation occurs if the doorway is adjacent to the wall and the doors open onto this wall. As you can see in the picture, the doors do not open fully. In such a situation, if we go straight, we can easily tear the clothes, catching on the handle, or hit sideways on this handle in a hurry.
But even if you install doors with opening in the other direction, where there is no wall, then the corner of the junction with the wall will still look chopped off. The side architraves will not be symmetrical. the platband near the wall will have to be sawn along to narrow it so that it fits.
Therefore, if you yourself form a doorway in the wall, then it must be independent, i.e. do not adjoin the wall, but retreat from it by at least 100 mm. A hinged interior door in this case, when the door is opened towards the wall, it will swing open more than 95 degrees
Problem number 2: The purchased door does not fit into the doorway either in height or in width

The buyer often has two questions: The doorway is, for example, 900 mm wide, what width will the door leaf fit? The door leaf is 800 mm wide, how wide should the doorway be?
The difference between the leaf and the doorway should be 80-100 mm wide and 60-80 mm high from the finished floor. In the instructions for self measurement doorways, all possible situations of doorway sizes are described in detail.
Problem #3: The platbands don't fit snugly against the wall.

The wall at the doorway should be vertically flat. If the wall is tilted or curved, then there will be a gap between the platbands and the wall, since the platbands are attached to the door frame, which must be installed exactly vertically, otherwise the doors will close or open by themselves from tilt.
If you or your employees leveled the walls during the repair, then you need to check the correctness of the work done near the doorways. The evenness of the walls is most important in those places where something will adjoin them.
Problem #4: Gap in the floor between trim and laminate