How to plaster walls yourself. How to plaster walls - we know the theory, we move on to practice. Approximate prices for plastering work
Qualitatively prepared walls for further repair are a guarantee that in the future any coating will fall on them perfectly evenly and beautifully. Therefore, do not neglect such a type of work as do-it-yourself wall plastering, even if you decide to change the interior not in new apartment, but in the house in which you live for a long time. How to choose the right material, and what should be the sequence of work - we will understand further.
How to choose the type of plaster
To begin with, it is worth deciding what type of plaster to choose - the so-called dry or wet. Wall cladding will be dry gypsum boards which will save some time. However, this type of work is beneficial only for rooms with a large area, since in the conditions of small apartments, drywall slabs will significantly “hide” the area.
Plastering walls in an apartment in a “wet” way involves applying various building mixtures to the surface. It is also worth considering one important point- what material are the walls of the renovated premises made of and where are we going to plaster - outside or inside the building. Let's take a closer look at the examples.
Brickwork walls
- For masonry walls, cement-based mixtures are best suited, in some cases with the addition of lime in small volumes, which gives the plaster greater plasticity. It makes sense to add some lime when plastering walls with cement mortar outside the building or in rooms where there is or is expected to be high humidity.
- The thickness of the plaster for bricks should not exceed 3 cm, in cases where a layer of more than 2 cm is supposed to be applied. It is necessary to cover the walls with a layer of chain-link mesh before applying the cement mixture, which will keep the heavy dried mixture on the surface.
- We knead the cement mixture as follows - mix clean sand and dry cement and dilute with water to a thick consistency. If we decide to add a lime component, sand will be added in slightly larger proportions, and an aqueous lime mortar will be added to the composition of the finished cement-sand mortar.
- An important point - if our brickwork of the walls consists of facing bricks, the work will be difficult due to the fact that this material has too smooth surface and it will be difficult to keep heavy cement mixtures on it, even with the use of a chain-link mesh. In such a situation, it is better to choose special compositions or entrust the work to persons with the appropriate qualifications who know how to apply the technology of applying plaster to difficult surfaces. ordinary person surfaces and know what materials for wall treatment to choose.

concrete walls
If the surface of the walls of the room consists of concrete, then before applying the plaster it must be primed with a special solution. It is advisable to choose a primer with the addition of quartz particles, they will ensure reliable adhesion of the wall material to the future plaster mixture.
For concrete surfaces, wall plastering with gypsum plaster is suitable - the case when gypsum powder is added to the cement mixture, or a mortar based on a mixture of gypsum and lime.
An important addition is that lime, gypsum and cement mixtures are prepared separately and only then mixed to a homogeneous and thick consistency.
Walls made of concrete blocks
Modern houses and buildings are most often Lately, are built precisely using foam concrete blocks. Such surfaces must not only be primed before the plastering process, but also apply a special reinforcing mesh - "sickle", made of special fiberglass.
solution for making plaster mixture both gypsum and cement can be used, and with the addition of a lime mixture. In any case, you should carefully study the instructions for all components and do not neglect the quality of the selected materials.
The key to the durability of walls is not only in the right materials for their manufacture, but also in well-chosen mixtures for their processing.

wooden walls
If you decide to plaster walls made of wood, then before applying the plaster mixture, it is necessary to make and fix a special mesh (shingles) of wooden slats on all treated surfaces. The shingles in a mesh form are gradually stuffed onto the wall, an important point is that the nails are not driven in to the end, half of the nail, together with the cap, is bent to the side.
Another preparation option wooden walls- installation of specially reinforcing metal mesh and its fixing on the surface of the walls before applying the plaster mixture.
Preparation of the repaired premises
After we decided on the type of walls, we chose and purchased all the necessary Construction Materials- We begin to prepare the processed room.
Stages of our preparation
- First of all, it is worth considering that any work using plaster is a “dirty” business. Dust and particles of the composition can scatter throughout the room and, after drying, will be removed with maximum effort. Therefore, if you started a repair in an already living room or an “inhabited” office, you should take out all the furniture, appliances and things as much as possible. Move the remaining items to the center of the room and carefully cover with foil or unnecessary newspapers. Ideally, it would be nice to de-energize the room so as not to stain the sockets and secure the lighting fixtures. And do not forget about the floor - if there is already some kind of flooring - it would be better to cover it as well.
- We clean the walls from the previous coating. If before that the surface was treated with wallpaper - we moisten them with water or a special mixture and remove the remnants of glue and finish with a spatula. If whitewashing was applied to the walls, we also treat with water, wash off the paint as much as possible with a sponge and brush, and also remove the residue with a scraper or spatula. In particularly difficult cases, craftsmen advise applying a liquid paste to the whitewash and, after it has completely dried, clean everything off with brushes and spatulas.
- We repair large cracks in the walls. If, after removing the previous coating, we found irregularities or microcracks under the walls, we prepare them for applying the future plaster mixture. With the help of a knife or a grinder (for large cracks), we deepen and expand especially noticeable cracks. We fill with a solution building mix and be sure to fix it with a sickle tape so that the repaired surface is as even as possible. If the cracks are not so big, it is quite possible to fill them with building sealant or silicone glue. For large cracks, the use of mounting foam is allowed, even in a situation where the primer has not yet dried.
- We improve the adhesion of walls and plaster mortar by making notches. If the wall is made of bricks, you can deepen the distance between the bricks at the seams up to 1 cm, but if the wall is made of concrete, we make notches ourselves with a hammer and chisel. Required for each square meter surface, apply notches no more than 1.5 cm long and up to 0.3 cm deep.
- We process the repaired surface by applying a primer solution. We dilute it in proportions of 1:6 or 1:10 in accordance with the dosage indicated in the instructions. In some situations, it is allowed to combine the stages of priming and notching, simply by adding a fine quartz sand. Such a composition will improve the adhesion of the wall and plaster during its application.
- Work on plastering walls must begin in a room previously cleaned of dirt and debris with a dried primer mixture.

Wall primer
If all preparatory work carried out with due diligence, next stage of our work - the actual plastering of the walls under the wallpaper or another coating of your choice.
If you are working indoors with uneven walls or it is necessary that the plastering of the walls be carried out for painting, then it is better to carry out work on the plastering of the surface using the so-called lighthouses.
Since when painting or any further processing walls, it is necessary to obtain the most even surface of the wall, then the application of the plaster mixture must be done in an even and uniform layer, for this it is necessary.
Beacons for walls made of wood will serve as a fixed mesh or wooden shingles, for surfaces with brickwork or consisting of concrete, it is possible to install metal guides or beacons from building or gypsum mortar.

Stages of ongoing work
- do-it-yourself wall plastering on beacons begins with marking on the surface to be repaired - at a distance of no more than 20 cm we drive a self-tapping screw with a weight onto the ropes at the top of the wall, at the bottom of an impromptu plumb line at the right level we fix another nail;
- between the installed screws we throw a few heaps mortar and fix the metal profile of the lighthouse;
- according to the worked out scheme, we install metal beacons at the end of the wall, in the middle and between them, observing the rule that the distance between the beacons should be kept at 1 meter;
- after the mortar has hardened on the lighthouses, rough plastering of the walls is carried out - a building mixture is applied over the entire surface of the lighthouses with protrusion beyond their borders by no more than 2-3 cm;
- using the rule, we fill in the remaining voids - we apply plaster from the bottom up, thus filling all the voids and removing the existing excess mortar;
- plaster using the rule is applied to the walls until the surface looks perfectly even, and, of course, within the maximum possible thickness of the plaster layer - up to 3 cm, after that we wait for the building mixture to dry completely and begin further processing surfaces - painting, pasting or processing with other finishing materials.

Using the rule for plaster
Features of the manufactured plaster mix
We have already talked about the types of mortar being prepared, now we will note some subtleties depending on the composition of the plaster:
- Cement-based plaster is prepared from 3 parts of sand and 1 part of cement mixture and is used within an hour after production. That is why you should be extremely careful and prepare only the required amount of the mixture, otherwise the remaining composition will dry out, its use will be impossible.
- A cement-lime mixture is obtained from 1 part of cement, 5-6 parts of sand and 1 part of lime composition.
- Gypsum plaster from 3 parts of lime diluted to the dough and 1 part of powdered gypsum dries and hardens the fastest, so it is recommended to make them before the application process itself and in small quantities.

How to apply plaster correctly
If we plaster the walls with our own hands without beacons or with them, it is important to know not only the sequence of work, but also the technique of applying the plaster mix:
- The first layer of plaster will be a spray applied using a special device - a trowel. A mixture is collected on it in the right amount and from a close distance is applied to the surface of the walls with a wave of the hand, we do it not so sharply so that the entire solution does not scatter in different directions.
- We apply a light primer layer using a float or spatula.
- We lay the covering layer of the mixture on top of the wet soil, it is important not to allow it to dry out, otherwise you will have to re-wet the surface.
- We level the surface of the walls with the rule, and after drying, we go through them with sandpaper or a special machine, only then the plastering of the walls will be considered complete.
So, no matter how difficult the process of plastering walls may seem to us, with a sufficient level of preparation and simple building skills, it is quite possible to do it yourself. If you doubt your abilities, the surface of the walls is quite uneven or consists of complex materials that require the use of special skills, do not be too lazy to include in the repair costs the appeal and help of real experts in their field.
Any, even the most expensive and high-quality finish will look completely ridiculous on curved walls. And not any material will “lie down” on an unprepared surface. In addition, curved walls cause a lot of problems when arranging or hanging furniture and other interior items. Therefore, the problem of careful alignment of all surfaces to be trimmed is relevant in the vast majority of cases of repairs in the premises of an apartment or house.
And you absolutely cannot do without applying plaster if you have to deal with a “bare wall”, for example, brick or block masonry. Here it is necessary to apply a layer that will become both protective and at the same time leveling. And such cases are very common both in modern new buildings and in the construction of your own house.
The work of professional plasterers costs a lot. Therefore, many homeowners, wanting to save money, try to do most of the finishing operations themselves. They need to be prepared for the fact that it may not start right away - this operation cannot be called simple with all desire. And the more important it will be for them to know in advance how to properly plaster the walls, so that they can soberly assess their own capabilities and make a decision in favor of one or another option.
What is the amount of work to be done?
The owner of the apartment (house) must answer this question in advance. The complexity of their implementation and the amount of materials that will need to be purchased will depend on the assessment of the scale of the work.
- It is necessary to measure the dimensions of the room - this, by the way, will help to draw a diagram on paper. The requirement is optional, but still graphic image very often it becomes a great help when a novice master begins to evaluate the thickness of future plaster layers on each of the walls.

- The initial parameters will be the lengths of the sides of all walls. IN rectangular room, ideally, the opposite walls should be the same, but, alas, this does not always happen. The measurement and comparison of the diagonals immediately shows how distorted the correct configuration of the room is - the diagonals of the rectangle must be strictly equal.
- The height of the walls is measured - this will determine the area of \u200b\u200beach of them. Naturally, window and door openings should be subtracted from this area. By known values area it will be possible to estimate how much material is required for plastering.
To help those who have problems with determining the surface area.
Walls do not always have a rectangular shape, and determining the area of more complex shapes sometimes becomes difficult. For example, when finishing attic rooms often there are areas in the form of trapezoids or even non-rectangular triangles. More complex, for example, arched configurations may also come across. Various cases are discussed in detail in a special publication on .
- It is clear that the task of plastering walls in any case will be to bring them to a vertical plane. With the help of a long rule and a building level, you should immediately assess how the plane of the wall differs from the required vertical. To do this, the rule is pressed from the point most protruding towards the room. These indications (the direction of the deviation and its magnitude) can also be applied to the diagram with symbols that are understandable to you. In the illustration above, for example, they are indicated by blue arrows. That is, the distance from the vertical line to the wall surface is measured, for example, using a ruler or square.

If there is no long rule, for the entire height of the wall, at your disposal, then you can hang the plane with an ordinary plumb line. After hanging it, the distances from the wall surface to the thread at the maximum and minimum points are measured, compared, and their difference shows the magnitude of the level difference.
plaster prices
plaster

The obtained values of the differences are also useful for preliminarycountsthe required amount of materials for plastering.
- It has already been said above that the shape of the room may differ from the rectangle. Plastering can also eliminate such a disadvantage, if it is fundamentally important for the owners. Knowing the values of the measured diagonals and the lengths of the sides of the room, it is easy to complete the drawing diagram, and try to fit a rectangle into it, estimating how much the thickness of the walls will have to be increased in different areas.

At the same time, they try to choose a wall with a doorway as the starting line - the width of the walls of this opening (slopes) after plastering should be the same on both sides, otherwise it will look extremely ugly. And if you start such an alignment from an arbitrary wall, then just at the level of the doors (or, in a variation, the window opening), a very solid skew may well run up.
When choosing this alignment path, it must be borne in mind that it must be justified by practical considerations. It should be correctly understood that each extra centimeter of the thickness of the plaster layer results in tens of kilograms of mortar and in a significant complication of work. In addition, the area of the room is also reduced. So it is often wiser to draw the walls exactly vertically and put up with slight deviations from rectangular shape rooms that will not be particularly noticeable, rather than bring them to the ideal. However, it's up to the owners. The chart drawn up should help them make that decision.
What plaster walls
To date, consumers for plastering walls are offered very a wide range of various formulations. They differ in the basic component and, accordingly, in the scope.
- Plasters based on gypsum (of which very often polymer additives) are leading in popularity when leveling indoor walls. They are very easy to use, have high plasticity, provide a high-quality surface for further finishing.
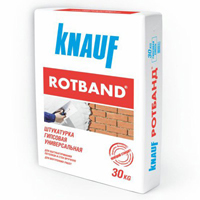
 "Knauf Rotband" typical example high quality gypsum plaster for interior work
 The disadvantage of such plasters is the instability to high humidity, due to the characteristics of gypsum. That is, they are suitable only for interior work and only for rooms with normal humidity. Sometimes, however, reservations are made that it is permissible to use them in bathrooms and kitchens, if a continuous coating of ceramic tiles with careful sealing of the joints is expected. But still, this is a rather risky option - due to the fact that tile adhesives usually have a cement base, “conflicts” are possible.
- For rooms with high humidity and for external works cement-based plasters are used. They create a solid foundation for any type of subsequent finishing.

True, working with cement plasters is much more difficult, although many of them are enriched special polymer plasticizing additives. Significantly higher material consumption. But at the same time, the cost cement compositions about a third lower than gypsum.
Prices for plaster "Knauf Rotband"
plaster «Knauf Rotband»
- Very good decision is the use of combined cement-gypsum plasters, which combine the advantages of both types listed above. Such compositions are the most versatile.

Such compositions are convenient in work, as they have the plasticity of gypsum mixtures. And, at the same time, the plaster layer calmly tolerates conditions of high humidity. And the only drawback can be called only that their acquisition will cost more.
- There are also ready-made compositions for polymer base. But we will not consider them, since for the internal alignment of walls, the use looks completely unprofitable - their prices are quite "impressive". And plus to that - most often polymer-based plasters imply any, that is, they are usually used for facade decoration.
In the table below, for example, there are several popular brands of plasters that are well suited for leveling various types of indoor walls. Please note that the manufacturer specifies not only the scope, but also the permissible layer thickness for a single application - this is also very important when planning work.
| Image | Name, type of binder | Scope of application | Minimum and maximum thickness of a one-time applied layer, mm |
|---|---|---|---|
 | Gypsum plaster "Knauf Rotband" bags 5 or 30 kg | For leveling ceilings and walls with a solid base made of concrete, brick, including those coated with cement plaster, expanded polystyrene, cement particle boards. It is used in rooms with normal humidity levels, as well as in kitchens or bathrooms, if a waterproof finish is performed (ceramic tiles with sealed joints). | from 5 to 50 mm, with the possibility of reapplying after the first layer has dried. |
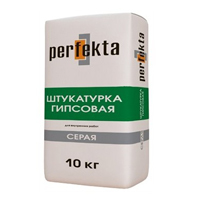 | Gypsum gray plaster "Perfecta" 10 or 30 kg bags | For plastering walls and ceilings made of concrete, gas and foam concrete, brick, stone and any gypsum surfaces in rooms with a normal level of humidity. | from 5 to 50 mm |
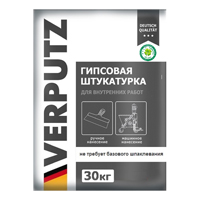 | Plaster white plaster "Verputz/Verputz", 30 kg bags | For leveling the walls of rooms with a normal level of humidity. It is applied on any solid base made of concrete, brick, stone, including those covered with old cement or gypsum plaster. | from 5 to 50 mm |
 | Gypsum plaster "Volma-Holst" 30 kg bags | For plastering indoors with a normal level of humidity. Applies to any solid base. | from 5 to 30 mm |
 | Gypsum gray plaster "Agat TM Stone flower" 30 kg bags | from 5 to 30 mm, it is recommended to apply once with a layer up to 20 mm |
|
 | Gypsum gray plaster "Prospectors" 30 kg bags | For plastering walls and ceilings in rooms with normal humidity on any solid bases. | from 5 to 50 mm, locally it is allowed to increase the thickness up to 80 mm |
 | Gypsum white plaster "Perfecta" 30 kg bags | For plastering walls and ceilings in rooms with normal humidity. It can be used on all solid bases made of concrete, brick, stone, aerated concrete and foam concrete. | from 5 to 60 mm |
 | Gypsum white plaster "Yunis-Teplon" 30 kg bags | For plastering walls and ceilings in rooms with moderate humidity on any solid bases. Possesses the increased heat-insulating properties. | from 5 to 50 mm |
 | Gypsum-cement plaster "Prospectors Mixter" 30 kg bags | For plastering in rooms with normal and high levels of humidity on all solid substrates made of concrete, cellular concrete, brickwork, including old cement plaster. | from 5 to 60 mm local application up to 100 mm |
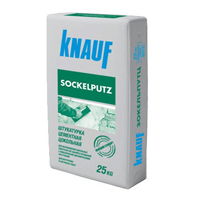 | Plaster basement cement "Knauf Zokelputz UP 310" bags 25 kg | For plastering plinths, as well as rooms with a high level of humidity and high dynamic loads. It is applied on the firm concrete and brick bases. | from 10 to 35 mm single application with a layer up to 15 mm. With a total layer thickness of more than 15 mm, galvanized plaster meshes should be used. |
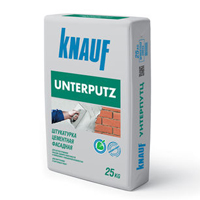 | Cement leveling plaster "Knauf Unterputz UP 210" bags 25 kg | For plastering facades and hard surfaces made of concrete, brick in rooms with high humidity. | from 10 to 35 mm with a single application layer up to 20 mm. |
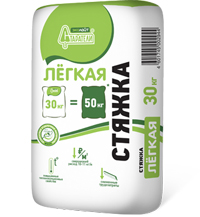 | Light cement-sand plaster "Prospectors" bags 25 kg | For outdoor and indoor use. For plastering facades and surfaces in rooms with normal and high humidity. It is applied on the bases from concrete, a brick, cement plaster, cellular concrete. | from 10 to 20 mm, there is a possibility of multiple application with drying of intermediate layers. |
The cost of mixtures can vary significantly, and not only for specific brands, but also for sales regions - the location of production lines and logistics features affect. So this parameter is better to specify specifically in place.
One of the characteristics indicated by the manufacturer is always the approximate consumption of the mixture. Most often it is expressed in kilograms - it shows how much composition will be used to apply a plaster layer 10 mm thick on an area of 1 m².

This allows you to calculate the volume of material acquisition in advance. In this case, of course, one should also take into account possible losses, which, due to inexperience, can be very significant. So, it would be useful to lay a margin of about 10%, and if plastering is generally performed for the first time, then all 15%.
One of milestones holding repair work is the plaster of the walls of the room. This article will discuss the main types of plaster, the rules for mixing mortars, as well as the phased implementation of procedures for leveling walls.
Modern manufacturers, today, present on the market a large number of ready mixes having different characteristics and properties. All the differences between them are in the components used, which affect the solidification time of the finished solution, its strength, hardness and duration of operation. Apart from ready-made options, which can be purchased at any building supermarket, the solution can be kneaded independently, observing the proportions, and using its necessary constituent elements.
When choosing a mixture, it is important to consider what surface it will be applied to. Since for concrete, brick, foam concrete and wooden walls, apply different materials, characterized in terms of adhesion (adhesion to the surface).
Plaster has a wide range of varieties, among which experts distinguish the following types, their basis is:
- limestone;
- cement;
- clay.
Thanks to technical parameters And physical properties, the most demanded is cement mixture. Plastering walls with such a composition is considered a practical, reliable and not expensive option.
cement mortar
This type of finishing materials is divided into two main types:
- cement and sand. With its help, the walls are leveled, and the finishing of all surfaces, except for concrete ones, is carried out.
- cement and limestone - the most optimal for leveling the surface of brick, concrete, ceramics.
By choosing this finishing material, it is important to determine the brand of the composition. It is with its help that the correct balance is determined between the binder and fillers, which can serve as sawdust, polystyrene, perlite, etc. It is these fillers that are used in warm plaster containing cement. This material is a novelty on the market, but is already actively used at facilities, as thermal insulation material, with increased quality characteristics and service life.

The choice of brand depends on the peculiarity of the mixture, that is, the scope of its application ( external, internal work; rooms with high humidity):
- M 50 - characterized by low strength of the working layer, minimal shrinkage. Most commonly used as a grouting material. Proportion (for cement M 400): 1 × 6.3, where the last value is sand.
- M 100 - available for interior finishing work. Proportion: 1×5.
- M 150 - we use for external work, as well as for interior decoration, with high level humidity. Proportion: 1×3.
Consumption per 1 m2 of cement mortar is calculated quite simply. To do this, the thickness of the proposed layer is multiplied by the available wall area. It is important to consider that the minimum layer to be applied is 6 mm, it is determined by the depth of the beacon. Wherein maximum amount directly depends on the curvature of the surface.
Preparing the wall for plastering
Plastering walls is a time-consuming process that requires compliance with the appropriate steps. One of them is preparatory work. They are carried out after laying all the necessary communications and engineering networks.
Stages of preparation:
- Wall alignment. Initially, it is worth identifying all the depressions, as well as checking the vertical evenness of the surface. To eliminate irregularities, a mesh or wire (10 * 10 mm) can be used. To exclude the formation of corrosive processes on its surface, it should first be treated with cement milk. Minor errors, in the form of cracks and pits, are sealed with cement mortar, after which you need to wait 3 days until it dries completely.
- Cleaning. Old plaster from the wall must be removed, because after applying a new mixture to it, after some time it will lag behind the base, and lead to deformation formations. Elimination is carried out using a special construction tool, or spatula, hammer. All pollution, in the form of dust, dirt, old painting should also be removed. After that, it is desirable to moisten the wall with water. Surfaces where oil stains are present should be deep cleaning, and the resulting depression is sealed with a mixture.
- Primer - involves protecting the applied plaster from premature drying, that is, it does not allow the base to absorb moisture from the mixture.
- Installation of beacons. The final result of plastering will depend on the accuracy and evenness of their installation.

Surface reinforcement
The plaster mesh is used in cases where the estimated layer of plaster exceeds 4 cm. The stainless steel mesh has cells from 1 * 1 cm, 4 * 4 cm. him an extra level of toughness.

Installation of beacons
Leveling the surface, the masters set themselves the task of achieving the maximum level of evenness. For this, plastering on lighthouses is the best suited. this work can be done by hand, but in this case it is necessary to listen to the recommendations of the masters.
Lighthouses are metal slats, along the perimeter of which there is perforation. Their standard thickness is 6 and 10 mm, and the length is 2.5 or 3 meters. You can buy such elements in finished form, in any hardware store.

To mark the future location, a plumb line and a building level are used, which verify the observance of plane and evenness. The step width varies, and the distance between the elements directly depends on the length of the rule. It is important that its ends fit snugly against the surface. According to accepted international standards, the first and last beacon is installed at a distance of 20 cm from each corner.
How to fix the beacon? To do this, you need a special alabaster solution, which is characterized by a high solidification rate. It is applied pointwise, on a predetermined marking line, after which the product is firmly pressed to the base. In some situations, in order to achieve a higher level of adhesion, the products are additionally screwed with self-tapping screws.

After mounting each element, it is necessary to check their plane, and, if necessary, make appropriate adjustments. Thus, the ideal level of the plane is reached, for the future application of the mixture. In addition to vertically installed products, there are cases when craftsmen can make decisions about the need to install horizontal beacons. Basically, this happens when machine plastering is planned.
Applying plaster
An important issue remains how to plaster the walls correctly. Actually there are three main types of plastering the rough surface:
- simple - applying two layers. It is used in non-residential structures, which subsequently do not require additional processing(attics, basements, technical rooms).
- improved - designed for living rooms, involves the application of three layers, according to classical technology. The final result allows Finishing work for decorating with finishing materials.
- high quality - carried out under a predetermined finish. It involves the use of expensive materials that will be applied to the markers.

Alignment is carried out by throwing a solution between the beacons, using a trowel. The mixture is collected on its sharp end or edge, after which it is brought to the wall, and by a sharp wave it is placed on the wall.
As mentioned earlier, the application of plaster occurs in several layers. The base one is called a splash. To do this, apply kneading in liquid state, which spreads over the entire surface in a continuous layer. Its thickness does not exceed 5 mm. After the base has dried, it is covered with a second layer, which is considered to be a primer. Its consistency is thicker, and makes up the bulk of the entire thickness of the leveling.

After waiting for it to dry completely, you can start applying the coating. With its help, the maximum level of evenness is achieved. The thickness of the coating reaches a maximum of 2 mm, while cases are not excluded that in some places its application is not necessary.
In situations where markers have not been installed, the solution is named. For this, a falcon is needed, on which plaster is applied in batches. Then it at an angle, at a short distance, fills the entire space with a uniform layer.
Removing beacons
The need to eliminate lighthouses is mainly determined by prejudices about the formation of corrosive processes on the metal, and the manifestation of rust. In addition, some believe that not timely removal can lead to the formation of cracks. All these conjectures are unfounded. If it is possible to eliminate this element, it can be eliminated, but if this is not possible, then it can remain, since modern products are made from stainless steel, which is characterized by resistance to mechanical damage and moisture.

However, despite this, no one gives full confidence that no deformations or stains will appear on the finish, since the influence of various factors is not excluded:
- product quality. For repairs, it is advisable to purchase only certified products, the documents of which indicate what raw materials it is made of.
- the formation of rust on galvanized beacons is not excluded, since they have a thin protective layer that can be easily damaged during the rule or during the grouting process.
- increased levels of humidity.
Regarding the formation of cracks, experts are not inclined to believe that lighthouses are involved in their appearance. They can appear, both in the process of their elimination, and if, during the installation of wall furniture, the master fixes it at its location

If, however, the products were nevertheless withdrawn, the resulting space must be sealed with a gypsum mixture, it has a shorter solidification time. After that, you can proceed to the process of grouting seams and irregularities.
Complete drying time
The refurbishment team determined a rough relationship between drying time and layer thickness. On average, 1 mm layer takes 1 day to dry. If a room or building has ideal conditions for drying, then this proportion changes - 2: 1.
The selected material plays a significant role in the drying process. Often it is a cement-sand mixture diluted with water. It reaches ideal strength and drying after 28-30 days.
In order for this process to occur as quickly as possible, it is necessary to adhere to the following indicators:
- humidity level - does not exceed 70%;
- internal temperature - up to +20;
- lack of drafts;
- exclusion of ultraviolet radiation;
- frequent ventilation to eliminate excess moisture.
Carrying out trowel work
Grouting the wall after plastering is the finishing step. After its implementation, all the shortcomings are eliminated, and a perfectly smooth base is formed. The process can be carried out both after drying and when applying plaster.
This stage requires the accuracy and experience of the master, since it is no longer possible to rely on any marks, guides. All work must be carried out with properly selected lighting, because the result can only be assessed visually. The best grout lends itself to gypsum, due to the viscosity of the components. With cement, the situation is a little more complicated, as it can crumble. To neutralize this effect, they resort to the addition of special substances - plasticizers..

Special attention deserves the tools that carry out grouting. Best Option considered to be a metal grater. For substances that have not yet hardened, it is worth giving preference to products based on polyurethane. They are strong enough and can be used several times without damaging the plaster itself.
Before grinding, it is desirable to moisten the grater, after which it is possible to perform horizontal and vertical movements aimed at eliminating and smoothing small particles, by distributing them evenly over the entire area. At the end of all processes, you can finally walk with a primer, which will serve as an excellent binder and form a protective film.
Particular attention should be paid to the corners. To avoid defects in the end, it is worth initially acquiring special corners. Non compliance this council can lead to the formation of defects that will be visible in further processing, especially painting.
Decorative grout
In addition to the smooth effect that is necessary for pasting wallpaper, painting, there are options with decorative plasters that have a characteristic pattern. In this case, it will not be possible to use a standard grater, since it can completely remove the formed structure and texture.
However, there is a way out of this situation, and it consists in the use of special devices, which include sandpaper, or a grout mesh. These options are an alternative professional tool designed to hold the replaceable abrasive segments.

All work is carried out after complete solidification, thus minimizing the risk of damage to the pattern. Then, with a brush or brush, dust is removed from the recesses and grooves, and the entire area is treated with a primer.


To make the decorative finish look beautiful and neat, you need to do a lot of preliminary work to level all surfaces. The most difficult and time-consuming of them is wall plastering. The technology of its implementation may have some differences depending on the base material, its quality and operating conditions. And also from the chosen topcoat.

How to plaster
The choice of the type of plaster mortar is a very important point. The basis for it can be gypsum or cement, with sand and various additives, which are often used as lime, clay, various additives that increase plasticity, frost resistance and other properties of the composition.

Right choice solution - pledge quality finishes Source remtra.ru
His choice is based primarily on the operating conditions of the walls.
- Gypsum-based mortar
It adheres well to any surface, spreads easily and, due to its low weight, does not create a large load on the base. A layer of any thickness dries quickly, without shrinking in the process and without forming cracks. The surface is smooth and even, so if you need plaster for painting without additional putty, then it is best to choose a gypsum mortar.
But gypsum has one negative property: it absorbs moisture too easily and quickly, while becoming loose and losing strength. Therefore, gypsum mortar can only be applied to internal walls rooms with normal and stable air humidity. That is, they are suitable only for internal work in heated buildings, and then with limitations: they are not recommended for use in bathrooms, bathrooms and other wet rooms without finishing with waterproof materials. The disadvantages can also include high cost and fast setting solution.

Scope of application of gypsum plaster - dry heated rooms Source 12mv.kz
- cement mortar
Much stronger and cheaper than gypsum, it does not collapse from moisture, is resistant to temperature extremes and mechanical stress, therefore it is more versatile. It is used in any conditions and on any surfaces, including for plastering facades and walls in damp and unheated rooms.
But due to the heavy weight of the cement slurry, the base is prepared more carefully to ensure maximum adhesion of materials. Cons - a high degree of shrinkage, leading to cracks if the technology is not followed, and a very long period of complete drying and hardening, which delays the finishing time.

Cement mortars are used to plaster such complex areas as plinths, walls of basements and pools. Source moypodval.ru
When deciding whether it is better to plaster the walls in the house inside or outside, they choose between ready-made dry mixes or self-prepared compositions. The first option is preferable, although more expensive, because such mixtures are professionally selected in composition, have a specific purpose and instructions for breeding and use.
A home-made solution is usually cheaper, but the types and proportions of all components, the brand of cement, the grain size of the sand will have to be selected independently.
How to prepare the base
Before plastering walls covered with old finishes, they must be thoroughly cleaned of it. It is advisable to completely clean everything to the ground, otherwise the plaster will not hold well. An exception can be made only for the old plaster layer, which is firmly attached to the surface, does not peel off, but needs to be reconstructed. You can check this by tapping on the surface with a hammer: if pieces do not break off and cracks do not appear, the layer is strong.

Further actions depend on the material of the walls.
Concrete
Main problem concrete walls– cracks and potholes on the surface, joints between concrete panels. They must be sealed and aligned with the plane of the wall. If this is not done, cracks will appear in their place in the new layer of plaster.
The termination method is selected in accordance with the size of the defects:
- shallow surface cracks are covered with putty or filled with sealant using a special nozzle;
- deep cracks for high-quality filling with mortar are expanded to gain access to the most inaccessible areas, and carefully covered with cement mortar;
- the largest gaps and joints between the plates are closed in the same way or filled mounting foam, and after it dries, the porous mass that protrudes beyond the plane of the wall is cut off with a sharp knife.
Video description
How to properly seal deep cracks is shown in the video:
It is important! Before sealing, all defective areas must be cleaned of loose pieces and dust and moistened with water, or even better, treated with a penetrating primer and allowed to dry.
Before plastering the walls, the repair material is also allowed to dry and set, after which the entire surface is covered with a primer such as Betonokontakt. Its peculiarity and difference from other similar compositions lies in the fact that the composition of the material includes quartz sand, which makes a smooth concrete surface rough and improves its adhesion to leveling mixtures.
The dried primer must be checked for strength, for which it is enough to run your hand along the wall and make sure that the sand does not crumble when touched.
A more reliable, but also time-consuming way to increase the adhesion of a concrete surface to a plaster mortar is to make notches on the wall about a centimeter deep.

Making notches does not eliminate the need to prime the walls. But this should be done after removing dust from the surface and shortly before the start of plastering.
Brick and other masonry
Masonry brick has rough surface, so the solution sticks to it well. For better adhesion, the seams in brick and any other masonry are deepened if necessary, which completely replaces the notch device.
But smooth foam concrete and aerated concrete blocks they do not differ in good adhesion, and the masonry joints between them are rare and narrow, therefore, before plastering such surfaces, it is recommended to fix an alkali-resistant reinforcing mesh on them after applying a primer.
Tree
Wood is a living material. It breathes, moves with changes in temperature and moisture content in the air, and also dries or rots, is attacked by insects and rodents. Therefore, first of all wooden bases well dried and treated with compounds with antiseptic properties.
And then they mount a reinforcing mesh on them, without which rough plaster it just won't stay on the surface. This can be a lattice of shingles - thin and flat slats that are stuffed diagonally onto the wall with small carnations.

The shingles must also be treated with an antiseptic so that it does not rot under the plaster layer.
Also, as a reinforcement for wooden walls, you can use a metal chain-link mesh, which is attached to wooden slats 3-4 mm thick pre-stuffed on the wall. They are needed to create a gap between the wall plane and the grid.
Step by step plastering
The way in which the walls are plastered, as well as the number of layers, is selected in accordance with the general repair plan and type decorative finishes. The plaster layer may be required only to thicken the wall for the purpose of its additional heat and sound insulation, restoration of gross defects. If in the future it is planned to be paneled or sheet materials with or without insulation, it is not necessary to achieve careful alignment and leveling.
In such cases, the walls are plastered without beacons, and the evenness of the surface is approximately controlled using a plumb line and a long level. The number of layers depends on the initial state of the substrate and the required coating thickness. In any case, the finishing leveling layer is not applied.

Another thing is when you need plaster walls for painting or wallpapering. Here, the smoothness of the surface must be perfect, and the plane of the wall must be strictly vertical. Therefore, the plaster is carried out along the beacons, previously set according to the level.
Installation of lighthouses
Lighthouses are guides installed vertically along the entire wall, along which the first plaster layer will be aligned. It can be flat wooden slats or metal profiles. But it is best to use special products made of galvanized steel - they can be left in the thickness of the mortar, while beacons from other materials must be removed after the initial setting of the layer, followed by sealing the resulting grooves with plaster.
Video description
The following video will tell you in detail about the beacon installation technology using the level and the rule:
The first layer is rough
The first layer of plaster is the most responsible. It is carried out along the lighthouses so that the mortar fills the entire space between them and the base and evens out gross wall defects and level differences.
The thickness of this layer will be uneven - from 1 mm to 8-10 mm, and sometimes more if the level differences are very noticeable.
Note! With differences of more than 20 mm, the use of a reinforcing mesh is mandatory, regardless of the material of the walls.
The technology consists in throwing a thick solution on the wall and pulling it out as a rule along the lighthouses. You can sketch with a trowel or just with rubber-gloved hands. The main thing is to do it on a grand scale so that the solution adheres better to the base. They start sketching from below, between adjacent beacons, filling all the space between them. Heaps of mortar should rise above the level of the beacons.
Having risen about a meter from the floor, they take the rule, install it with its ends on the beacons and level the solution, slowly lifting the rule up along the guides and making frequent movements from side to side.

With a large amount of work often used plastering machines, with which the solution is sprayed onto the walls.
If further wall cladding along the frame or installation of ceramic tiles is planned, this plastering work completed, since additional alignment will only lead to unnecessary costs. If needed Smooth surface, then after 2-3 hours proceed to the second stage.
The second layer is leveling
Now about how to plaster properly draft foundations for wallpaper or painting. To do this, you need to eliminate all the flaws of the first layer - small potholes and tubercles, traces of the rule. This is done with a more liquid solution of a pasty consistency, which is applied with a thickness of 5-8 mm.
The solution is taken from the container with a medium spatula and transferred to a wide longitudinal movement for uniform distribution. After that, with a little effort, it is smeared on the wall with wide cross movements in an arbitrary direction.
Video description
There is another way: the solution is thrown with a ladle and immediately rubbed with a trowel. You can see how this is done in the following video:
The stripes left by the edge of the spatula are immediately removed with the next movement or with a grater moistened with water.
Third layer - finishing or decorative
3 hours after applying the leveling layer, a liquid creamy solution is prepared, in which there should be no lumps or large inclusions of sand. The finishing layer is the thinnest, no more than 2 mm, so the solution must be as homogeneous and of high quality as possible.
Advice! If the previous layer is very dry, it must be moistened with water from a spray bottle before starting work.
Finishing plaster is applied in the same way as leveling, and its purpose is to eliminate the smallest flaws and make the surface smooth. Illumination of the walls with a bright light bulb tangentially to the surface will help control the process. Bring the surface to perfect condition by grinding with a grater. It is performed after 6-8 hours on a moistened base.

Instead of finishing plaster for painting, decorative compositions can be applied to the walls. There are many technologies for their application, and this is a topic for a separate discussion.
Conclusion
Knowing how to properly plaster walls, you can try to do it yourself. But theoretical knowledge alone is not enough; practical experience is indispensable in this matter. Therefore, you should not risk expensive materials with your own time - let specialists do this work.
Do-it-yourself wall plastering is a procedure that is recommended for craftsmen who only have experience in carrying out such types of finishing work. If not, then you should define small plot working surface and practice on it.
Don't try to save money: sometimes it's easier to hire a professional team to do the job.
Types of coatings
Before proceeding with the finishing work, you should learn more about the accepted standards. This can save you from wrong actions. Construction standards SNiP III-21-73 define 3 types of coatings:

Features of the work
Depending on the type of material from which they were built bearing walls, as well as where they are located (inside or outside), apply different types blends and application techniques. Before starting finishing work, it is necessary to clarify certain nuances of finishing various surfaces.
brick wall
 This type of wall is usually finished with a cement-based mortar. In some cases, lime is added to them to create a higher effect of plasticity and moisture resistance of the solution. The thickness of the plaster layer should not exceed thirty millimeters. It is recommended to use reinforcing materials to strengthen the layer.
In case of facing brick when performing finishing work, an additional number of nuances arise. Its surface is very smooth, so the solution, even when using a reinforcing mesh, can stick very poorly and subsequently disappear. To compensate for this shortcoming, the surface is pre-treated with a special primer. Only after that you can start the main work.
Concrete wall
Smooth surfaces are initially treated with primer, which contains quartz sand or similar additives. This composition will increase adhesion and ensure better contact of the solution with the wall. For the decoration of such walls are also used cement-based mixtures to which gypsum can be added. For walls that are rougher, it is enough ordinary cement plaster without adding any special components.
Aerated concrete blocks
When plastering walls based on gas or foam concrete blocks there will be no difficulties. At the preliminary stage the surface is only treated with a special impregnation. Ordinary gypsum plaster or a composition based on concrete and lime is used.
What is required for do-it-yourself plastering
Naturally, no one will undertake such work with bare hands. You need a good tool. To plaster the walls, we need to stock up on the following consumables and tool:

Finishing work
Plastering walls with your own hands can be done in two ways. In the first of them, at the beginning of work, beacons or threads are installed to mark the required level, and in the second, a solution is simply applied and leveled with a rule. When working with both methods, there are many different additions and subtleties.
There are many stages of surface finishing. But only if all of them are observed, you can get a high-quality and even coating that will last the prescribed period.
Preparatory stage
One of the activities during finishing work is surface preparation. It is carried out in several stages. The algorithm is the following:

Marking
Initially, you need to check the walls with a level for deviations. Measurements must be taken along the entire surface of the wall: both horizontally and vertically. Using the rule, you should find depressions and bumps. All found defects are marked with a marker.
Work begins from the corner of the room, retreating 300 millimeters and drawing straight vertical lines from ceiling to floor, in increments of 160 centimeters for the entire length of the surface to be prepared. Further, with an indent of 150 millimeters from the edge of the wall, it is necessary to mark the places along the line and install dowels with self-tapping screws under the beacons on them.
Then the cord is stretched from corner to corner horizontally. The result is two parallel lines. The cord must cross all vertical lines, and marks are made at the intersections and dowels without self-tapping screws are installed. The result is two rows of holes that run strictly along the same line.
ground cover
 The stage is mandatory, since the life of the surface to be trimmed depends on its implementation. The primer will increase adhesion and ventilation of the surface, add antiseptic properties.
When covering bricks or foam blocks, soil is used deep penetration, for the rest any soil for construction work.
To cover with soil, you will need a special painting container, in which there is a cavity where soil is poured, and a platform for squeezing excess from the roller. Work is carried out in layers with an interval of 2-3 hours and with final drying for a day.
Installation of lighthouses
Without beacons, plastering is difficult, and in some cases impossible. This is a guarantee of quality work. Beacon installation technology is performed in the following order:
- First, self-tapping screws are screwed into the prepared upper holes, after which it is checked by the rule how deep the lower self-tapping screw will need to be screwed in order to form a vertical line between them. According to this scheme, all fasteners are checked.
- After that, two diagonal lines are pulled between the caps with a thread, beacons are installed and checked to see if any of them will protrude.
- Now you need to calculate the distance between the upper and lower dowels and cut out the beacon profile so that during installation it protrudes 5 centimeters in each direction.
- Then a solution is prepared and applied to the wall along a vertical line, after which the beacon prepared by the step above is pressed into the solution so that it does not protrude beyond the caps.
- After the installation of all beacons, a control check is carried out by the building level. It ends with the removal of screws.
How to plaster walls with your own hands
The application of plaster on the wall will be considered based on a gypsum mortar. Work at this stage begins with the preparation of the solution and preparation the right tools. If the walls are made of brick or foam block, they are moistened before applying the mortar so that the wall material does not absorb the liquid from the applied mortar. Thus, premature solidification and destruction is not allowed. It can be applied in two ways: according to the cape principle, throwing the solution with a spatula on the wall and stretching it over the entire surface. There is also a simpler method: the solution is simply applied to the wall and stretched with a trowel.
 After applying the main part of the solution, a rule is taken, placed perpendicular to the installed beacons and carried out from the bottom up in zigzag movements. The sharp edge of this tool will remove excess mortar, which can be used to eliminate the noticed imperfections. Then once again you need to go through the rule on the processed part, but this time the movements can be performed simply from the bottom up, achieving a perfectly flat surface.
Seal corners around the perimeter
Work in this area must begin from the ceiling. A solution of the same consistency is prepared as for the walls, but already narrower spatulas are used. The formation of a small overlap on the main part of the surface is not critical: they will be eliminated in the future sandpaper. According to this principle, all corners are closed throughout the entire volume of the room.
When finishing corners, an already finished surface will serve as an example of a plane, and you can ignore the beacons. In this case, you need to use a square to maintain the perpendicularity of the corners.
At the end of the work, it is required to check the surface for the formation of cracks. In case of their occurrence, it is necessary to close up with a more liquid solution. If differences of more than one millimeter have formed, they are removed with the sharp edge of the trowel. Only after that it is possible to finally remove the beacons, and close the resulting gaps with a solution. The final processing consists in processing with sandpaper. When working with gypsum plaster, finishing is not required. This completes the finishing work. It remains to wait for the moment when the applied solution dries and gains hardness.